GitHub and Reproducibility Skill Sets
Activity 1: Git-ting Familiar with Branches
Create an account or otherwise login to GitHub
Install GitHub Desktop to your computer: https://desktop.github.com/download/
Create the repository for this activity
Go to the template repository for this workshop: https://github.com/fhdsl/reproducibility-sandbox
Getting familiar with the repository
This repository is a “mock” analysis. It has an example folder and file organizational structure that looks something like this:
- .github/workflows
- data/
- docker/
- plots/
- renv/
- results/
- 00-download-data.py
- 01-heatmap.Rmd
- 01-heatmap.nb.html
- README.md
- renv.lock
- run_analysis.sh
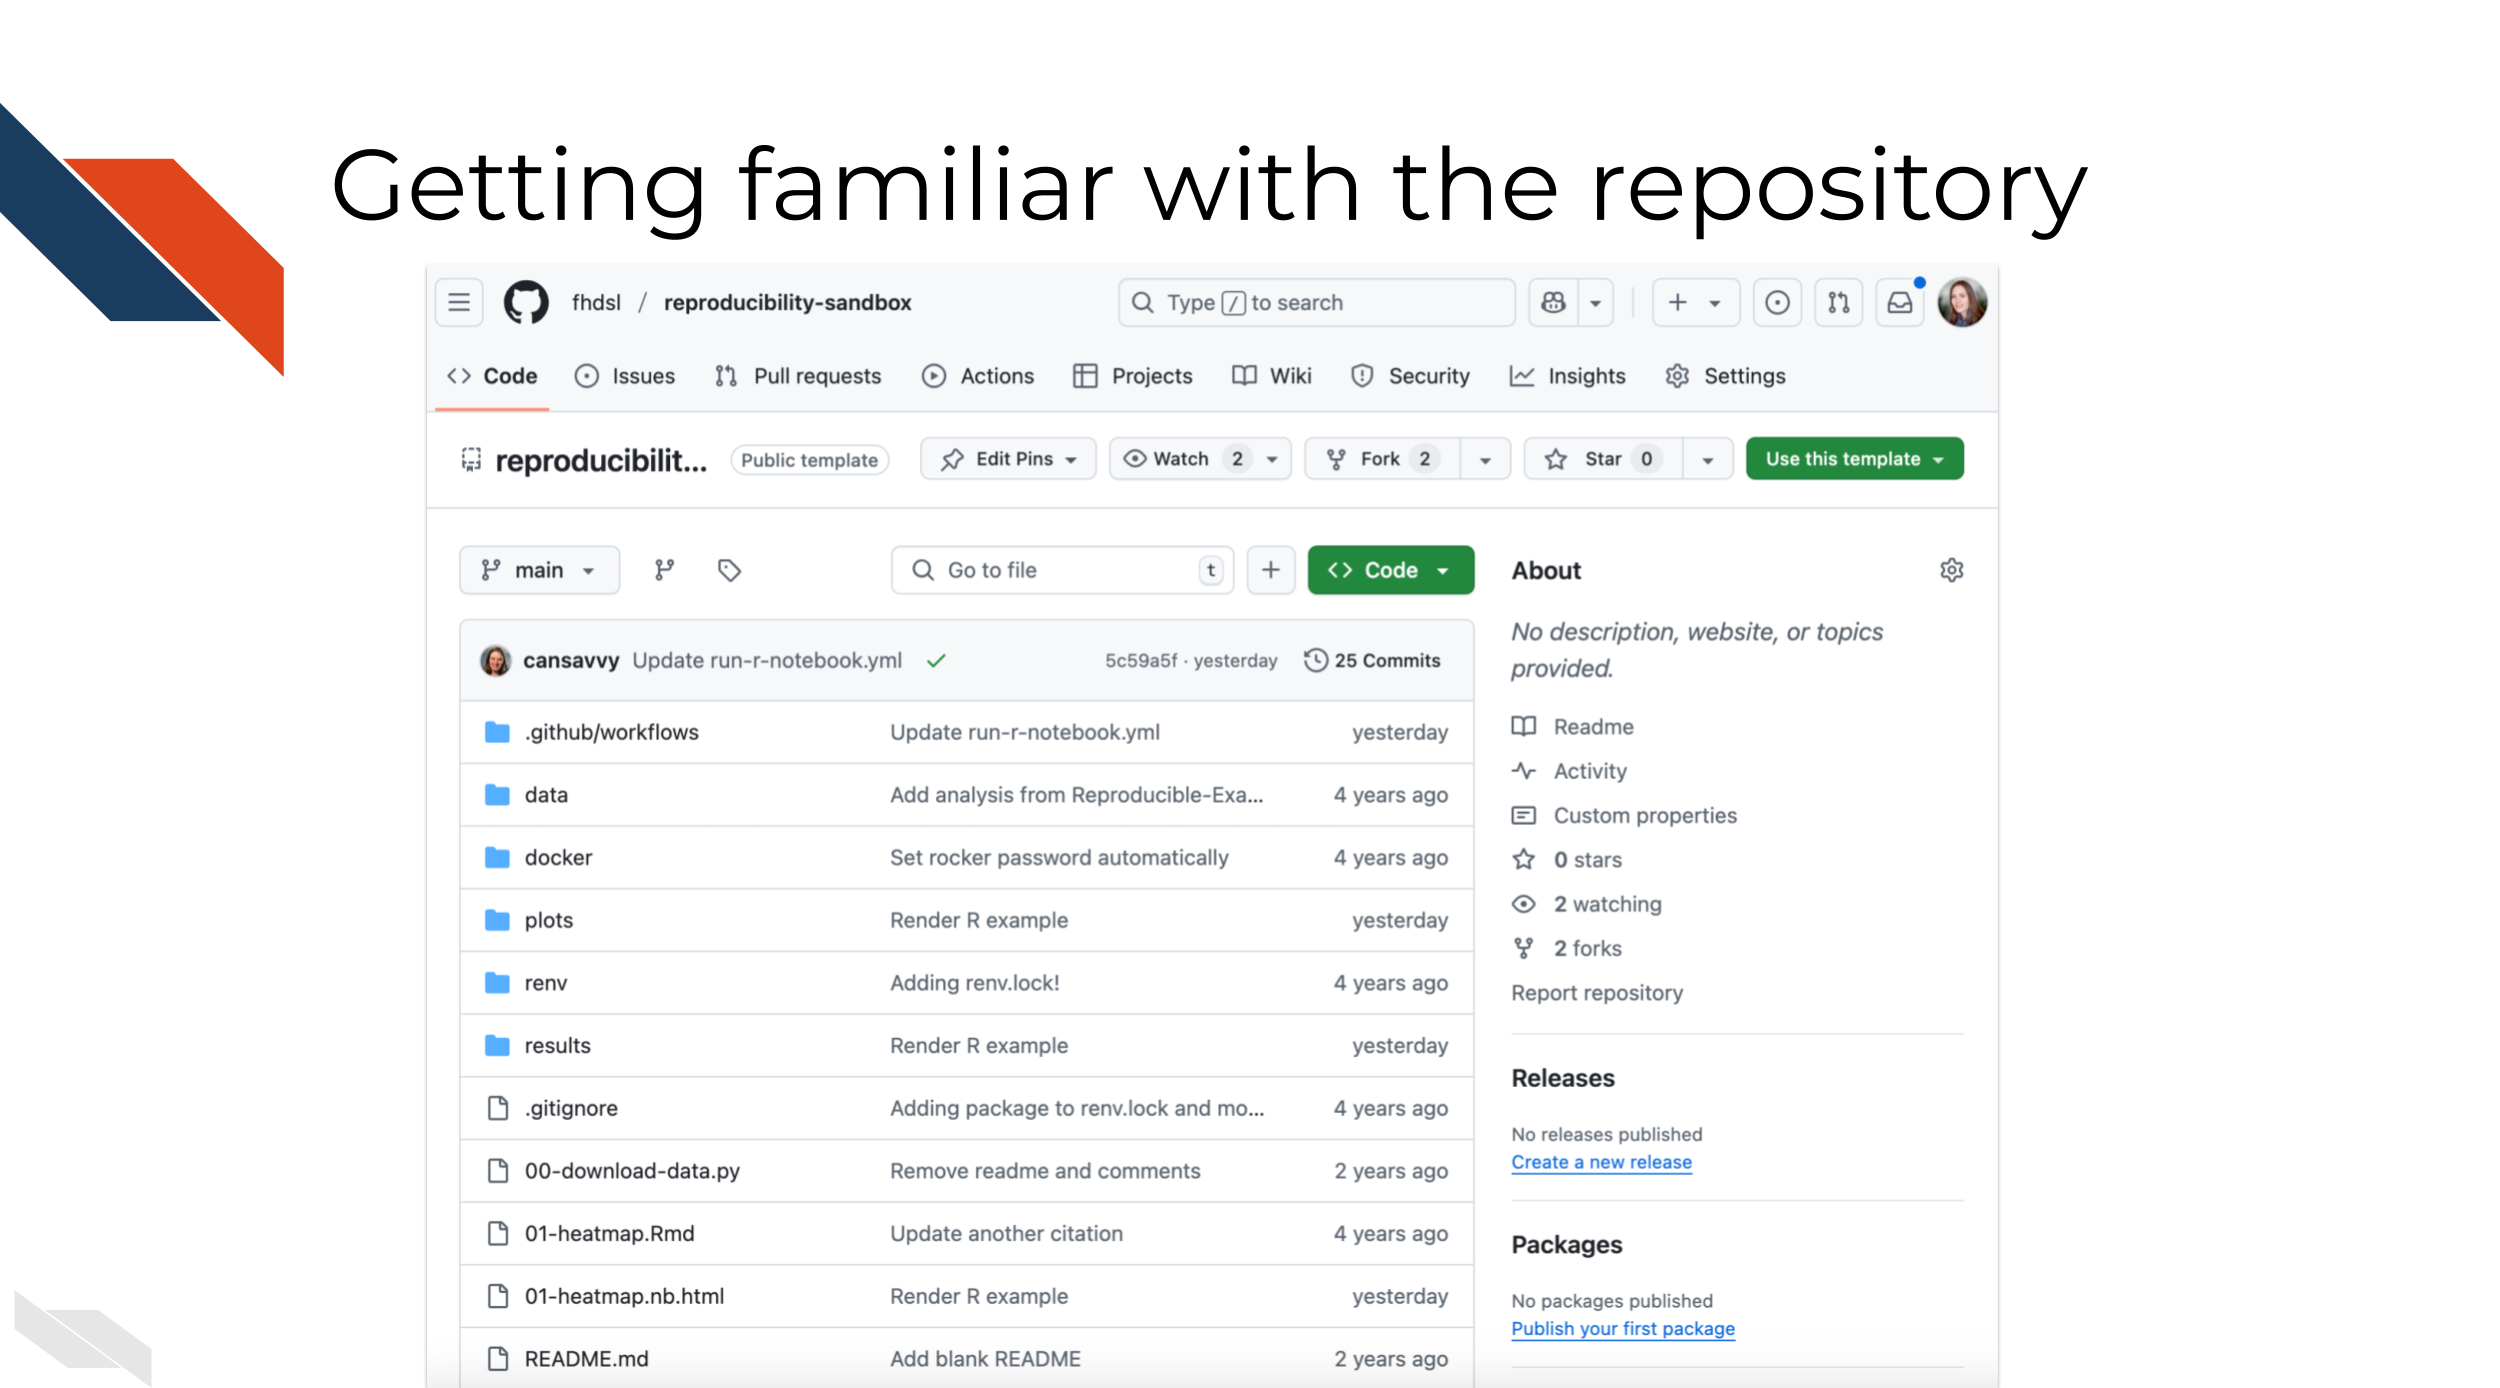
When you look at the README for this repository however, you will notice it is blank.
Create your own copy of this repository
Click the green
Use this template button and then
Create a new repository. If you don’t see this button, you
may need to expand your window.
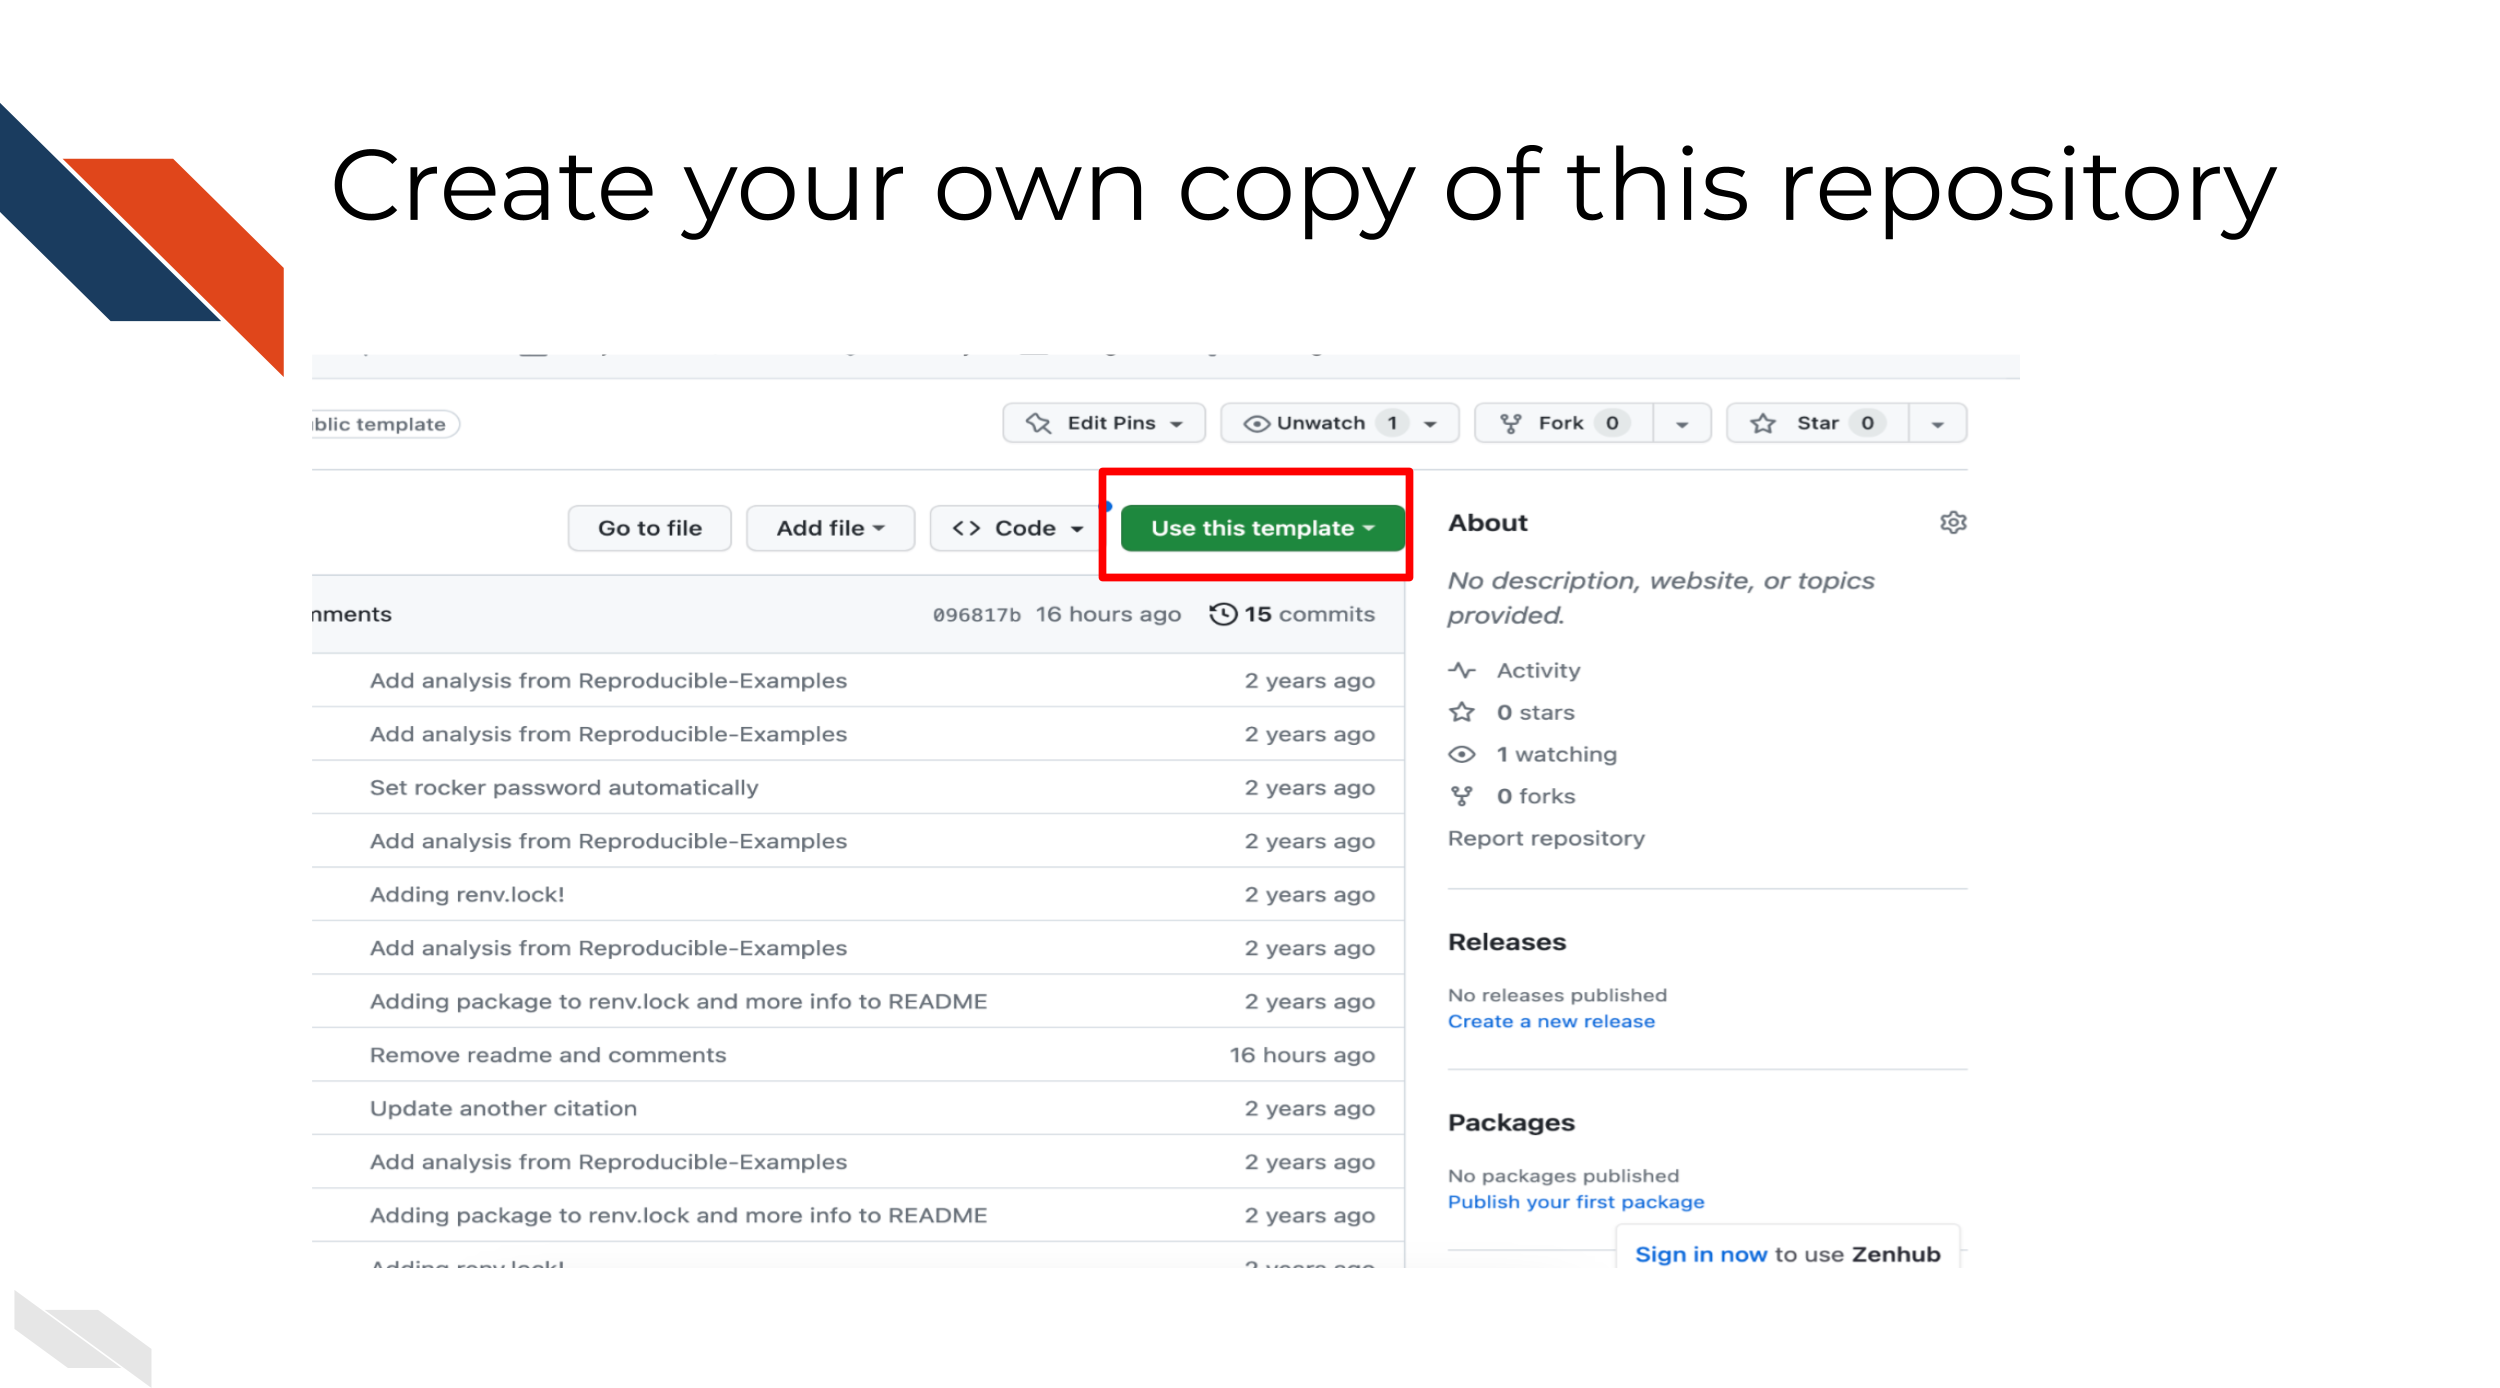
On the next screen, create a
Repository name.
Choose Public.
Scroll to the bottom and click
Create repository.

You will use the name in the next step!
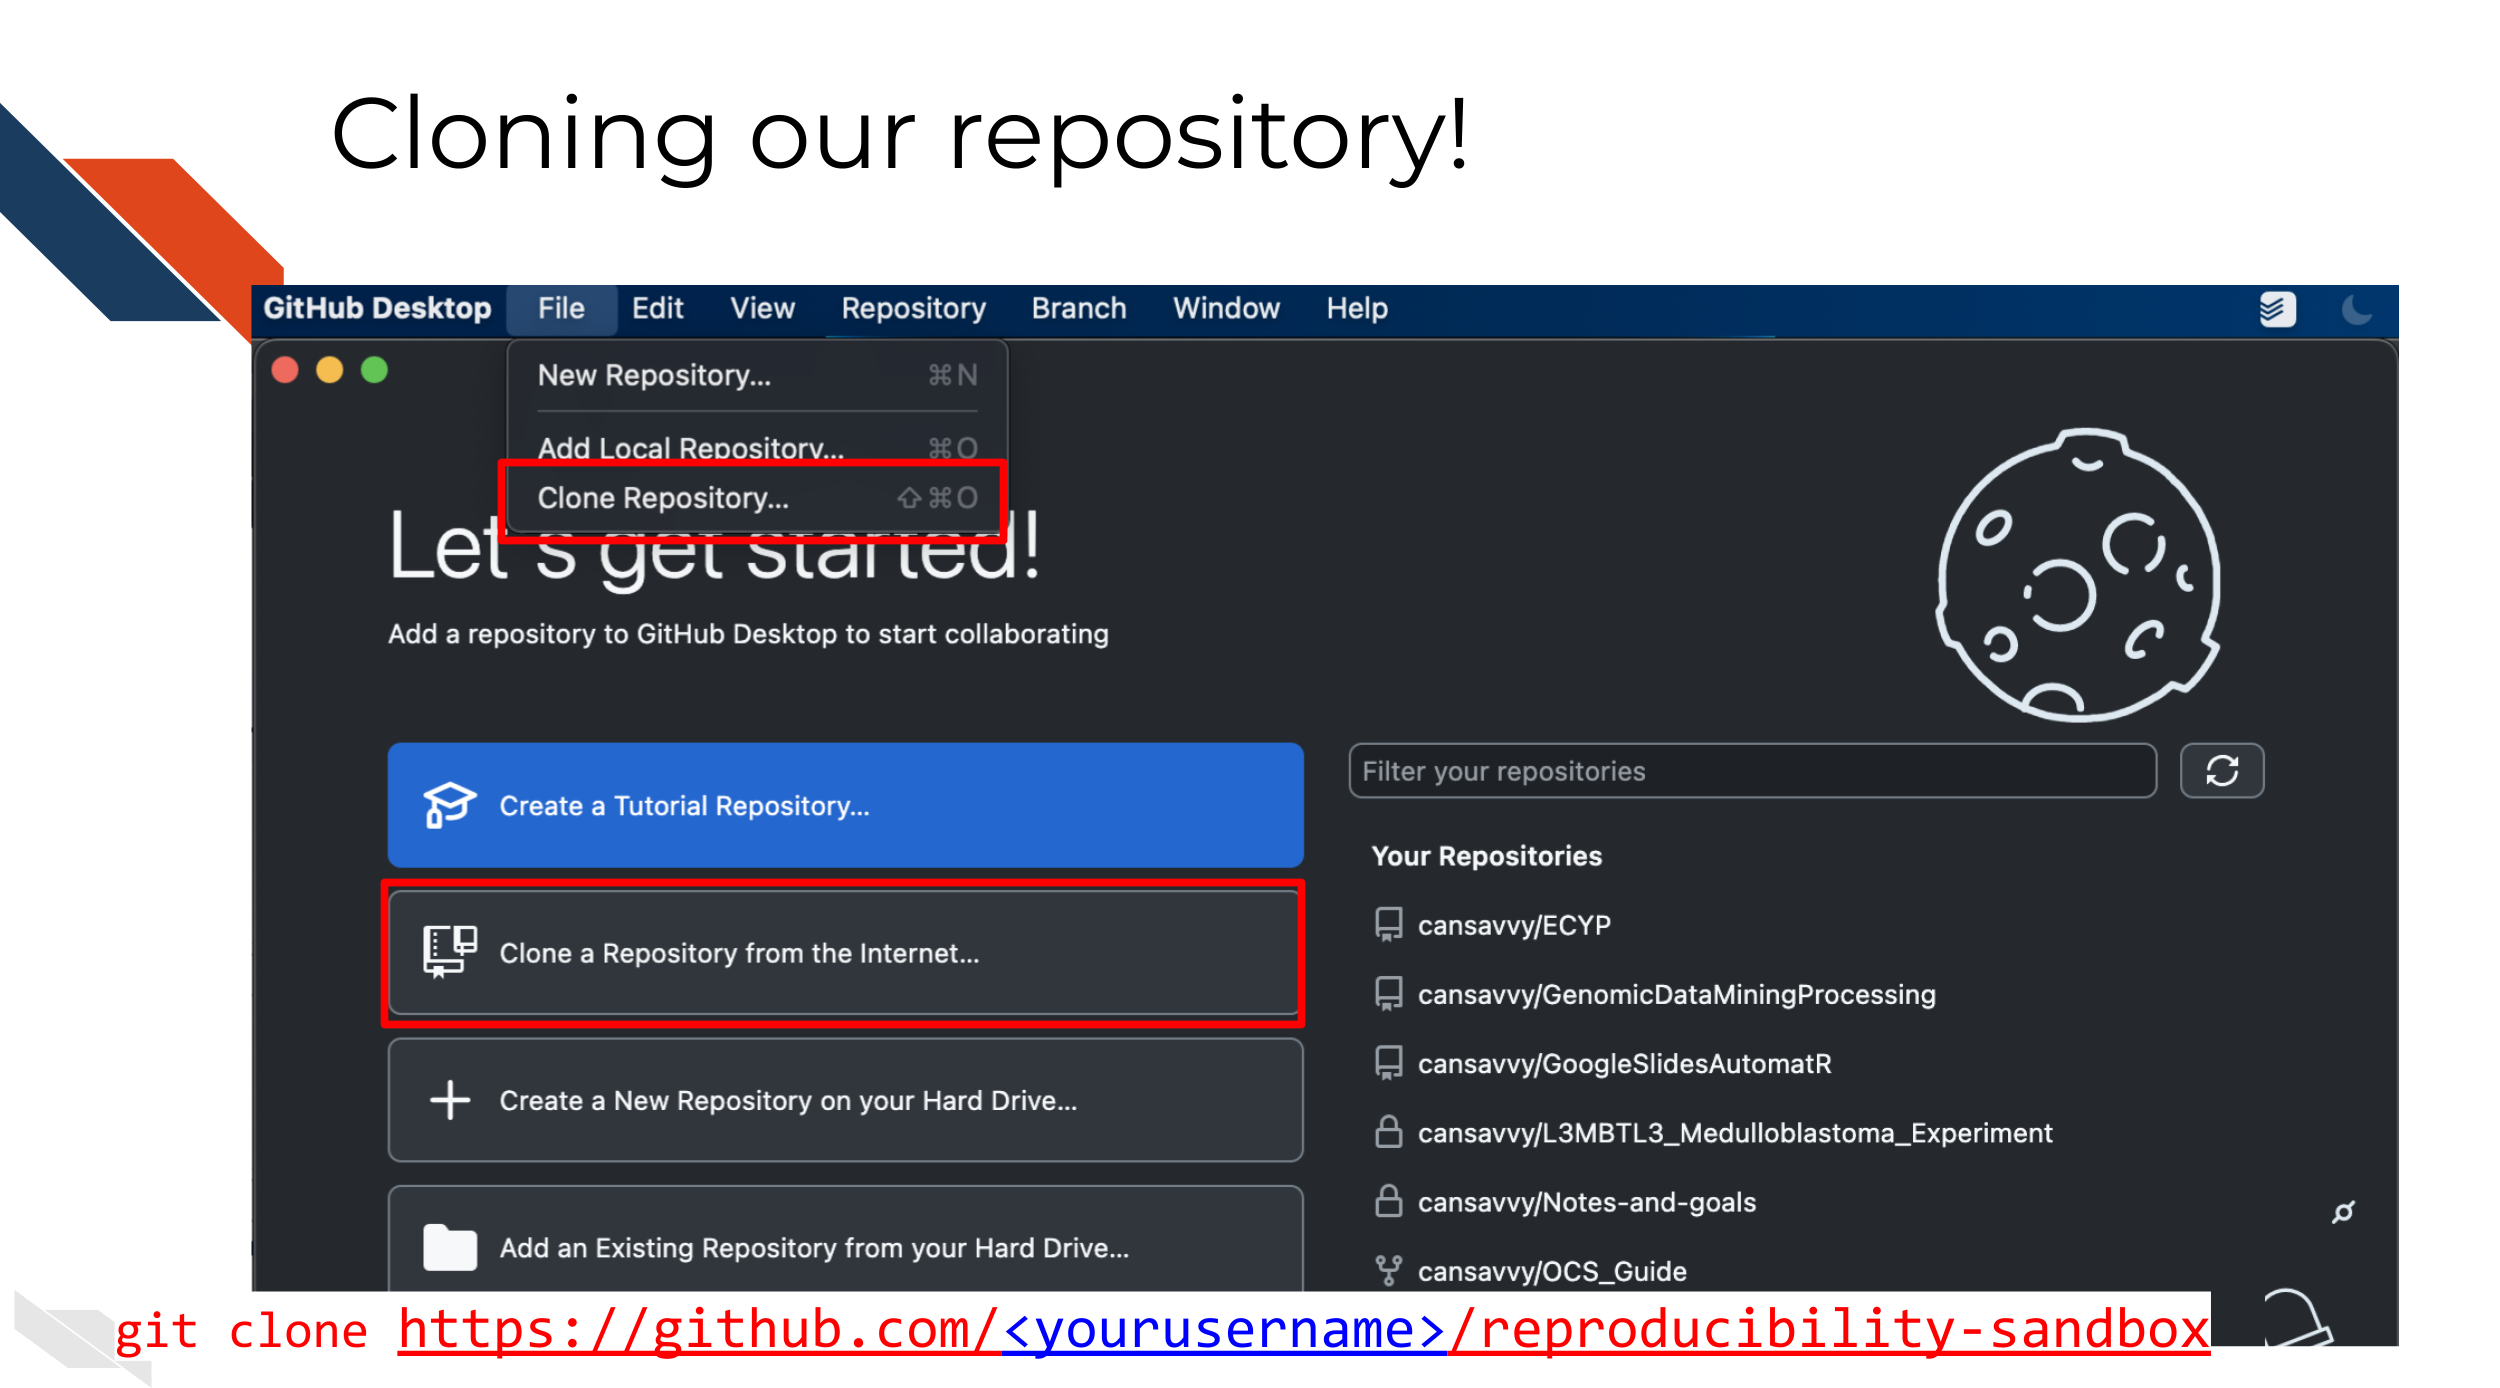
Cloning our repository
GitHub Desktop is a great tool to help use use version control and
interact with GitHub.
Open up GitHub Desktop on your computer.
Go to File >
Clone Repository.
Search for your ITN workshop repository name in
the tab that says Github.com. Click on the name of this
repository in this list. You can choose where you’d like it to download
on your computer underneath Local Path.
Click the blue Clone button.
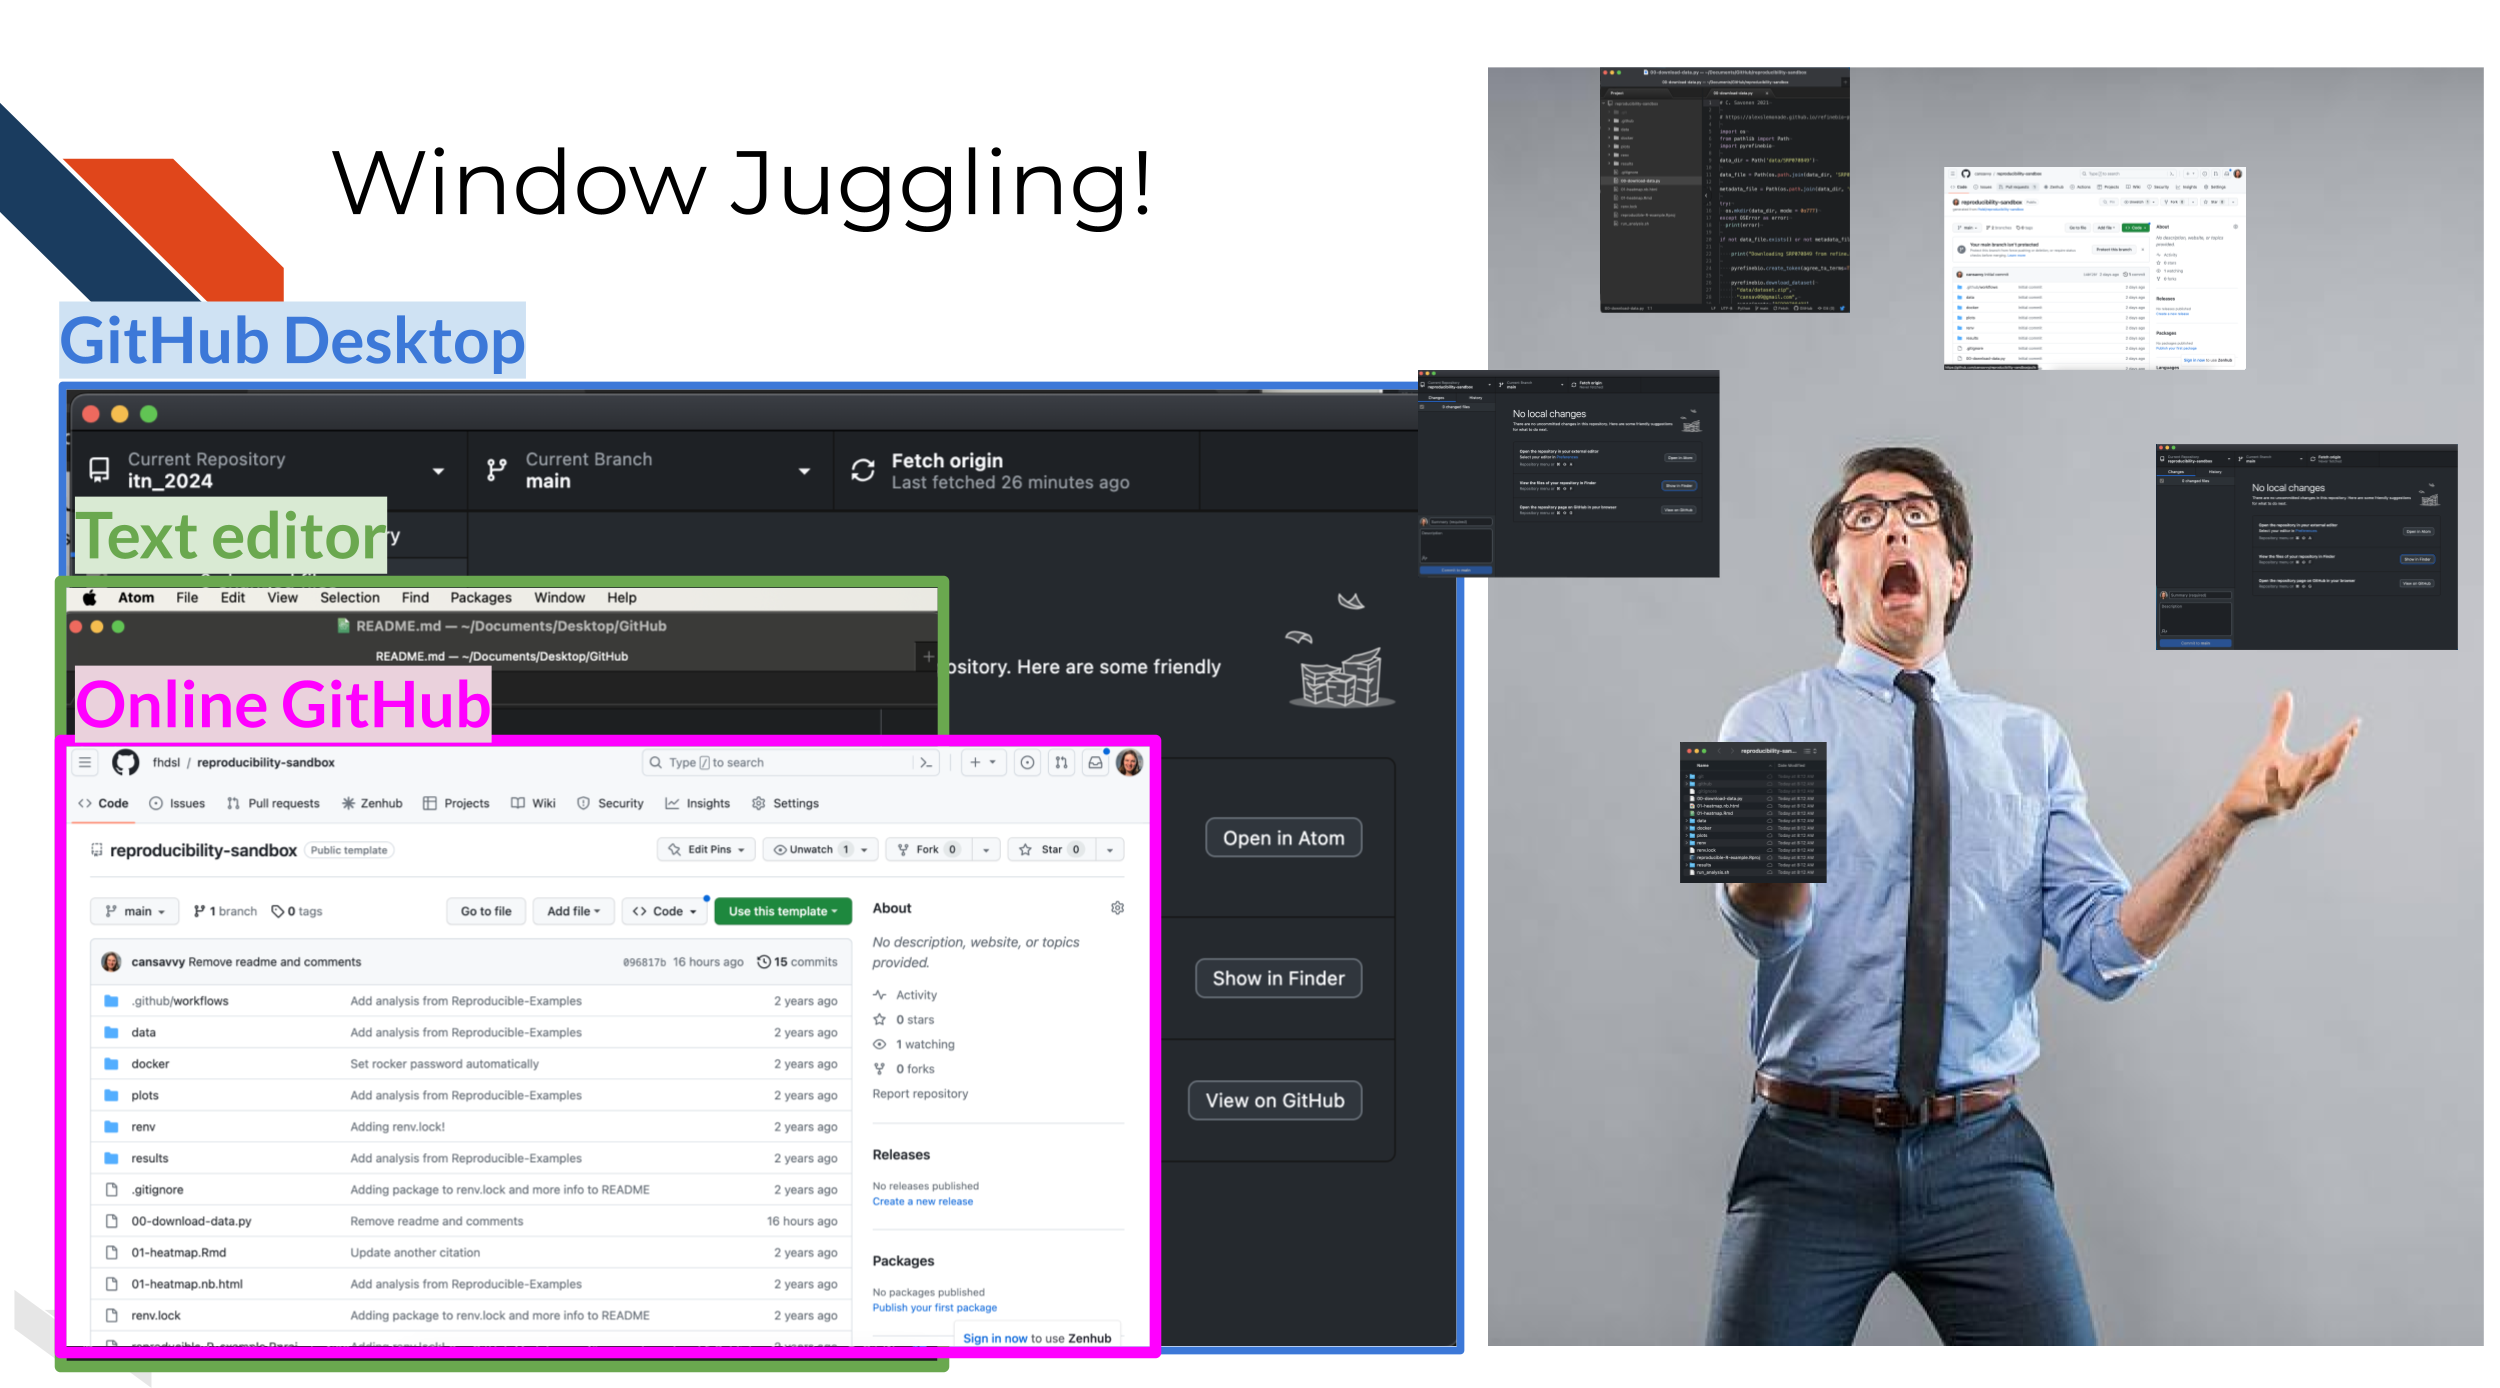
Window Juggling
Note the three buttons on the main GitHub Desktop repository page that connect us to related apps.
We will be “juggling” some windows when doing this activity:
Code editor– we’ll actually edit files with thisFiles– we’ll find where our files are on our computer with thisOnline GitHub– we will send our pull request and suggested changes to online GitHub.com with this.
Filing a pull request
Pull requests are great for suggesting changes in a way that allow us
to preview and discuss the changes before merging to the
main version.
We will practice filing a pull request by filling in the the README. READMEs are great for getting folks up to speed on a repository or code base.
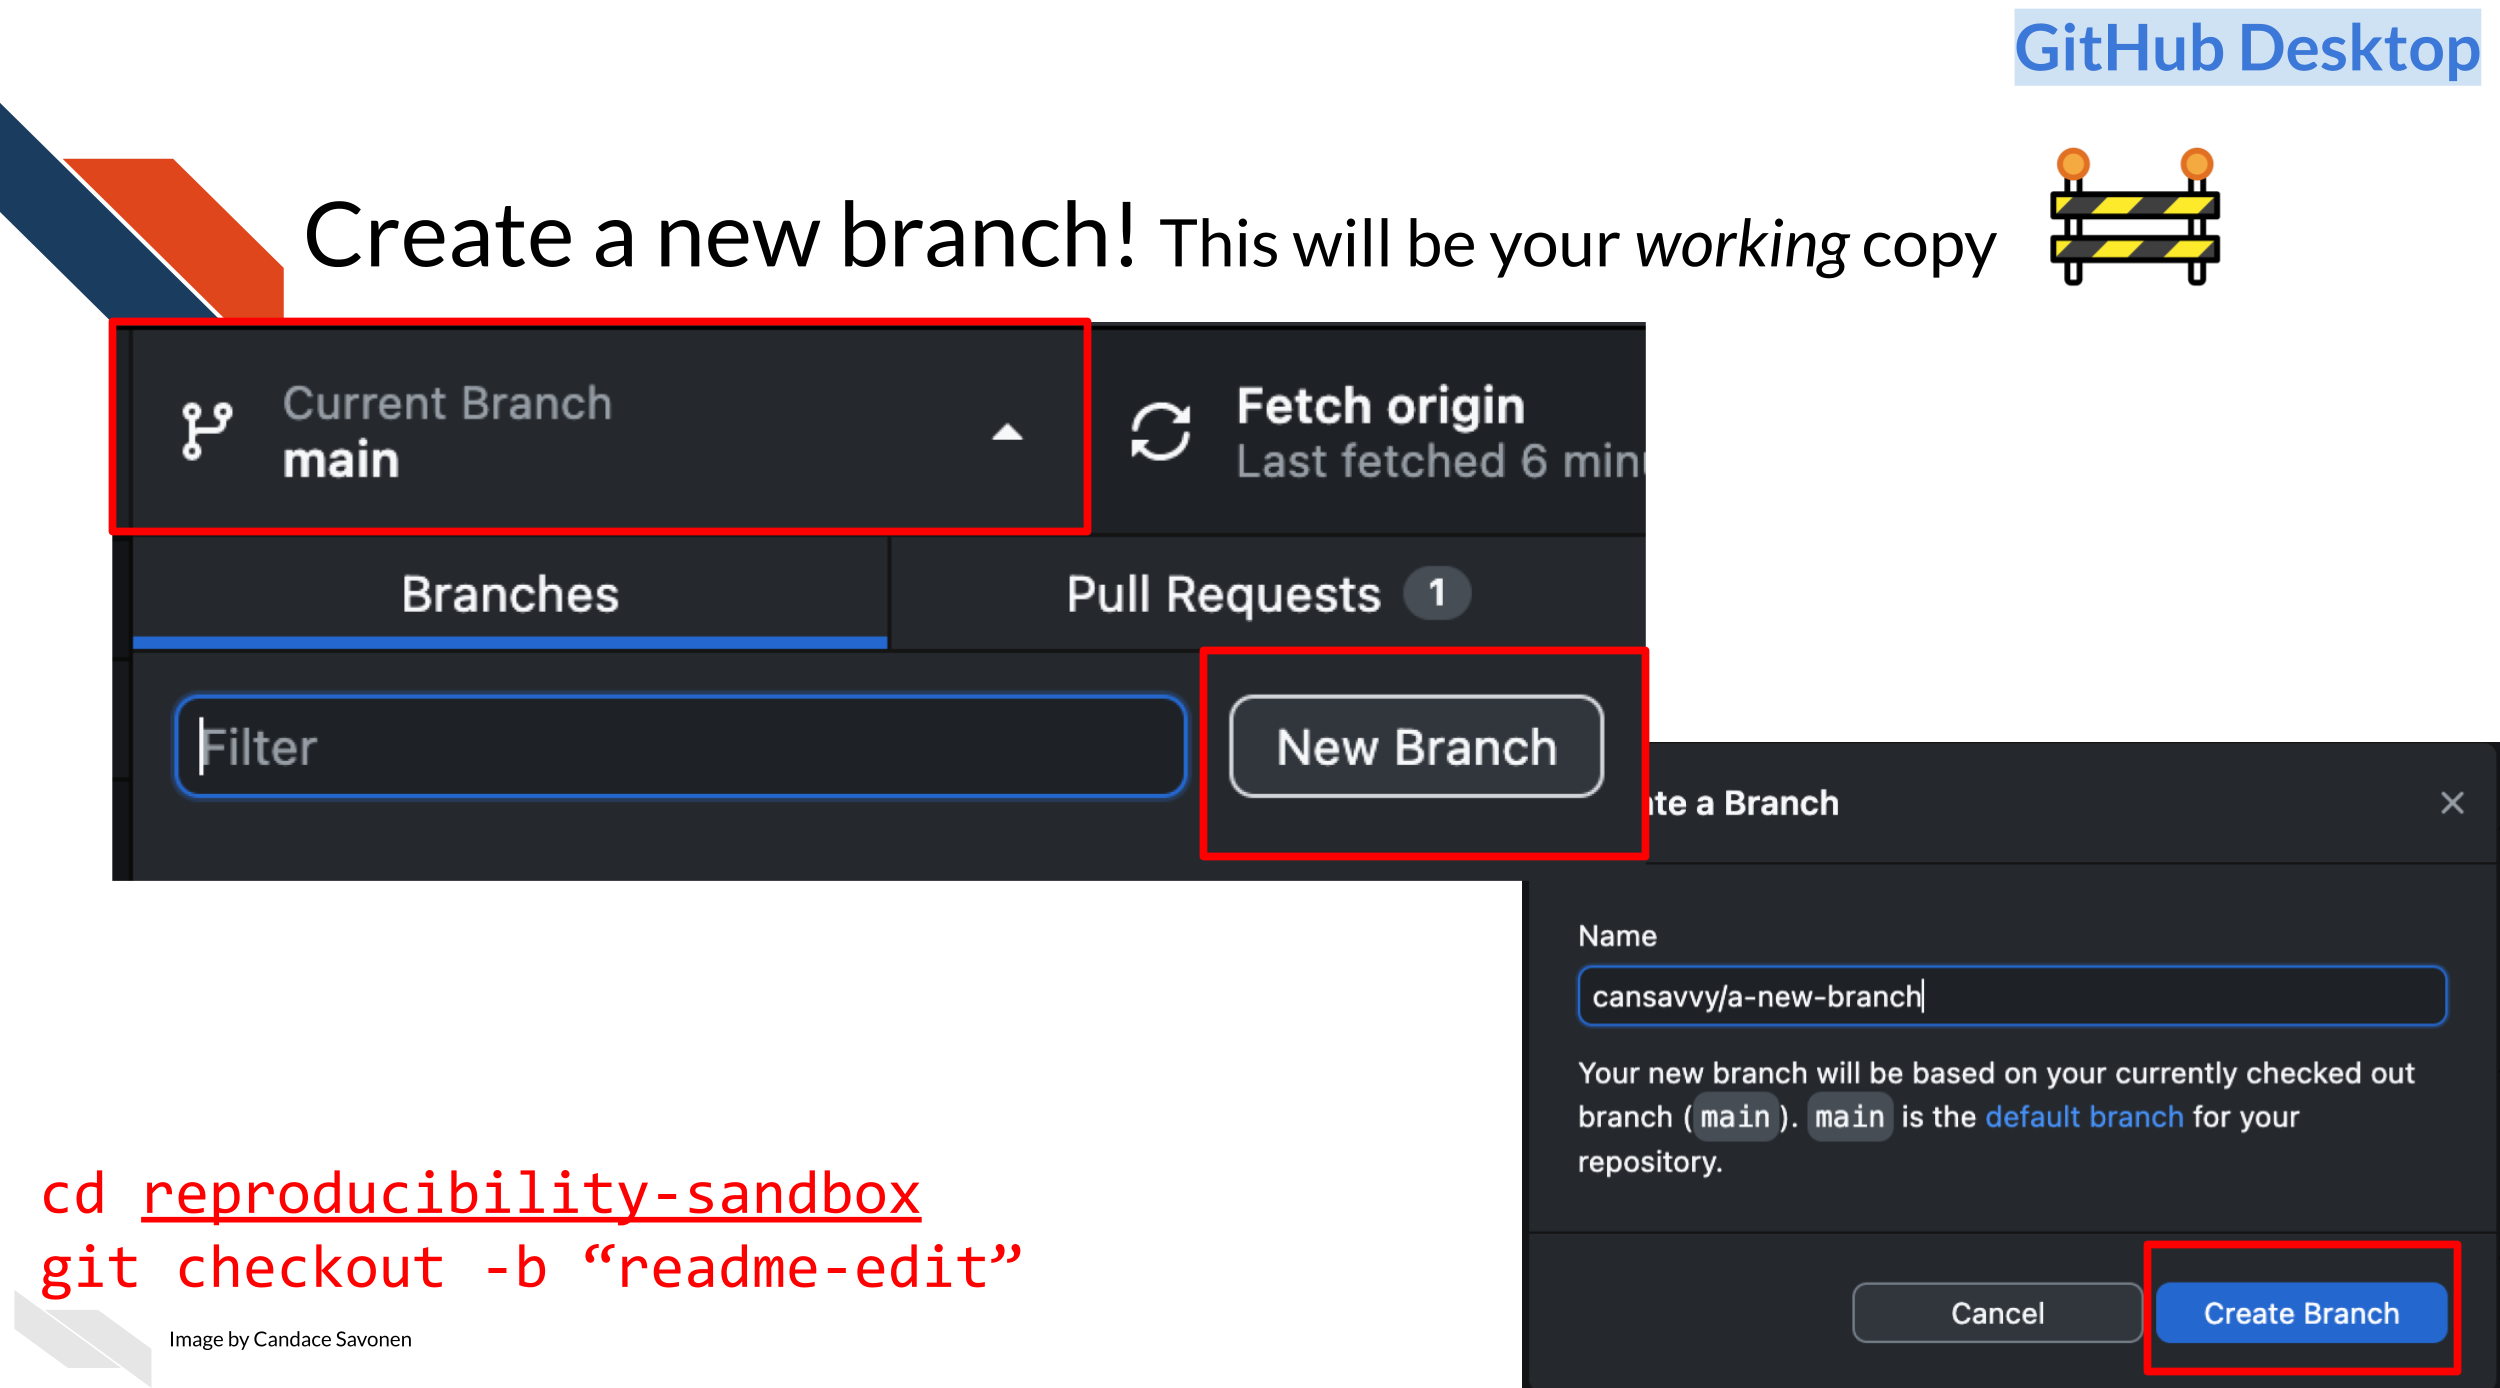
Create a new branch
But to create a pull request, we first need to create a branch to
work from that is separate from the main copy.
In GitHub Desktop:
Click the Current Branch box
> New branch.
Call this new branch
readme-edit.
Click the blue button that says
Create Branch.
Create an AI generated README
In GitHub Desktop, Click the
Show in Finder or Show in Explorer button
depending on your operating system. This should be about halfway down
the screen. Right click the file names to open
up both the 01-heatmap.Rmd file and the
README.md file with any text editor. (May need to select
Other and Enable all applications if on a
Mac.)
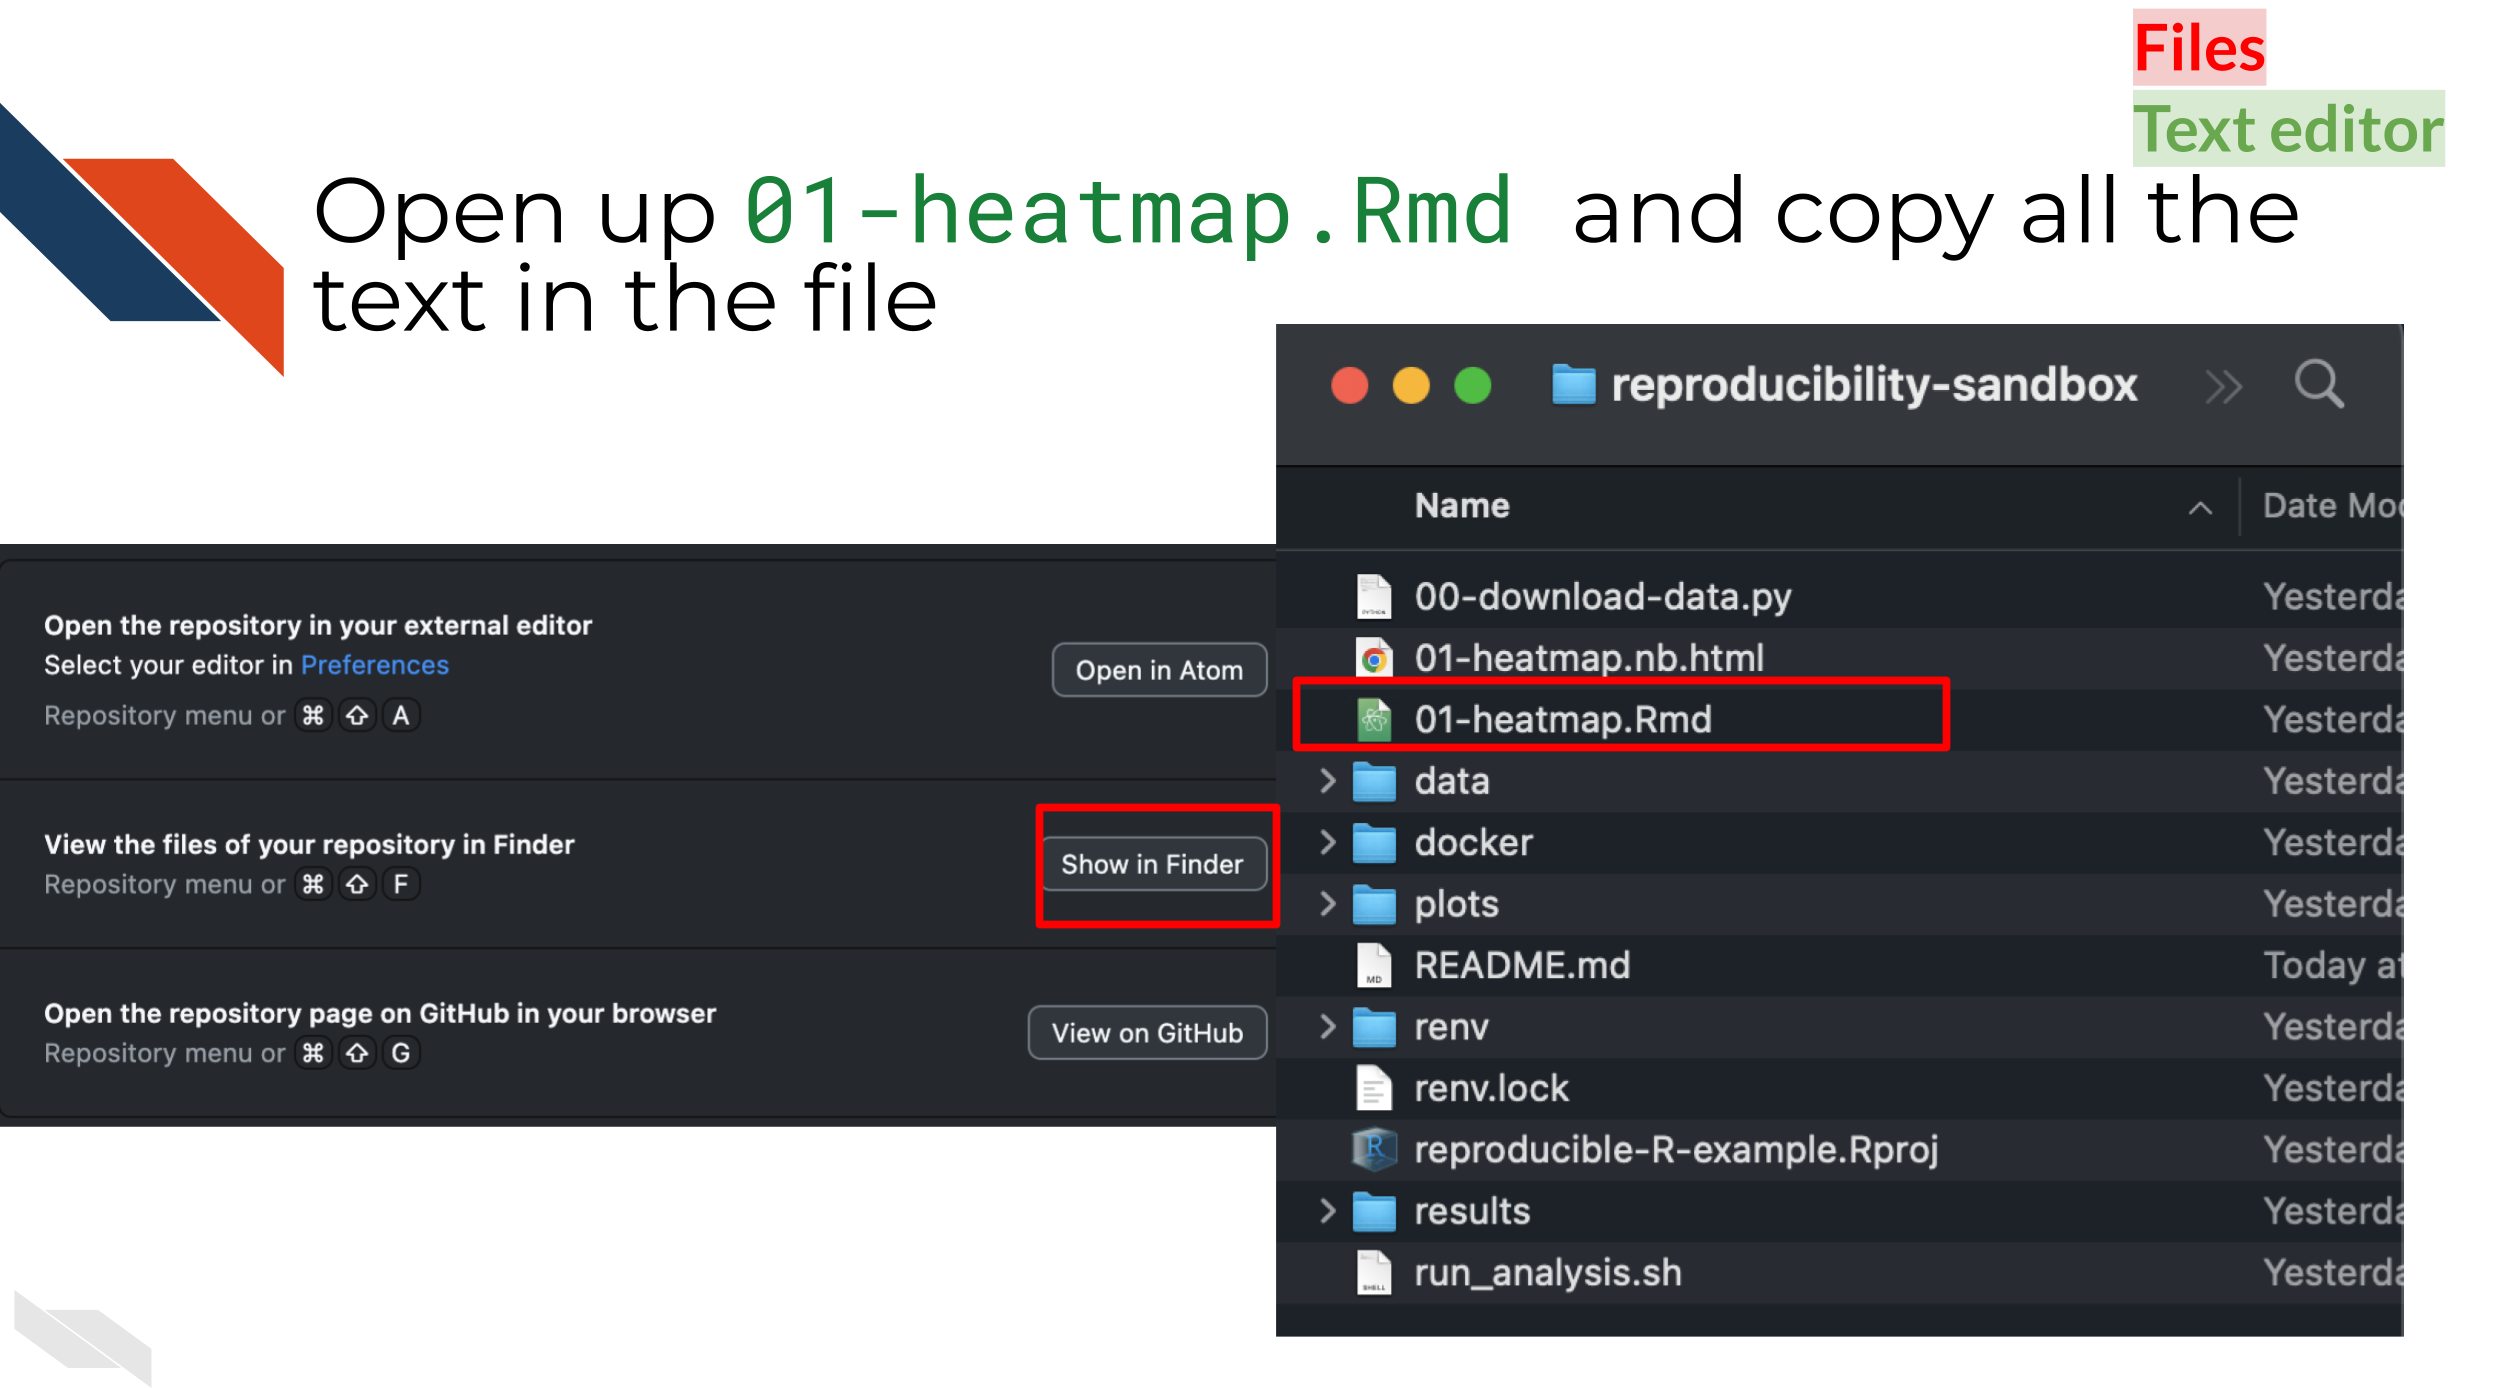
Copy all the text from
01-heatmap.Rmd (Cmd + A - Mac, Ctrl + A - Windows).
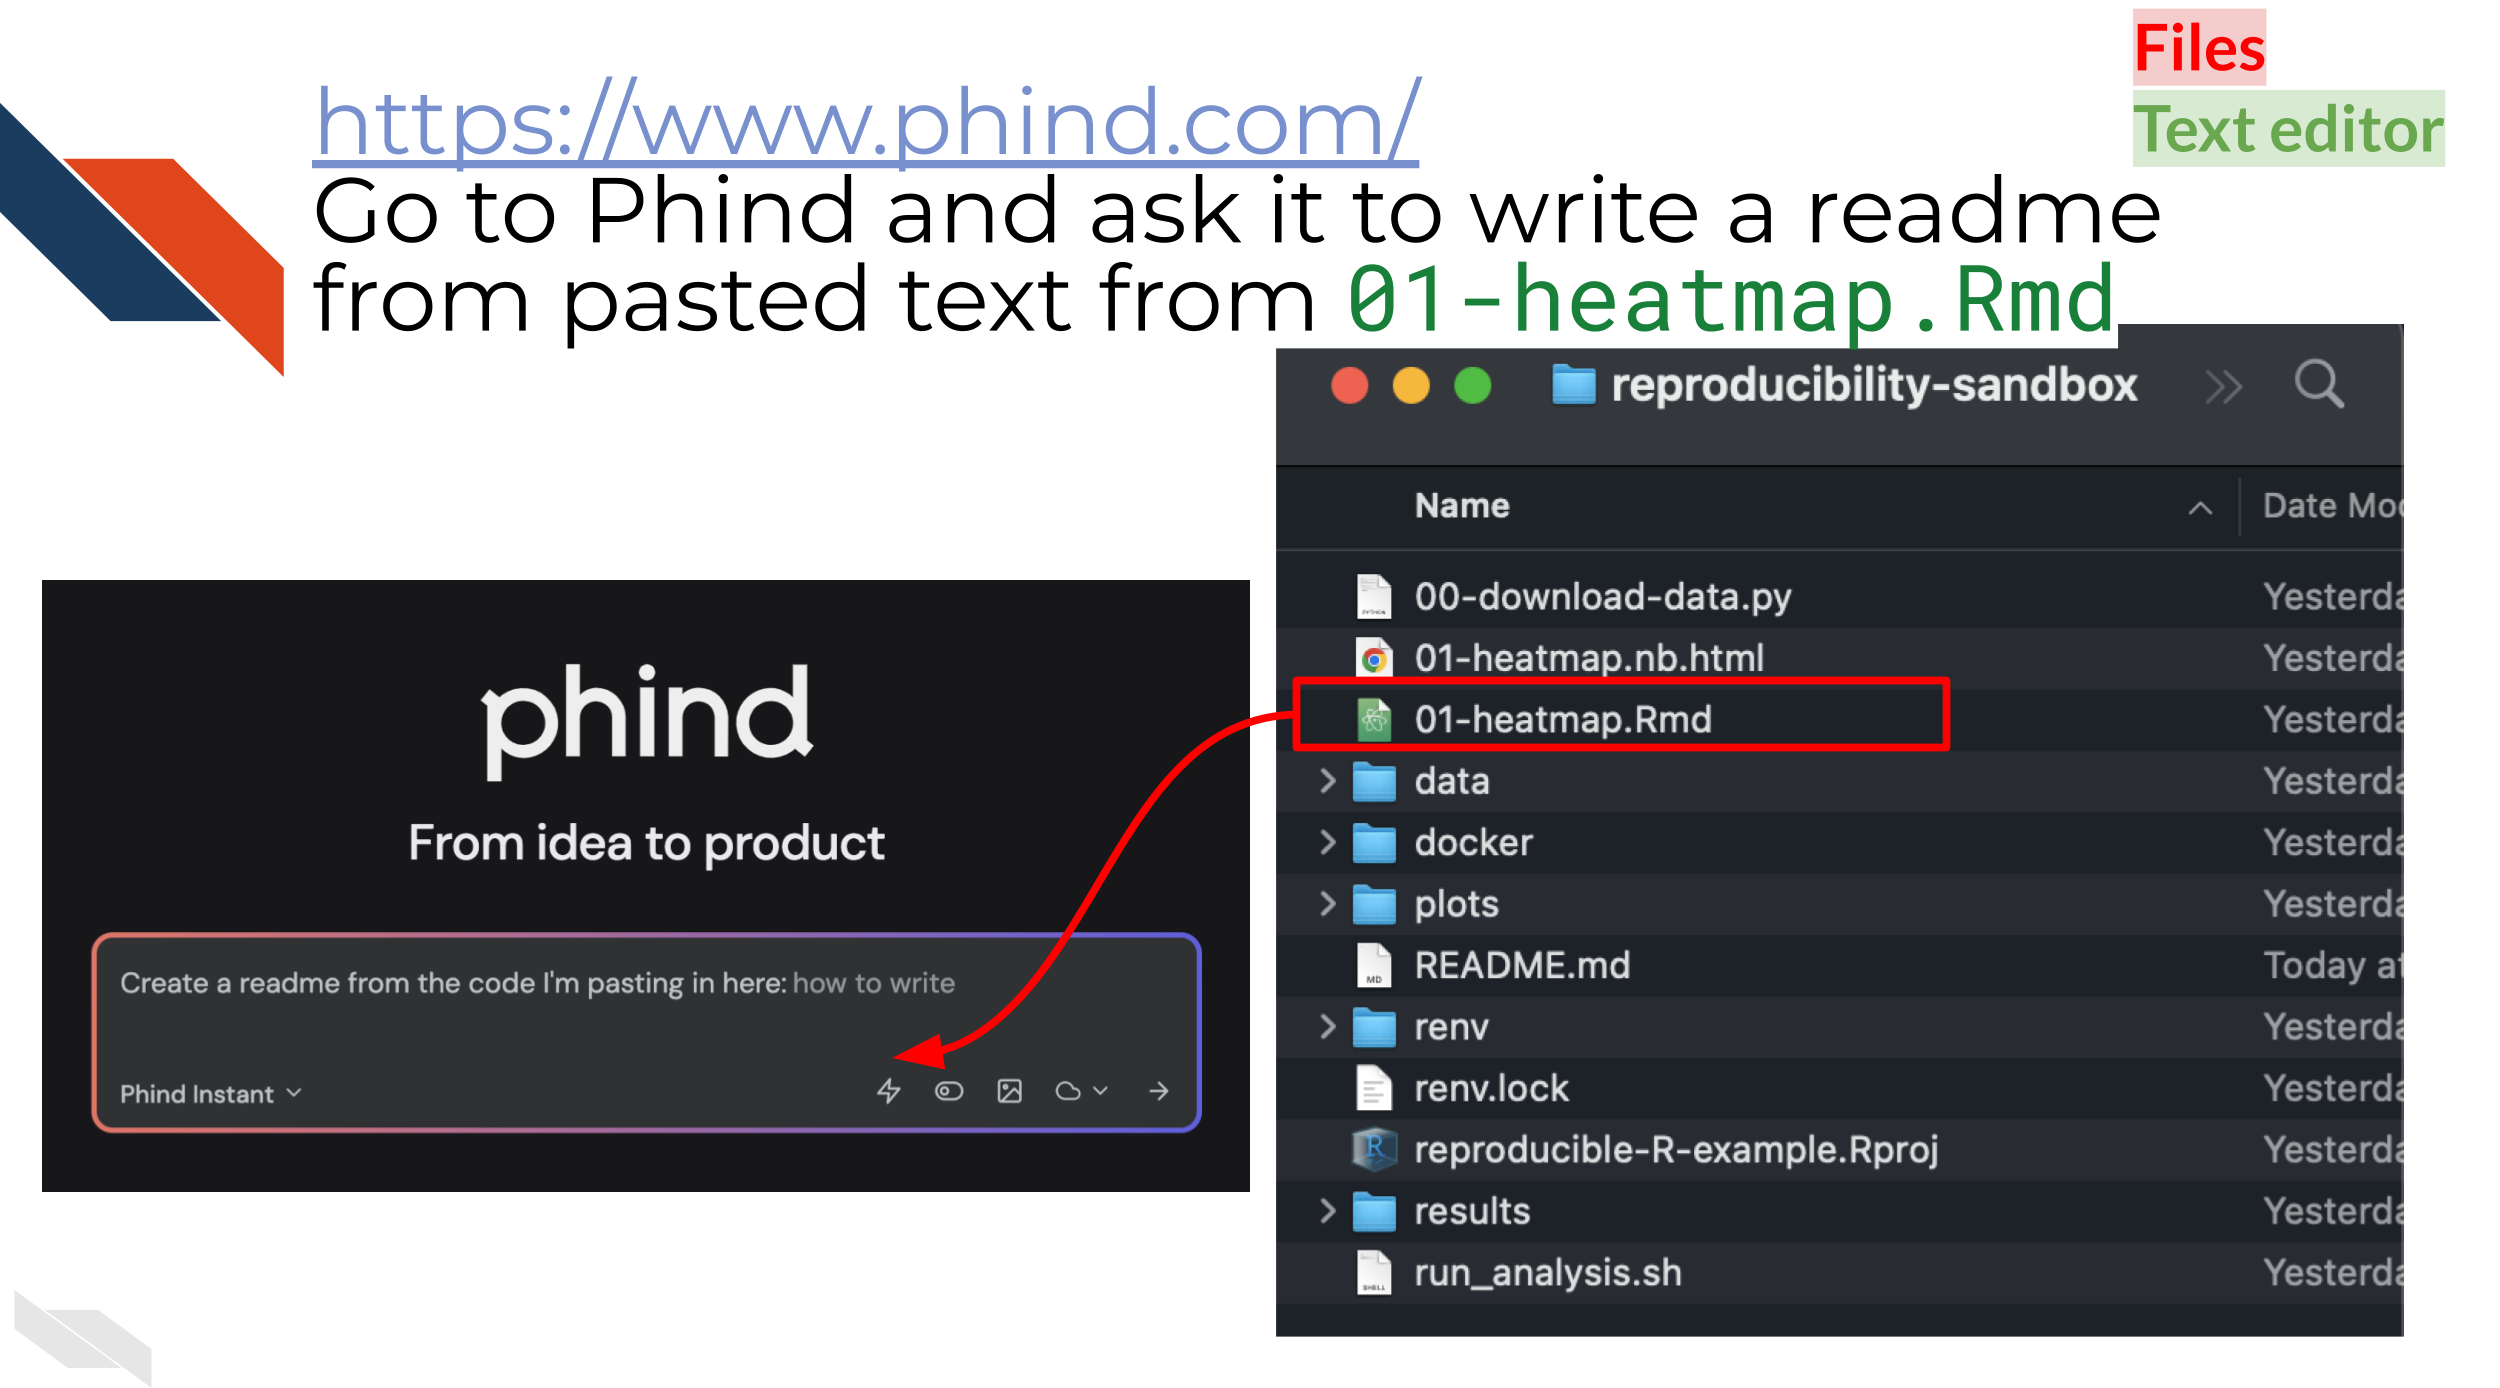
Go to phind https://www.phind.com/search in your browser. (Other AI
chatbots can also work like https://poe.com/) Ask phind to
create a README from the code. Copy (Cmd + A - Mac, Ctrl + C - Windows)
and paste (Cmd + V - Mac, Ctrl + V - Windows) in the code from
01-heatmap.Rmd. You may want to do some variations on the
prompt you use to ask phind to do this to get good results.
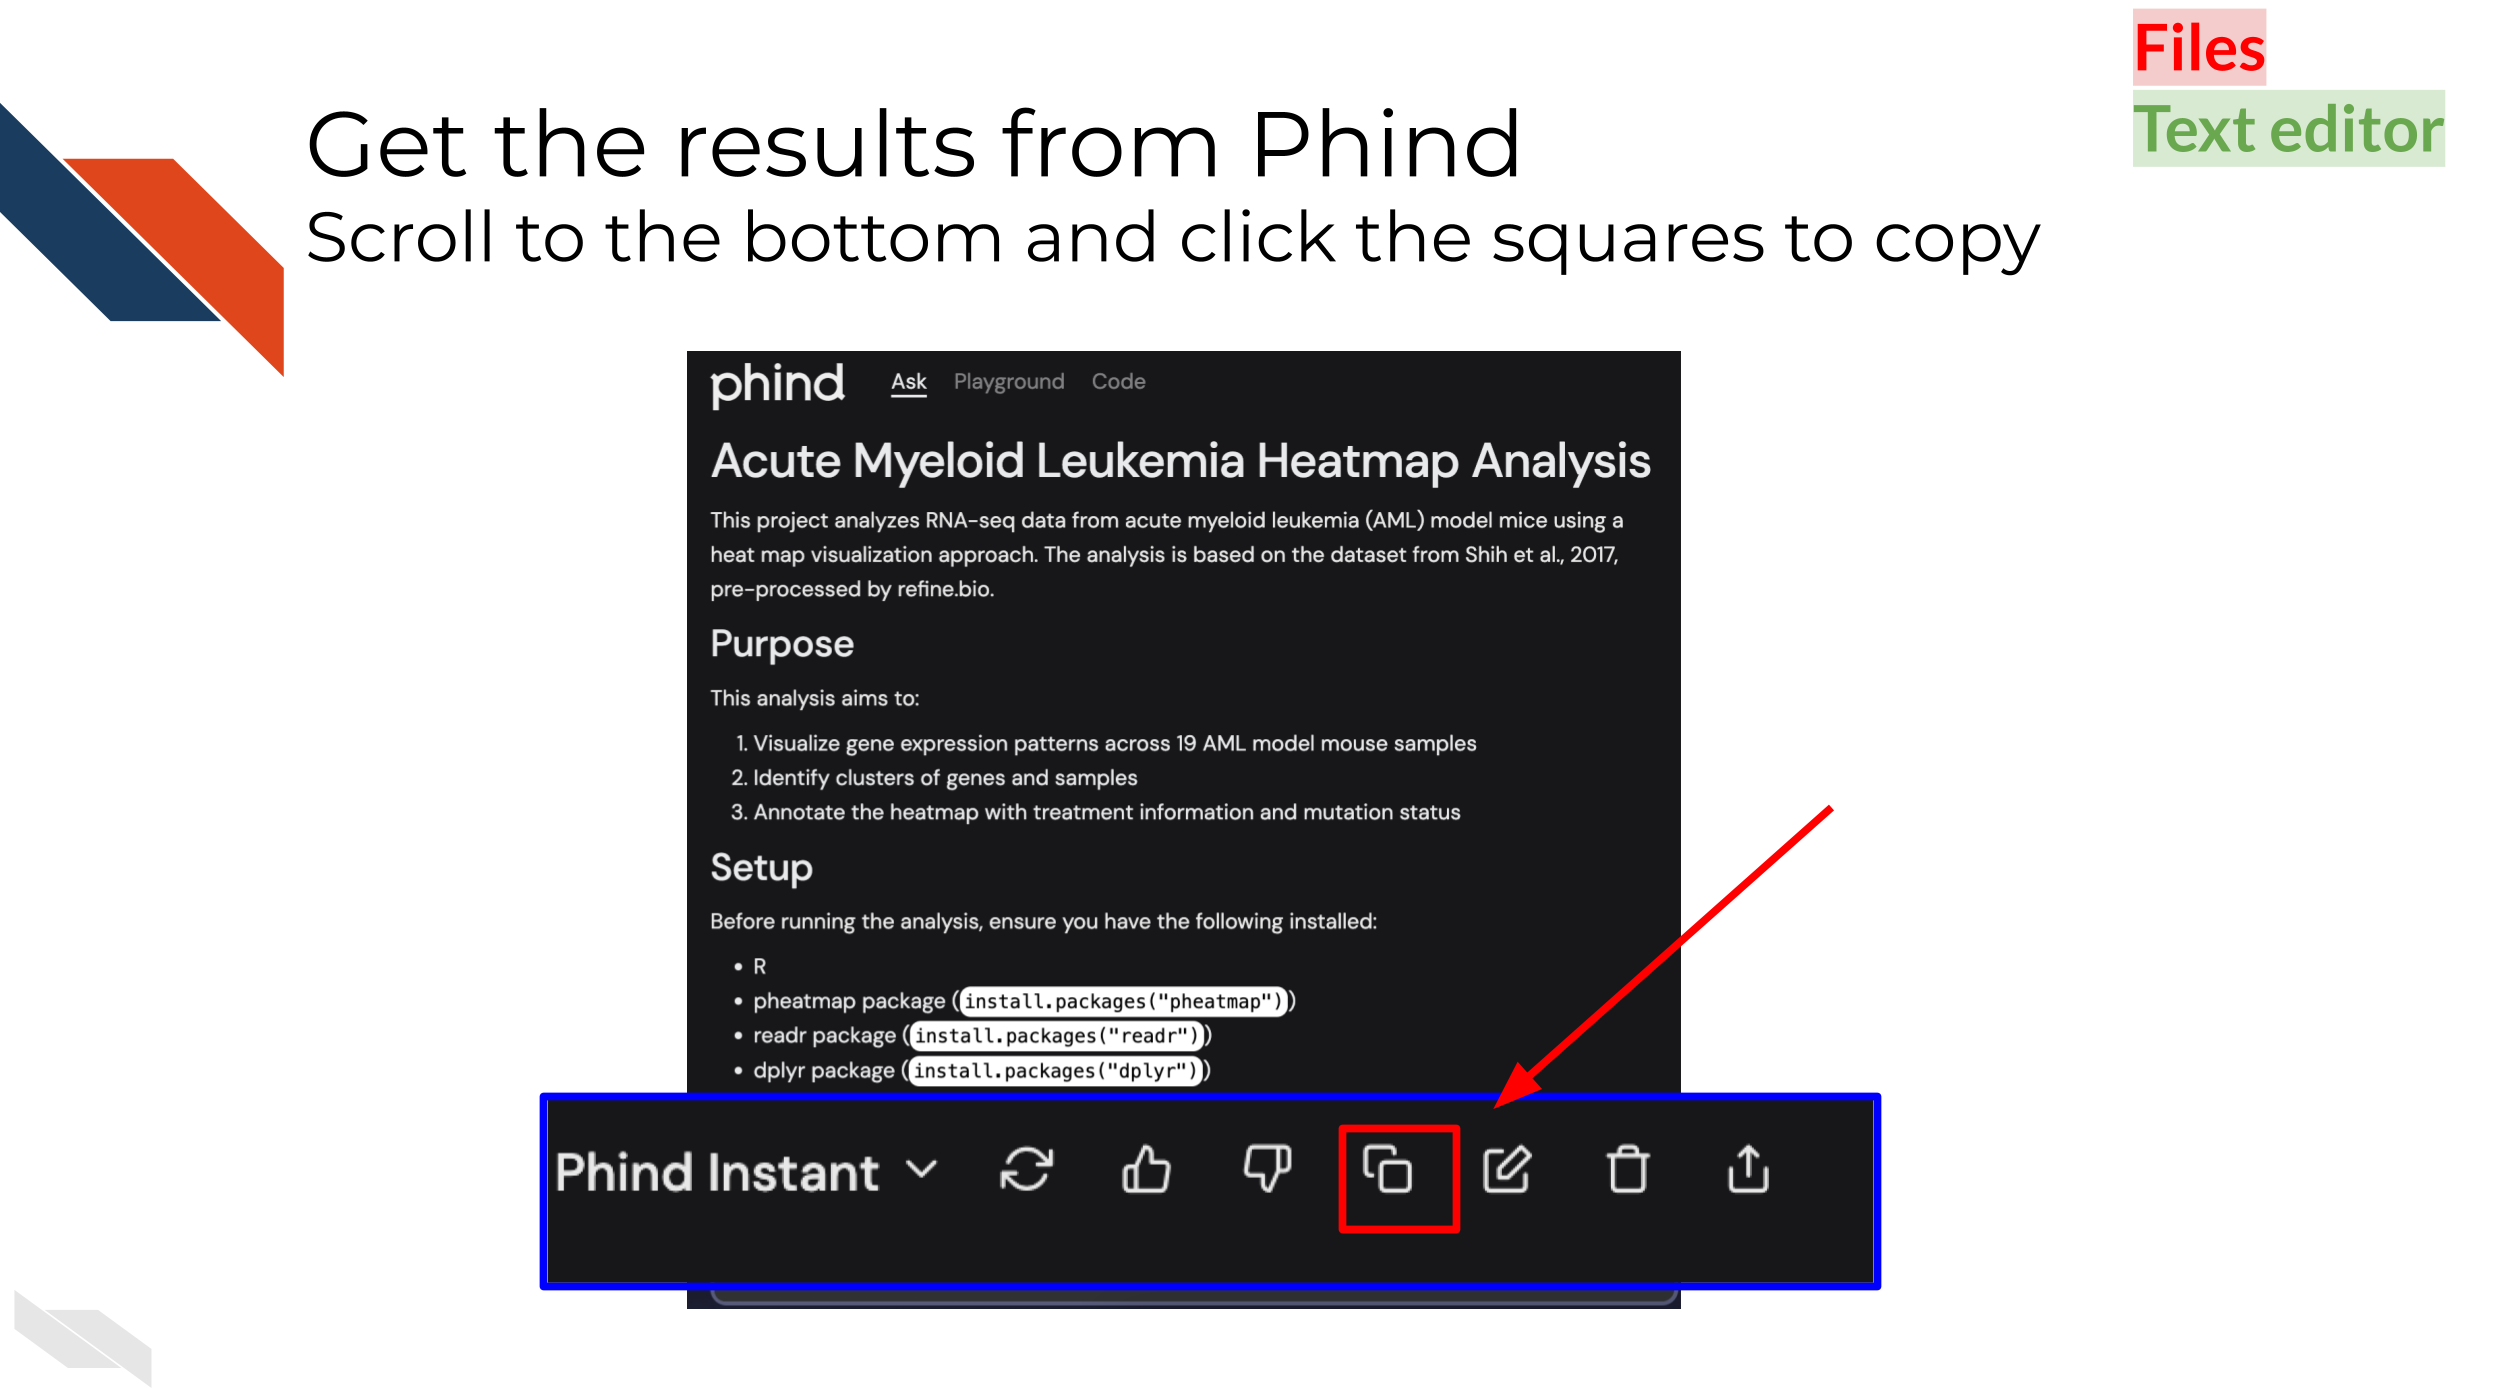
Copy all the text from the desired phind
output and paste it to README.md. Save the file.
Adding changes to a branch
Go back to GitHub Desktop. You should see
1 changed file in the upper right corner. It may be upper
left depending on your machine and version of GitHub Desktop.
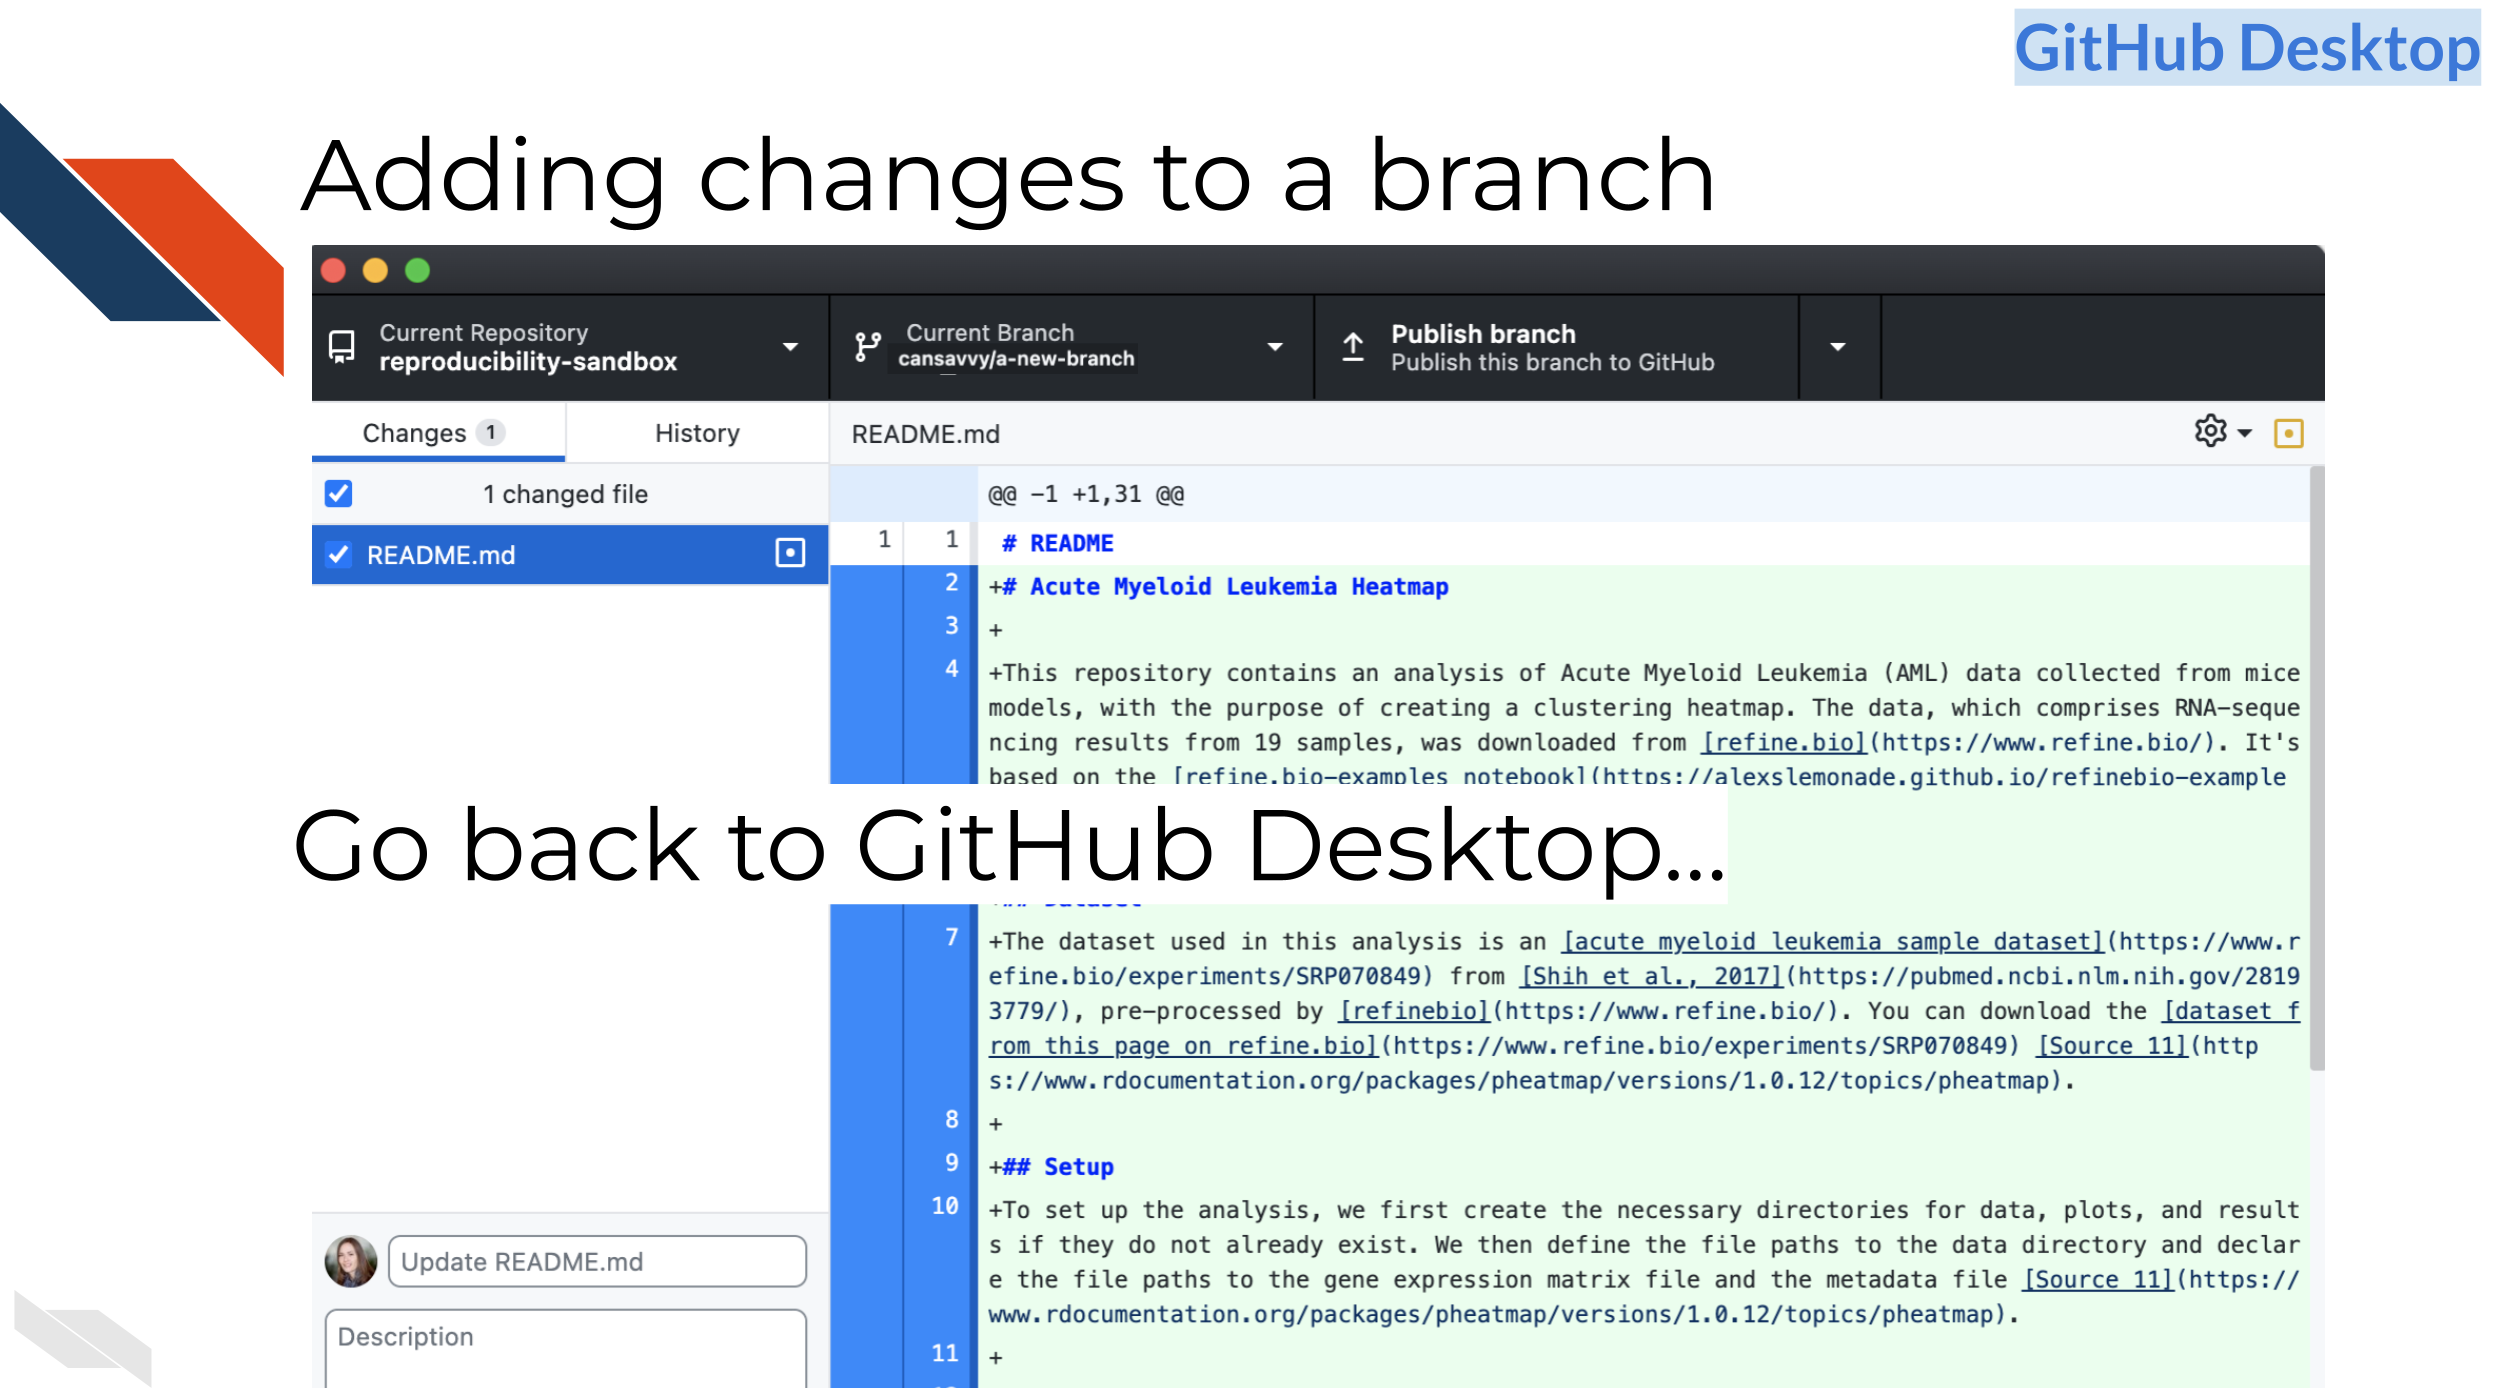
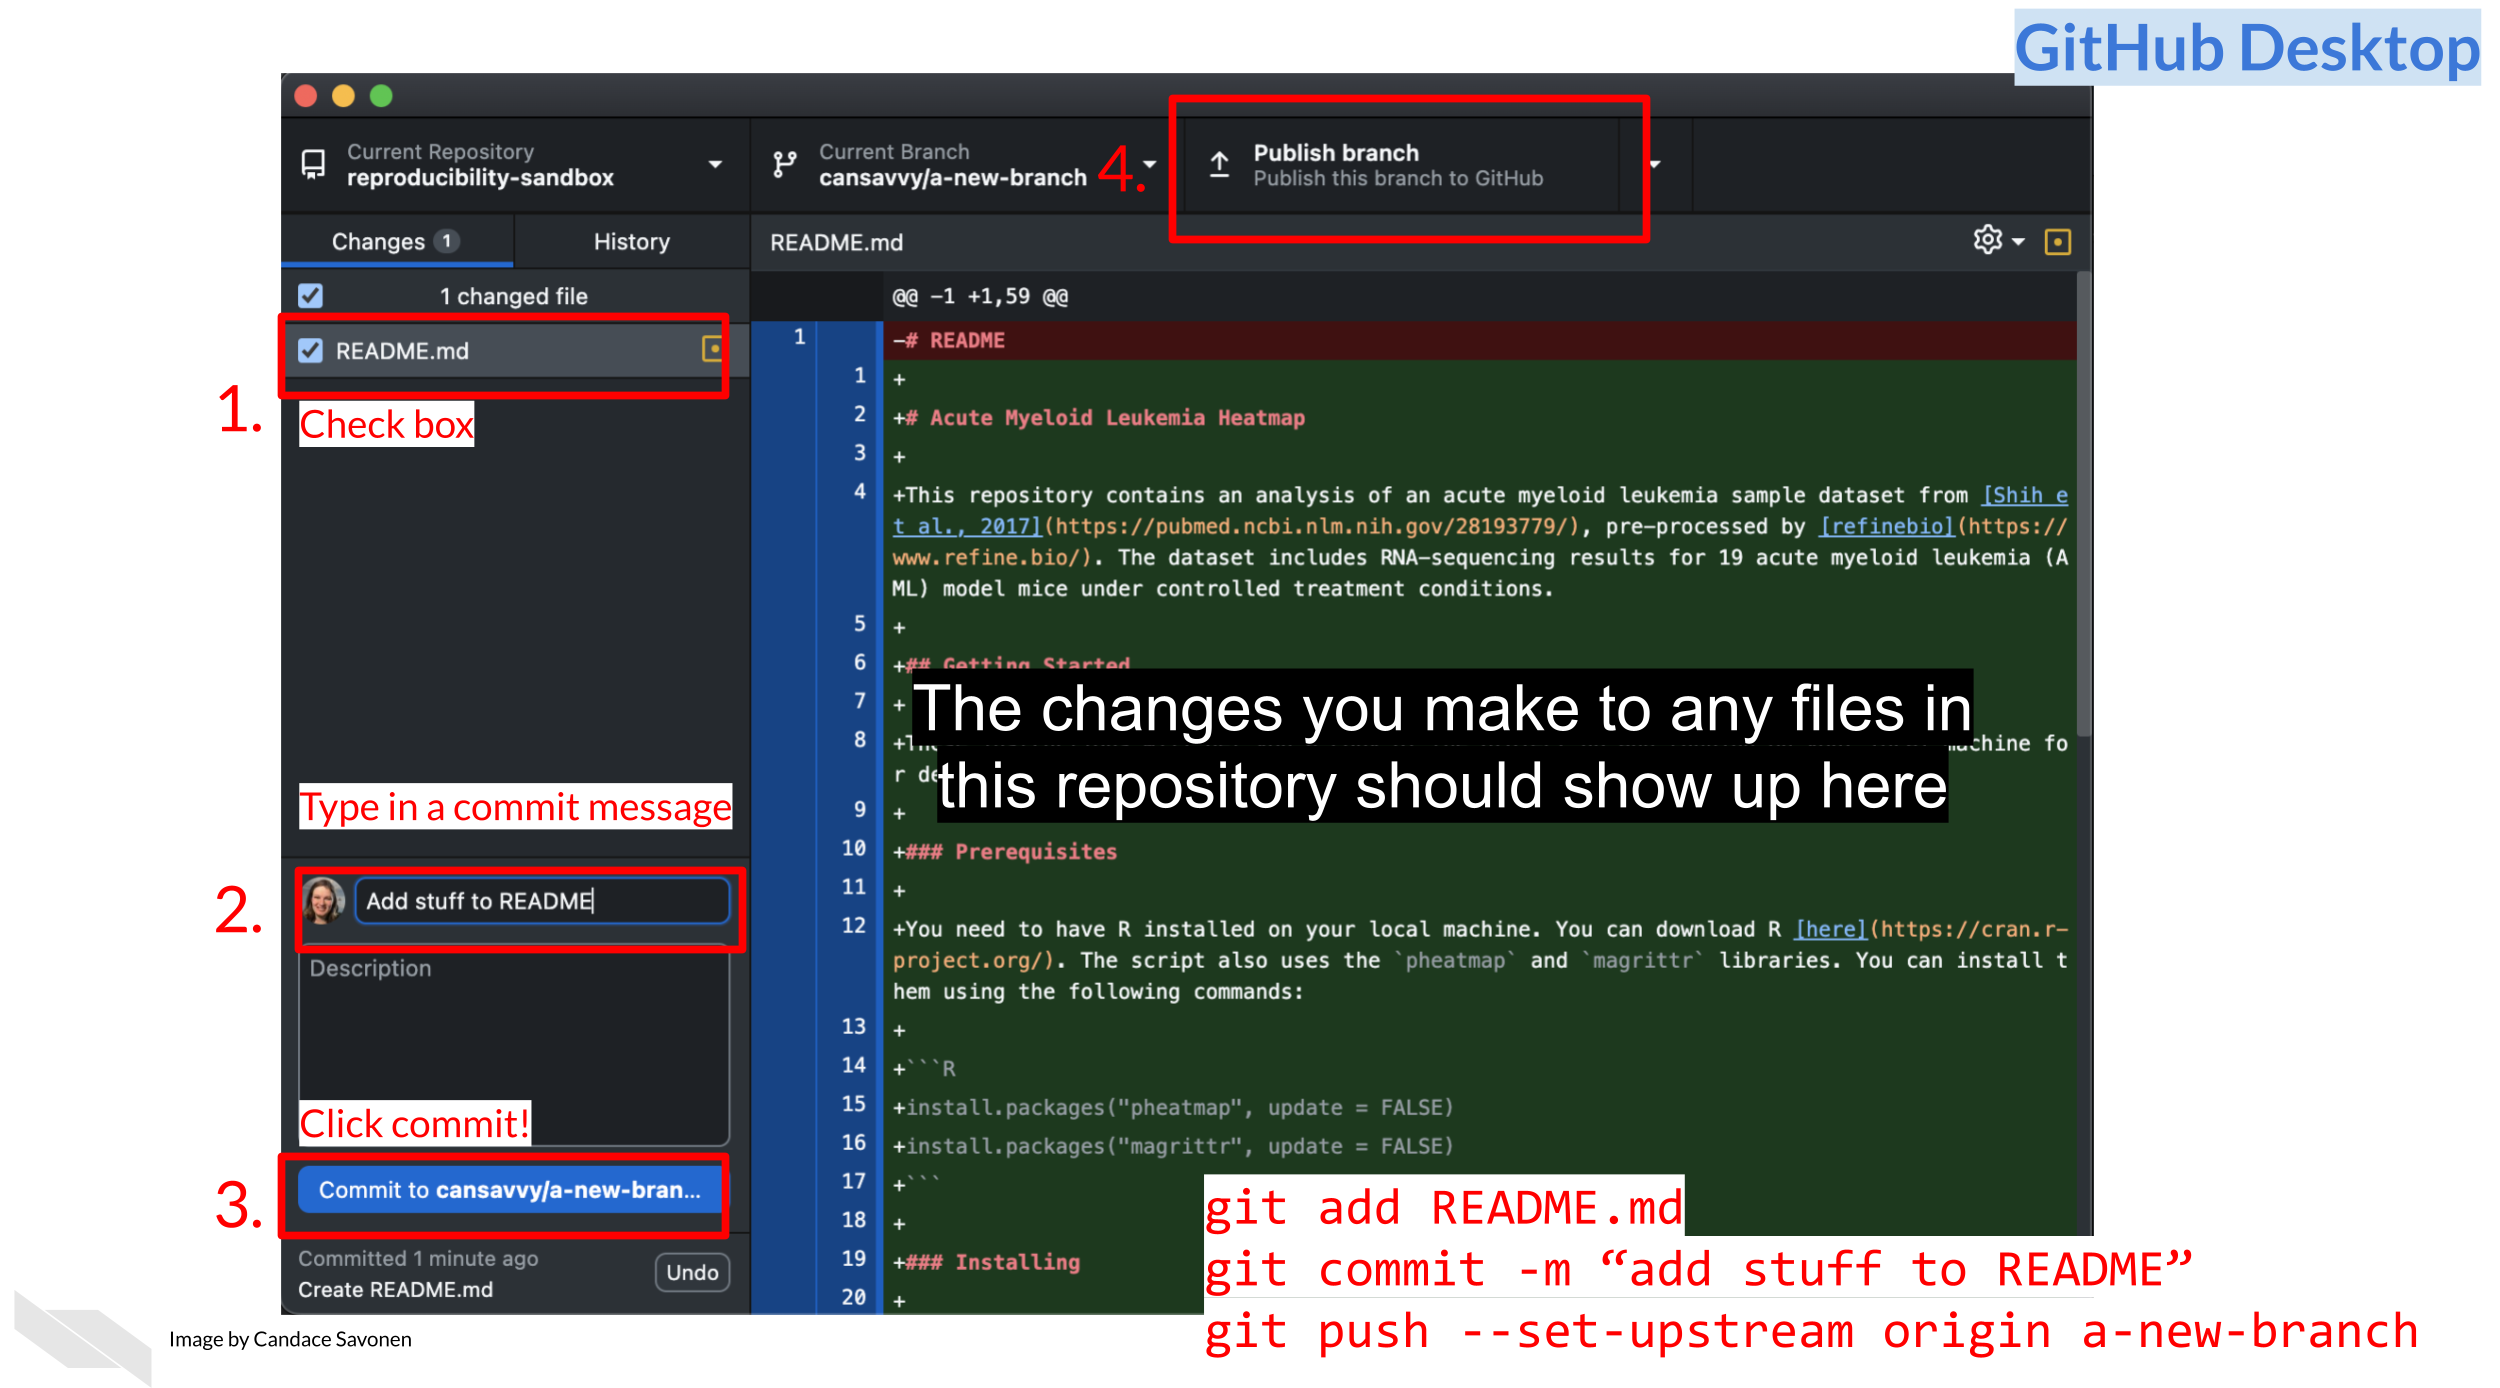
Type in a “commit” message. Commits are how
we add things to our branch.
Click the button that says
Commit to ... it will have your branch name which should be
readme-edit.
Click the Publish branch button.
This will “push” your changes to online GitHub.com
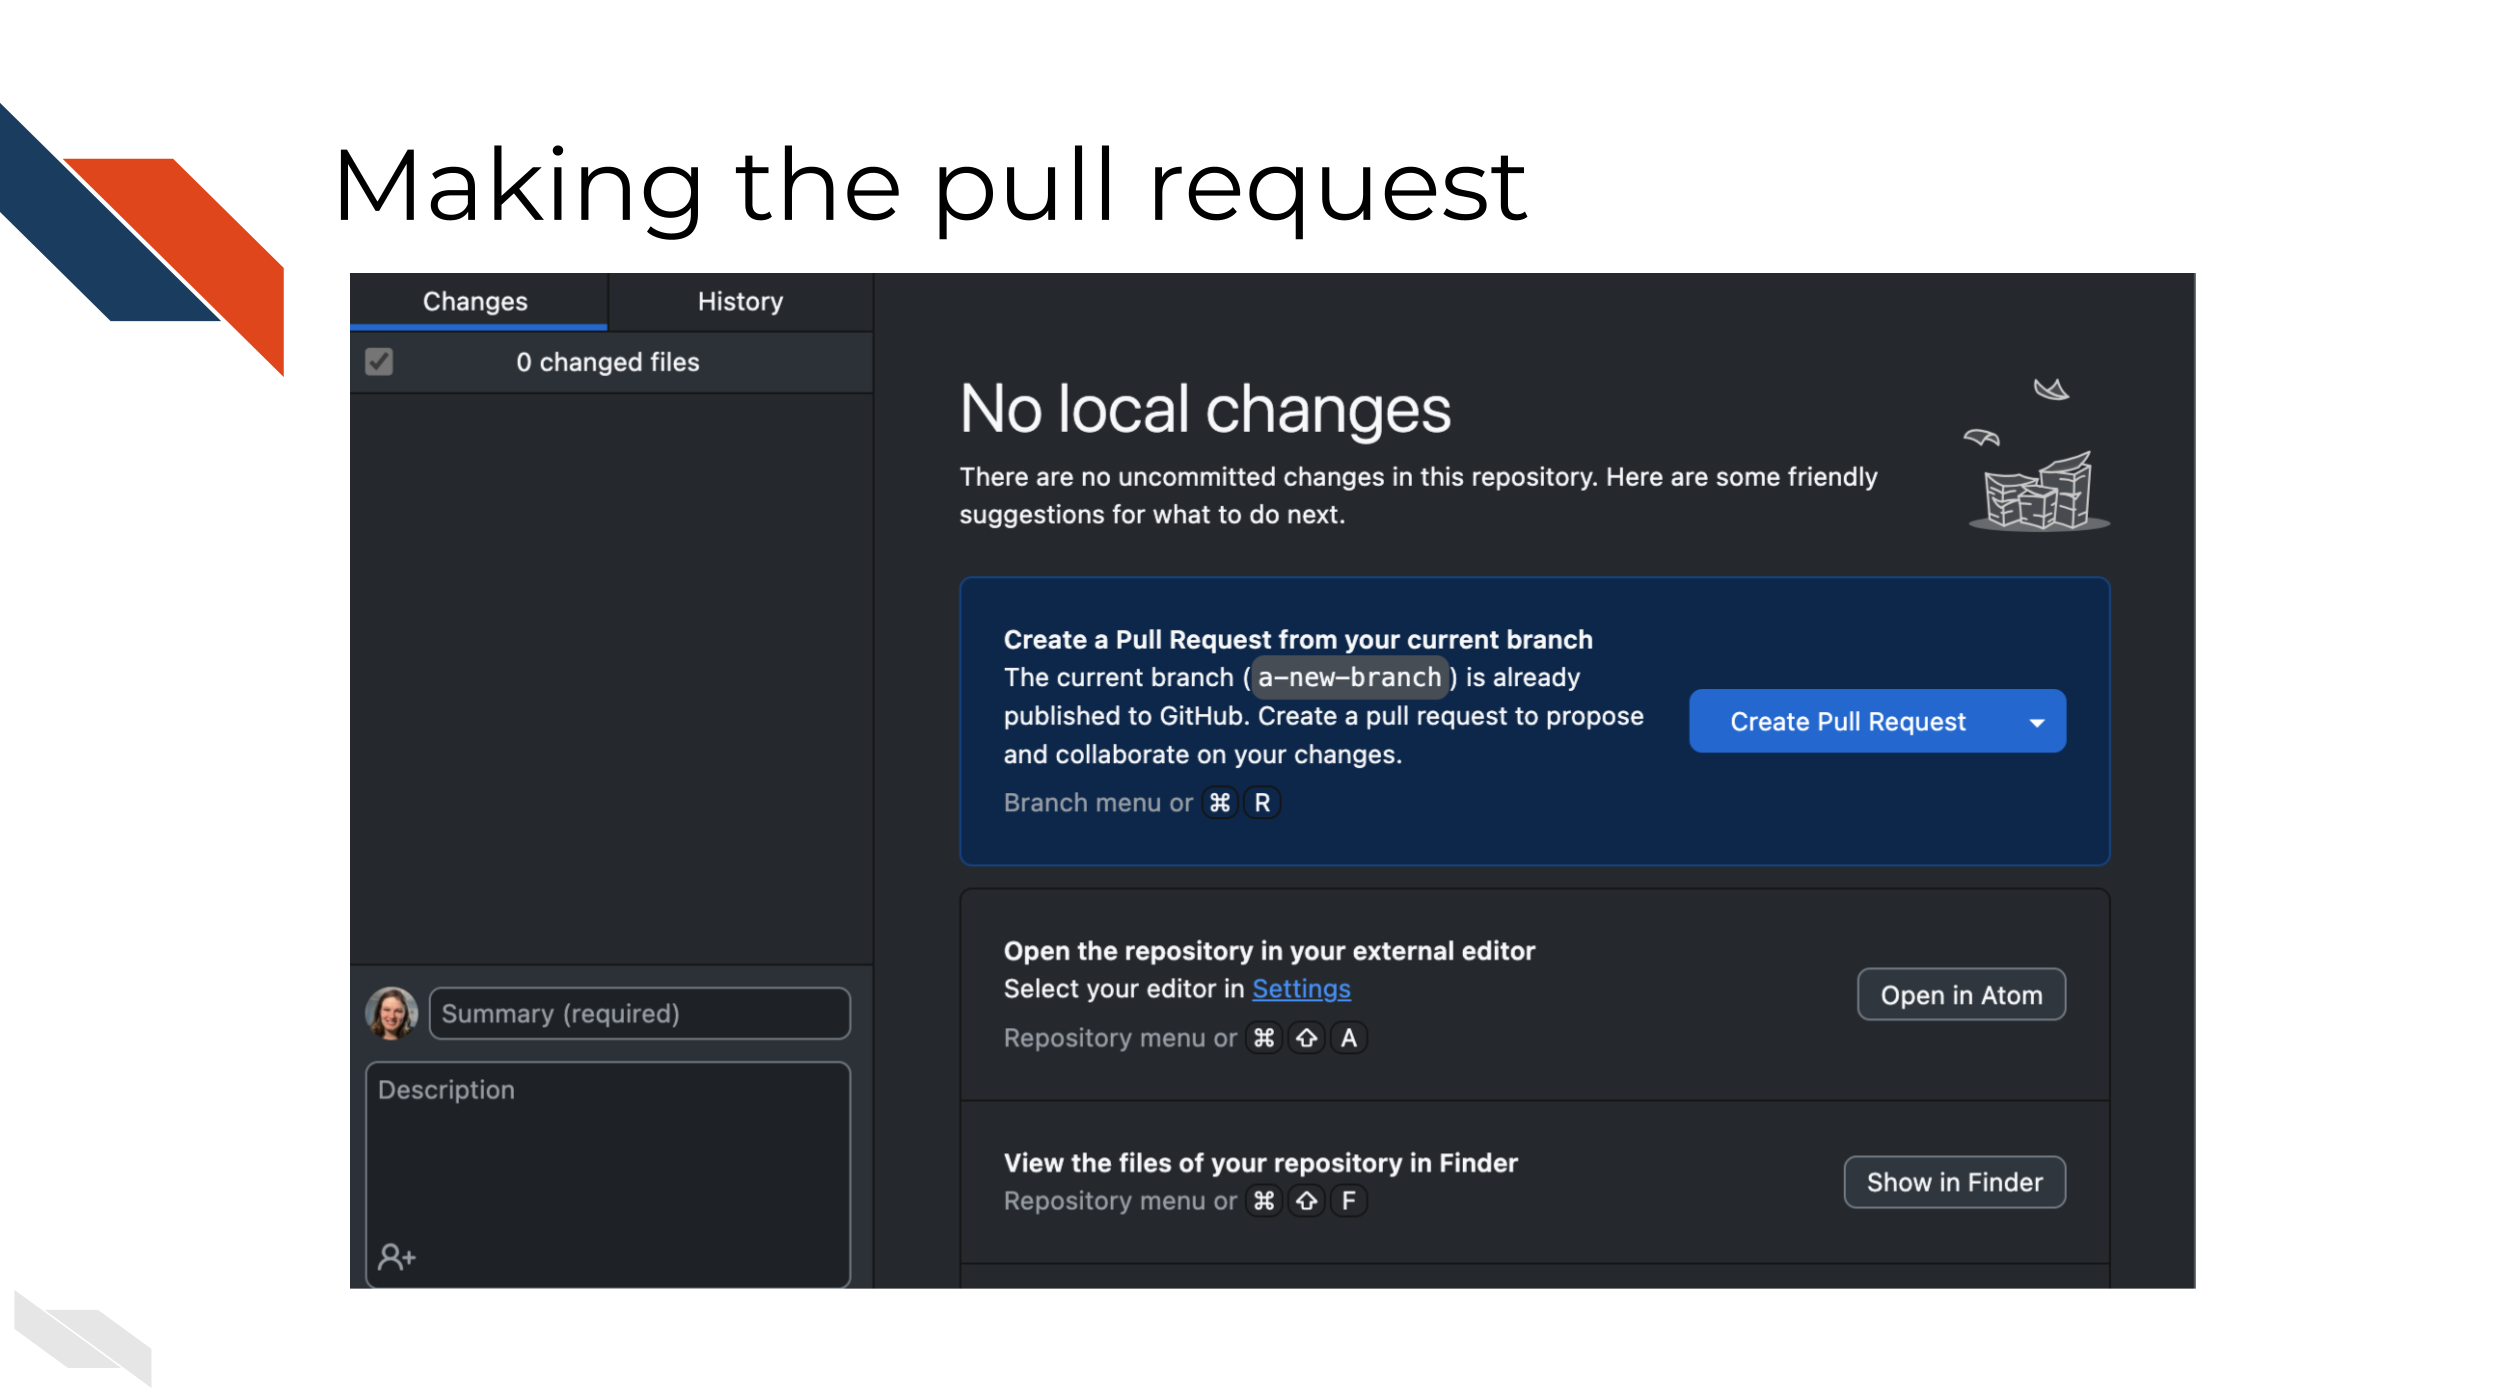
Making the pull request
Follow GitHub Desktop’s prompt to
Create a Pull Request and click the blue button. If the
blue button says Preview Pull Request then click the
downward facing arrow to see the option to
Create a Pull Request.
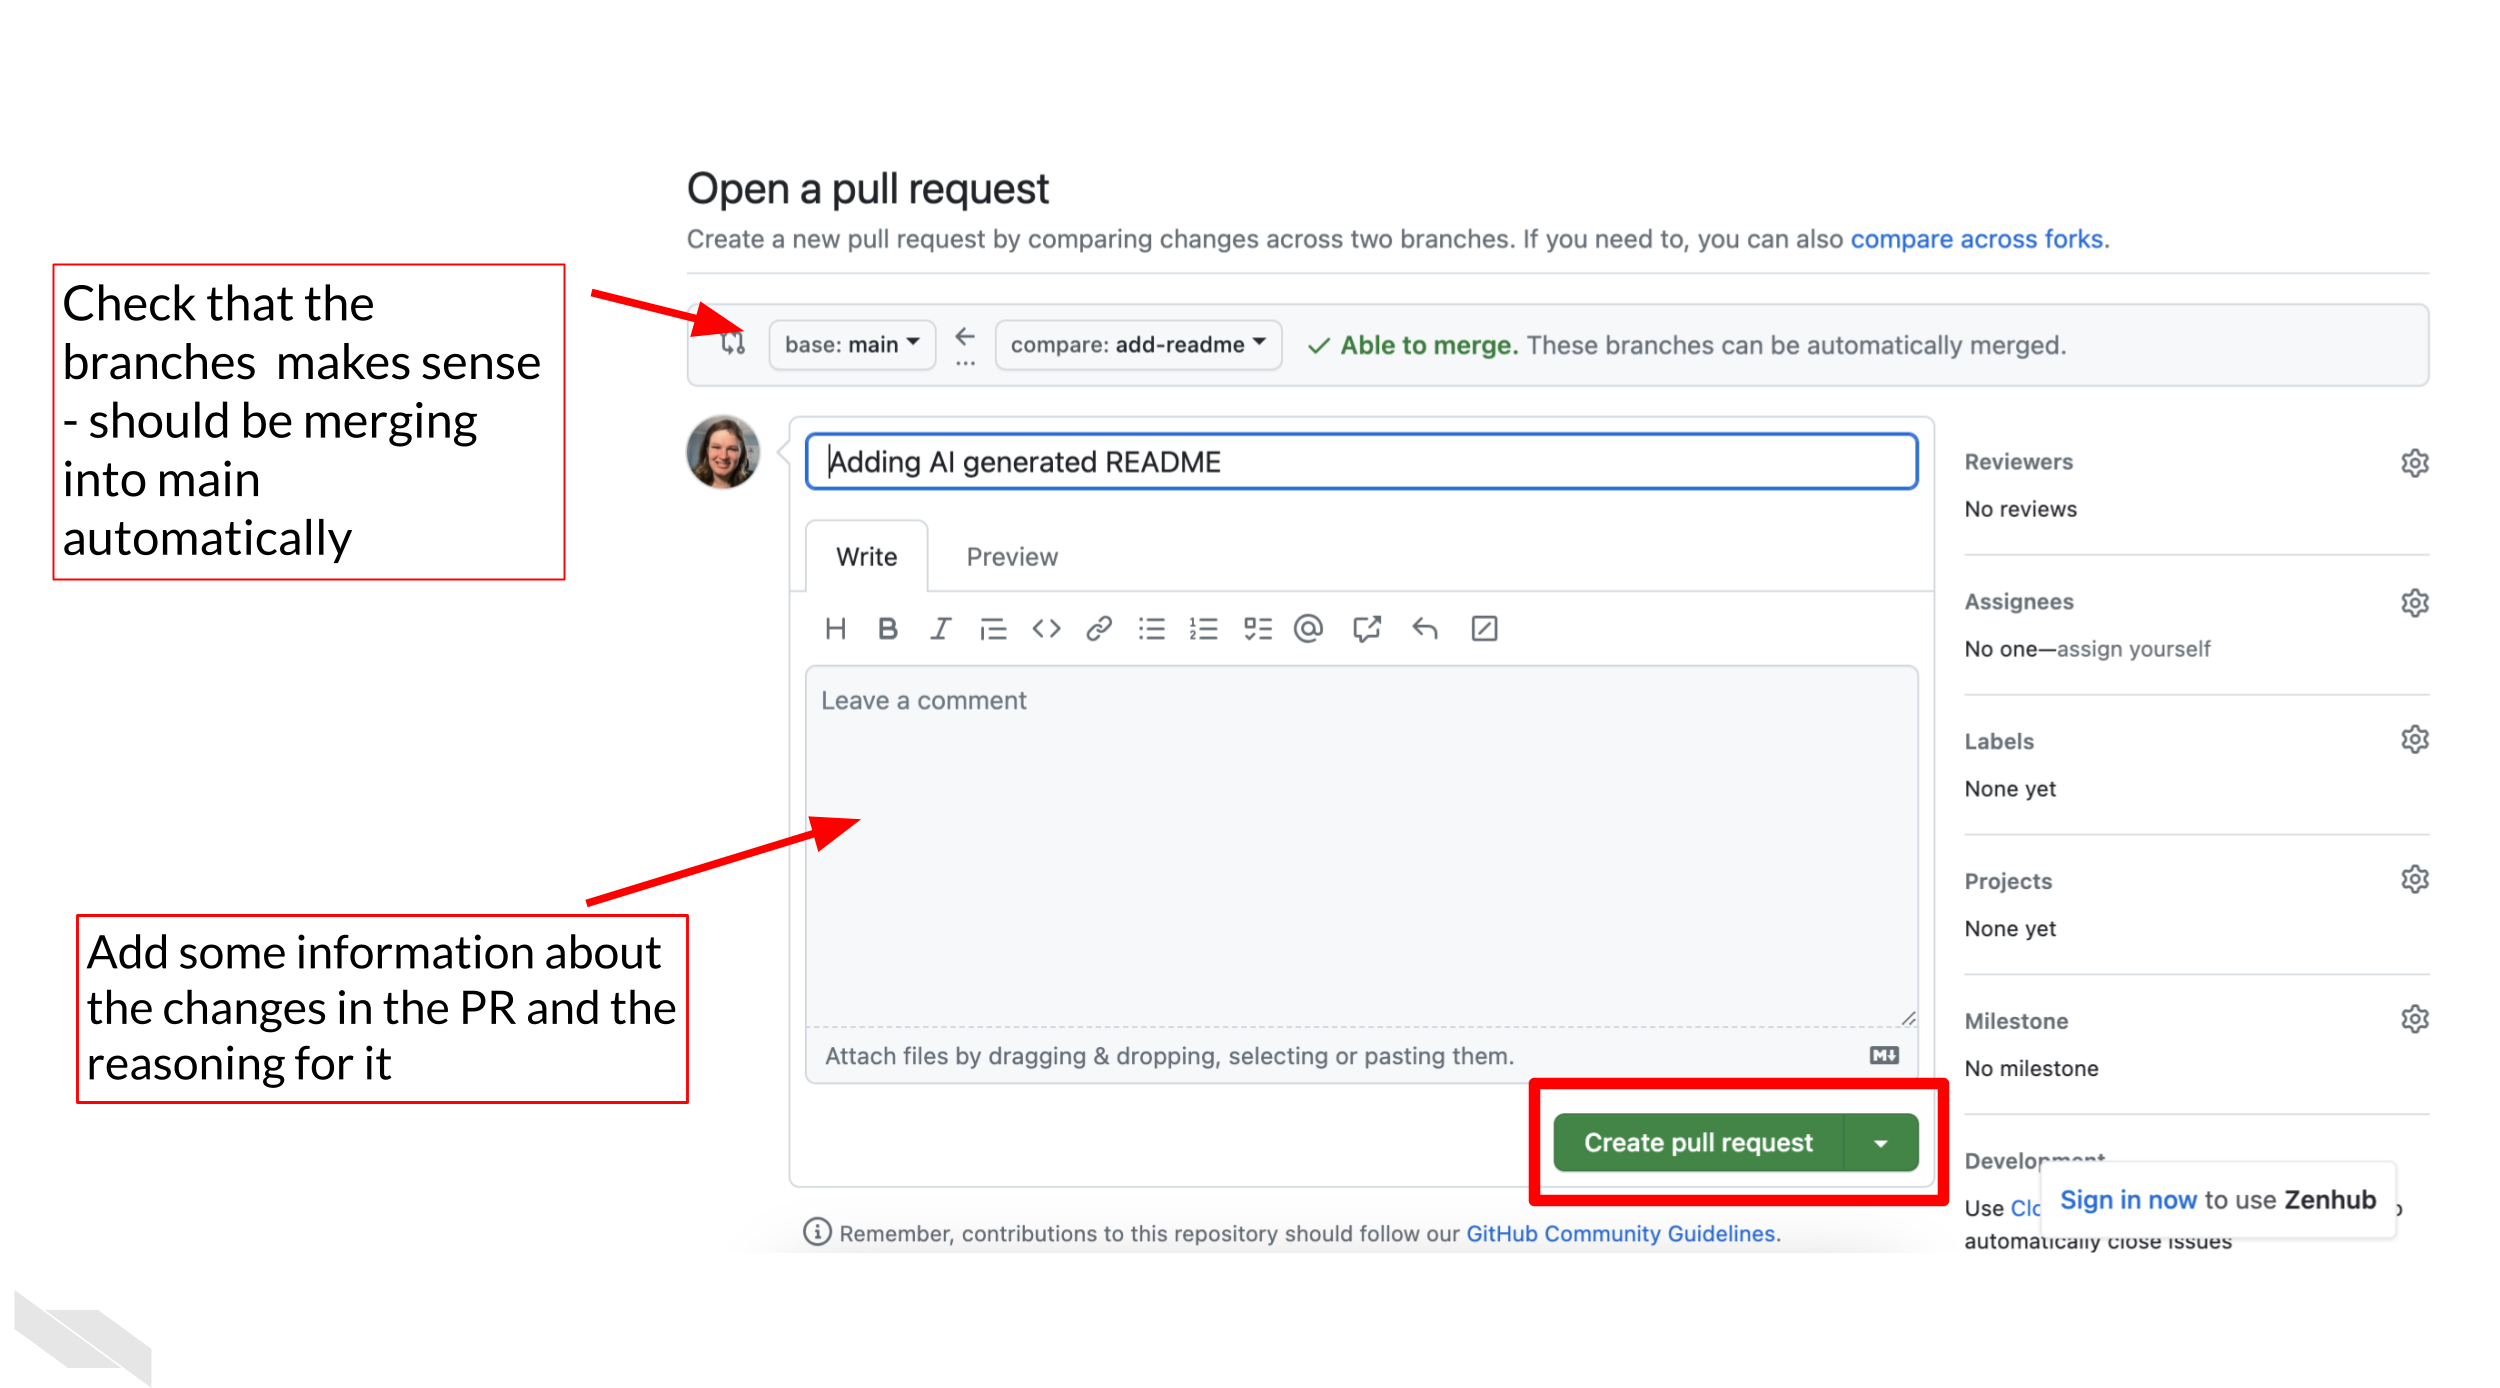
It should open up a page on GitHub.com Fill
out the Add a title and the Add a description
boxes to appropriately describe the work you did on the branch we are
making the pull request from.
Click the green
Create pull request button.
Activity 2: Navigating PR components
2a: Leaving comments and suggestions
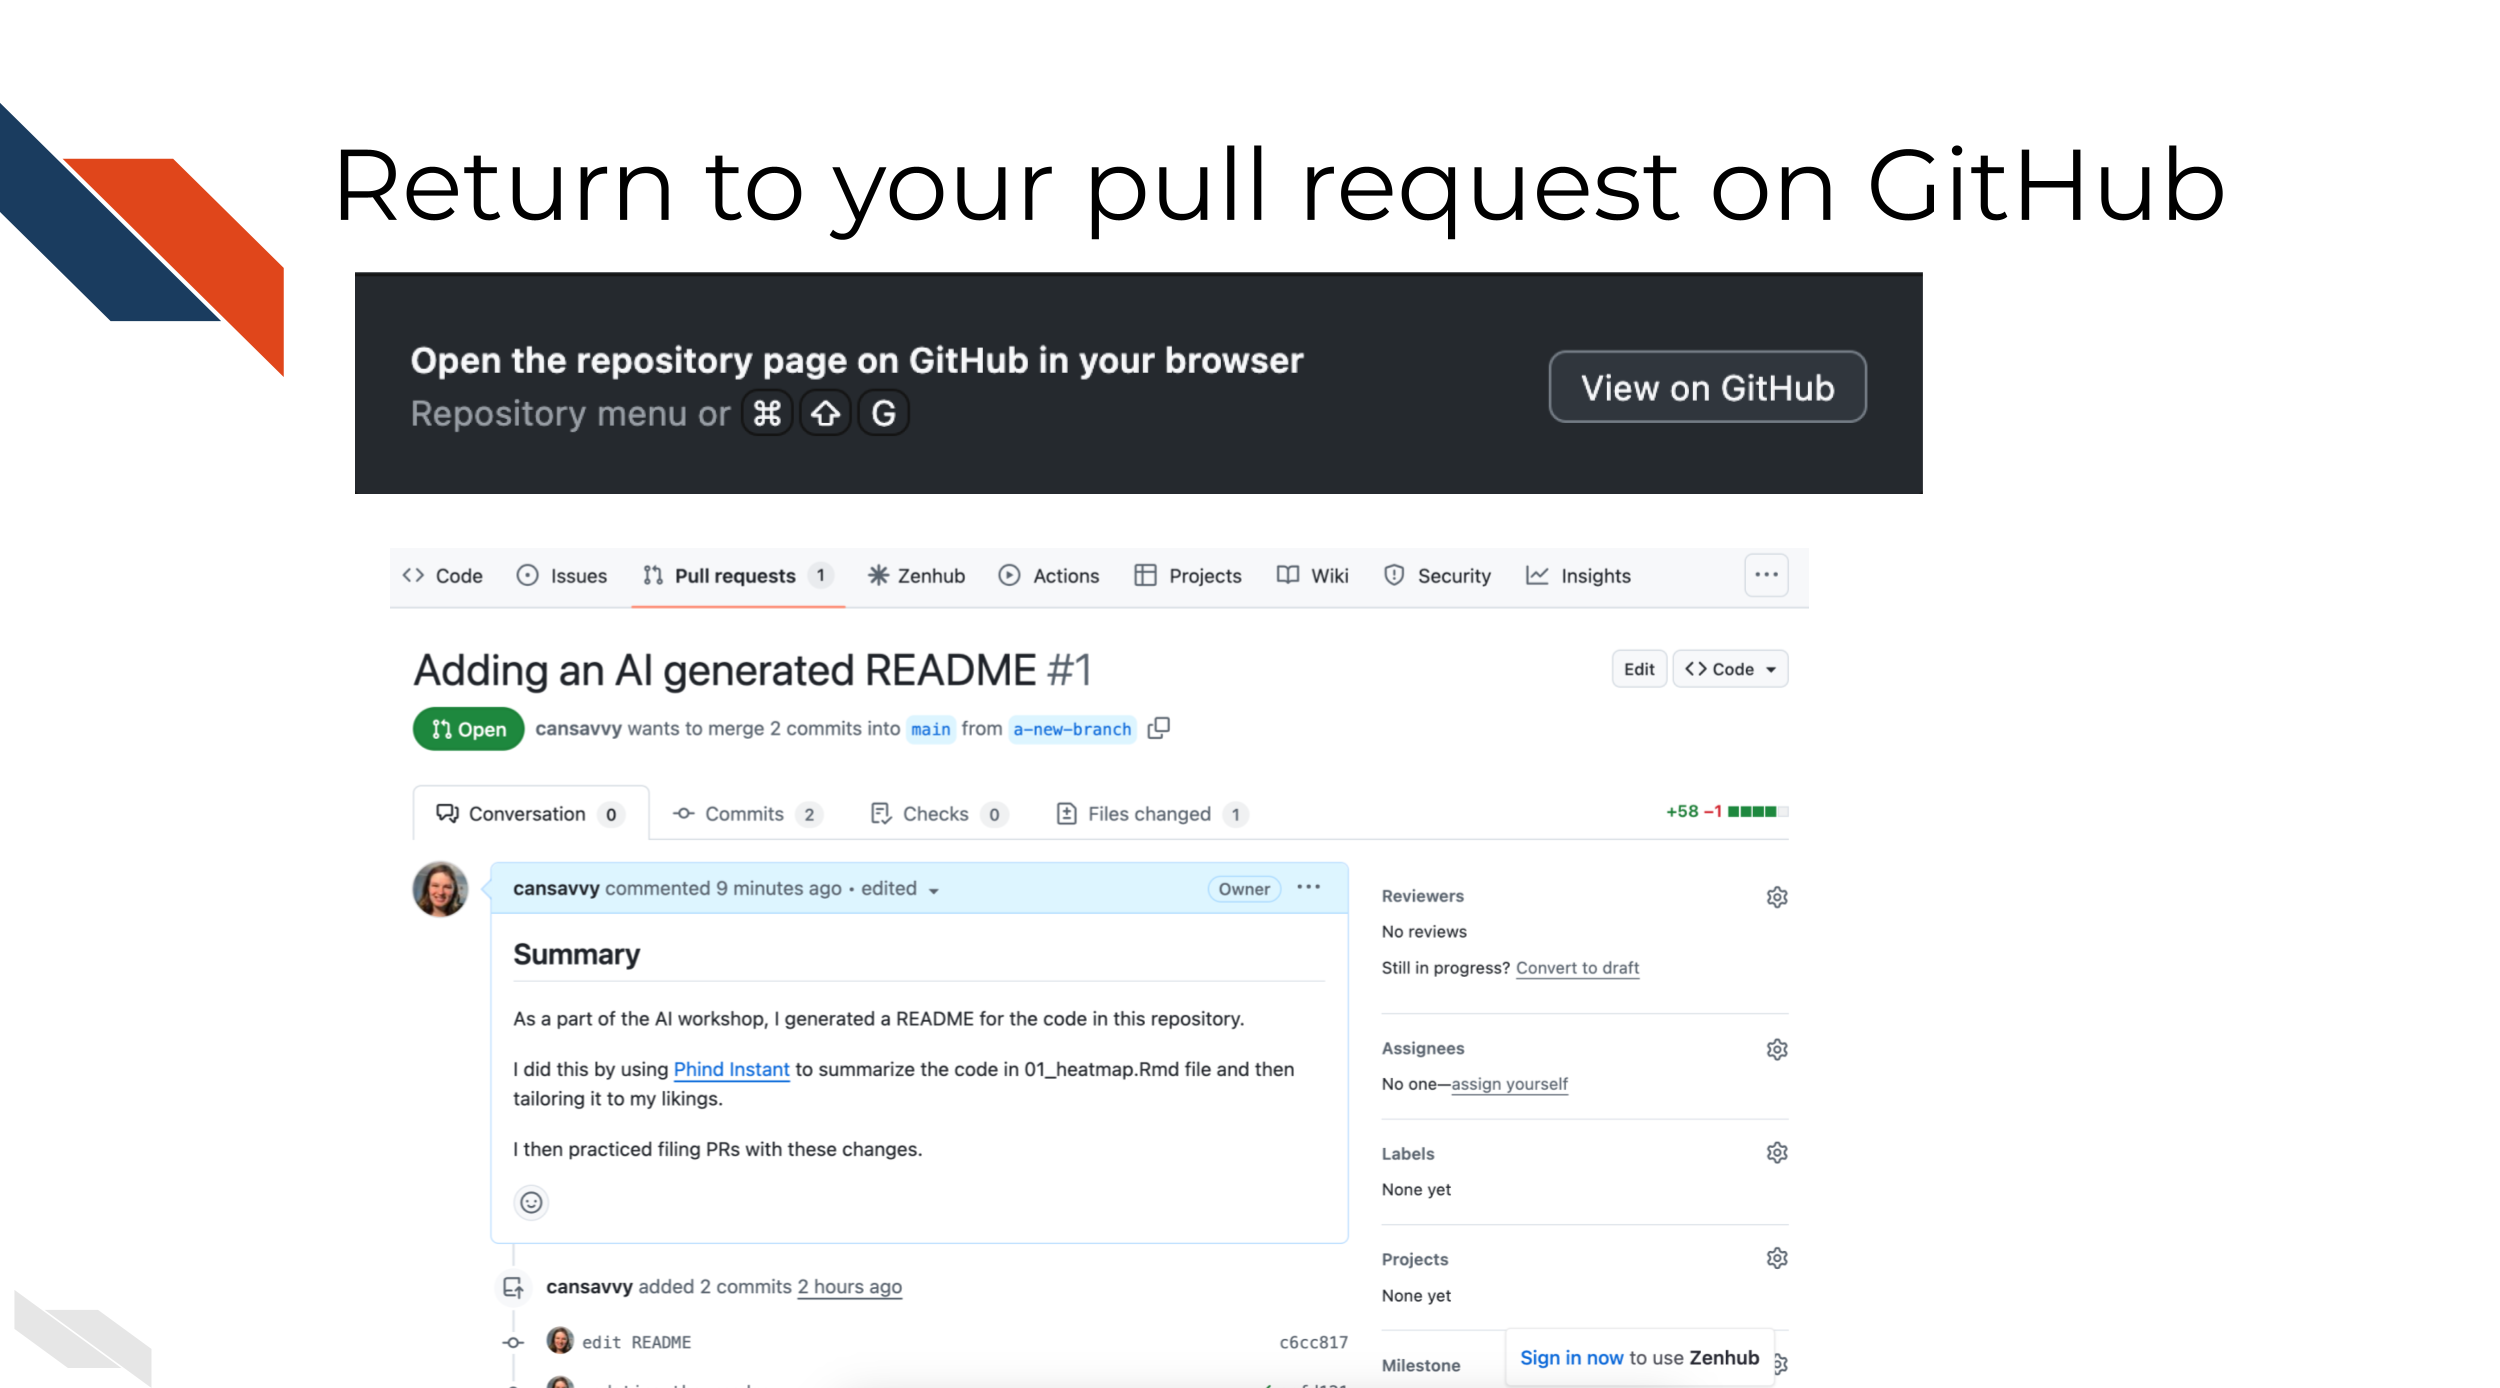
Return to your pull request on GitHub in your browser from Activity 1.
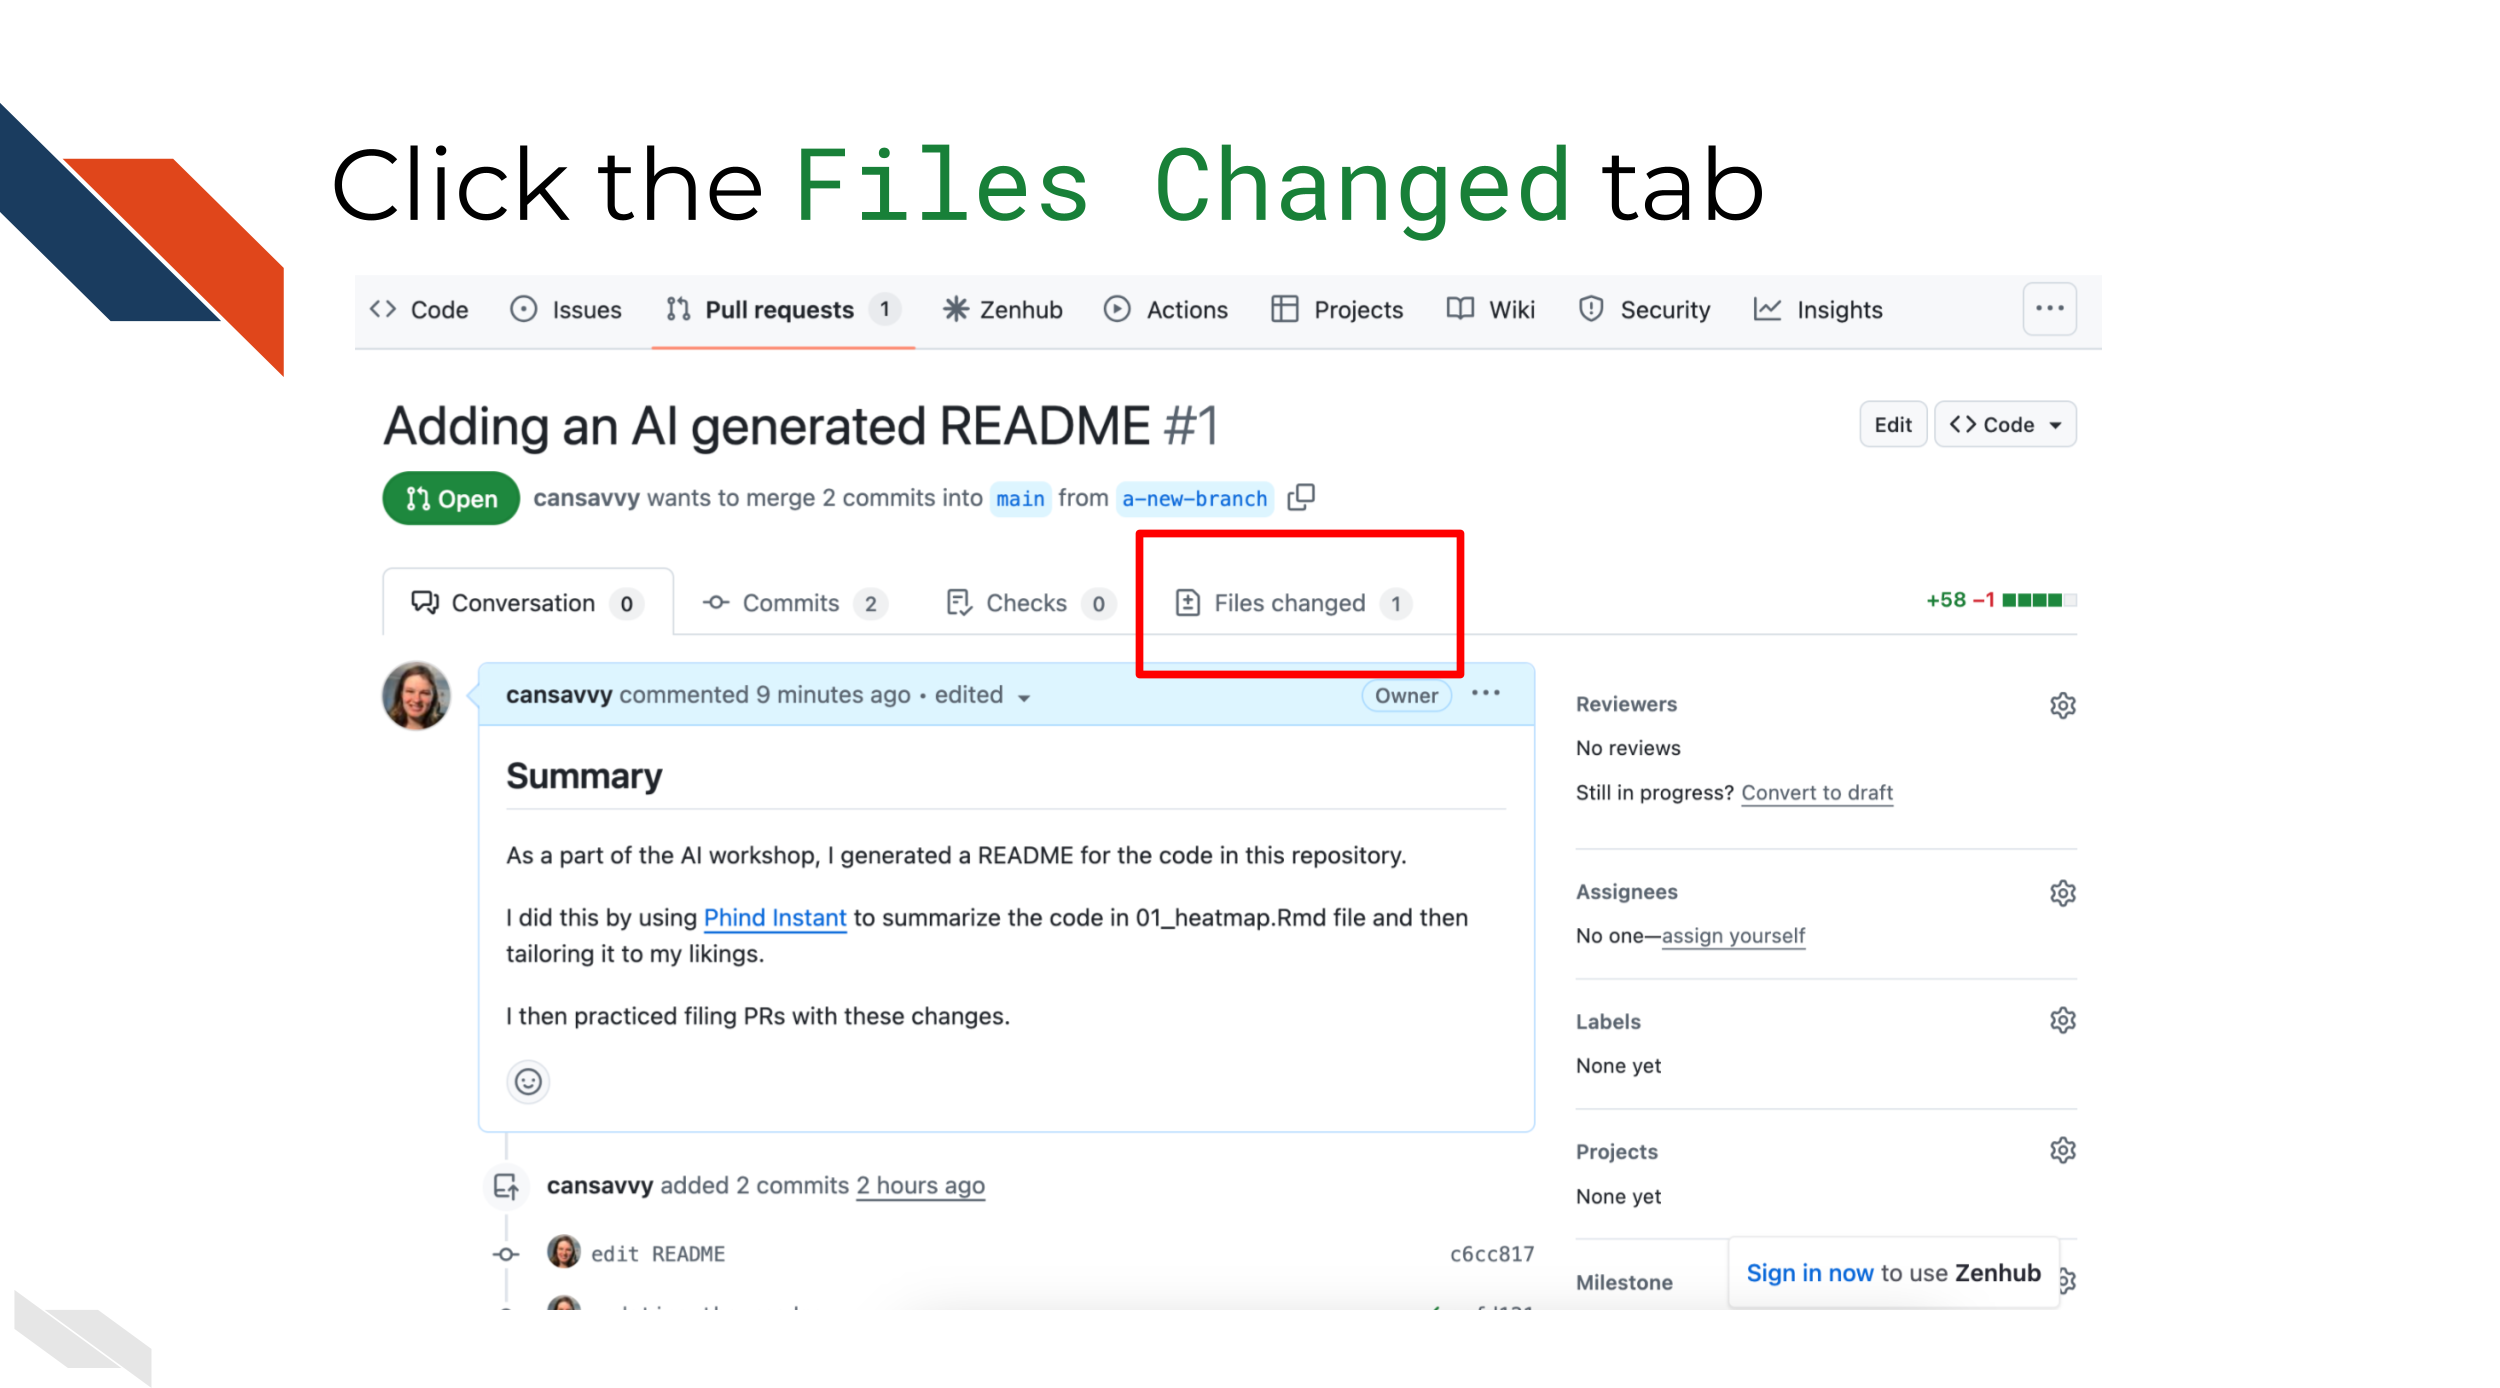
Click on the Files Changed tab
(lower set of tabs).
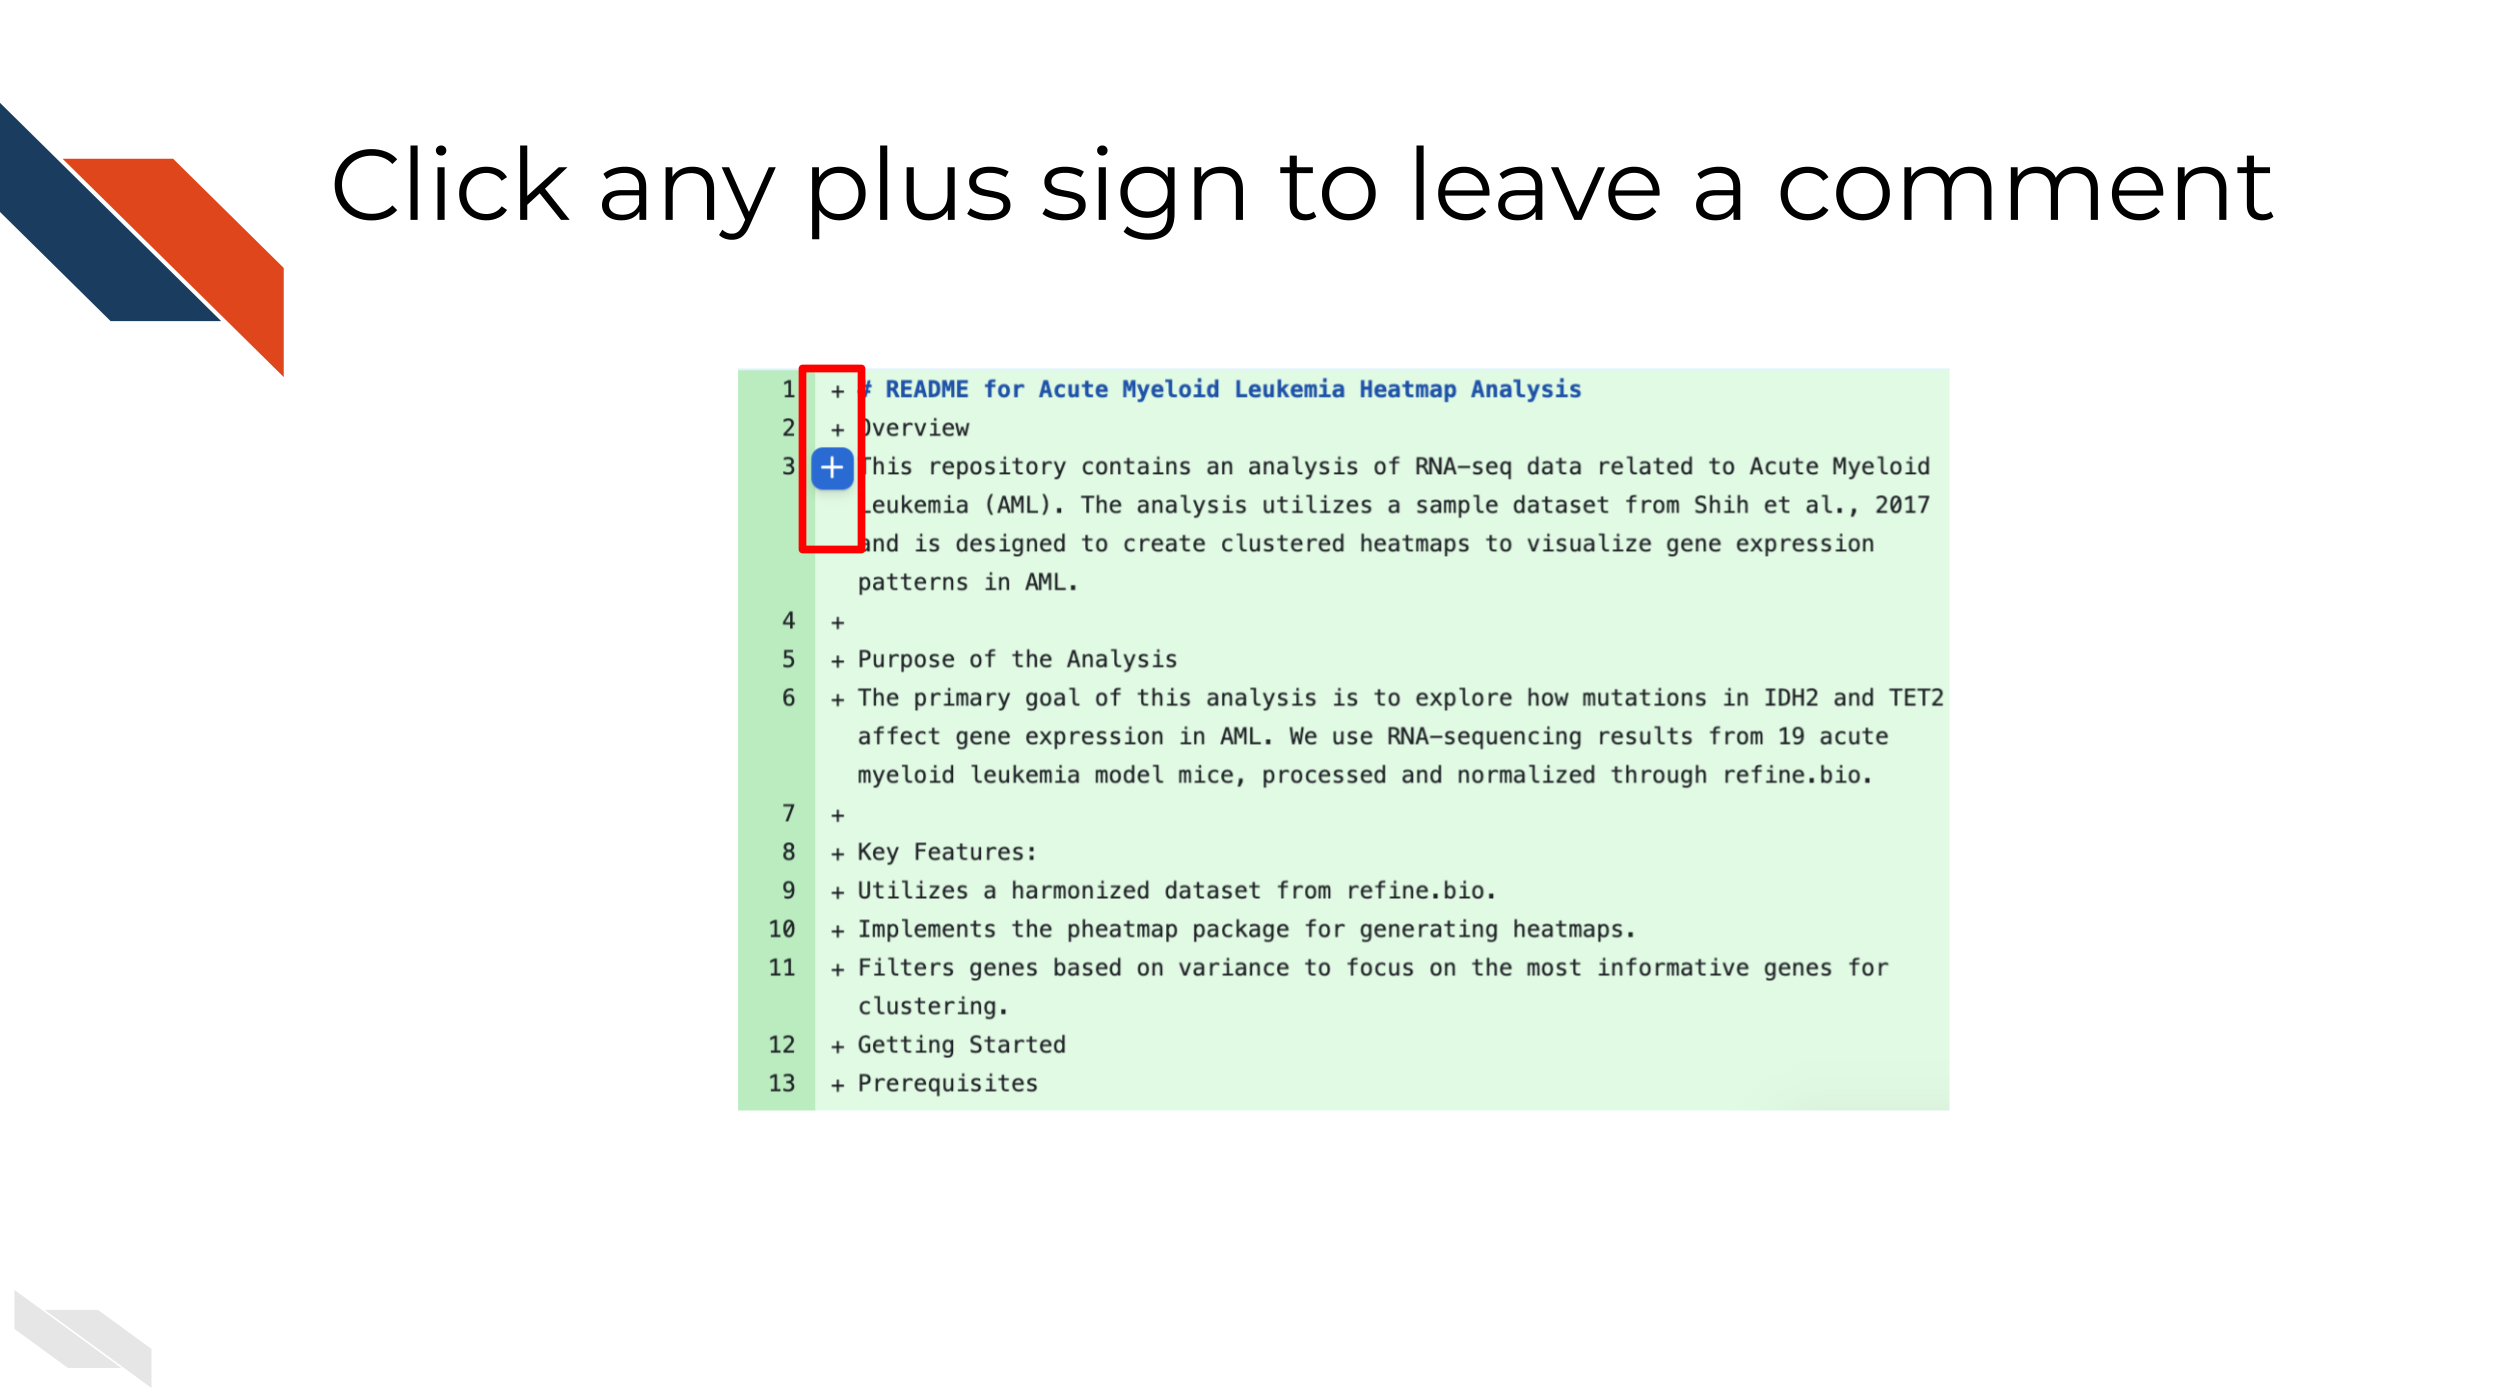
Click one of the plus signs to the left of one of your changes to leave a comment.
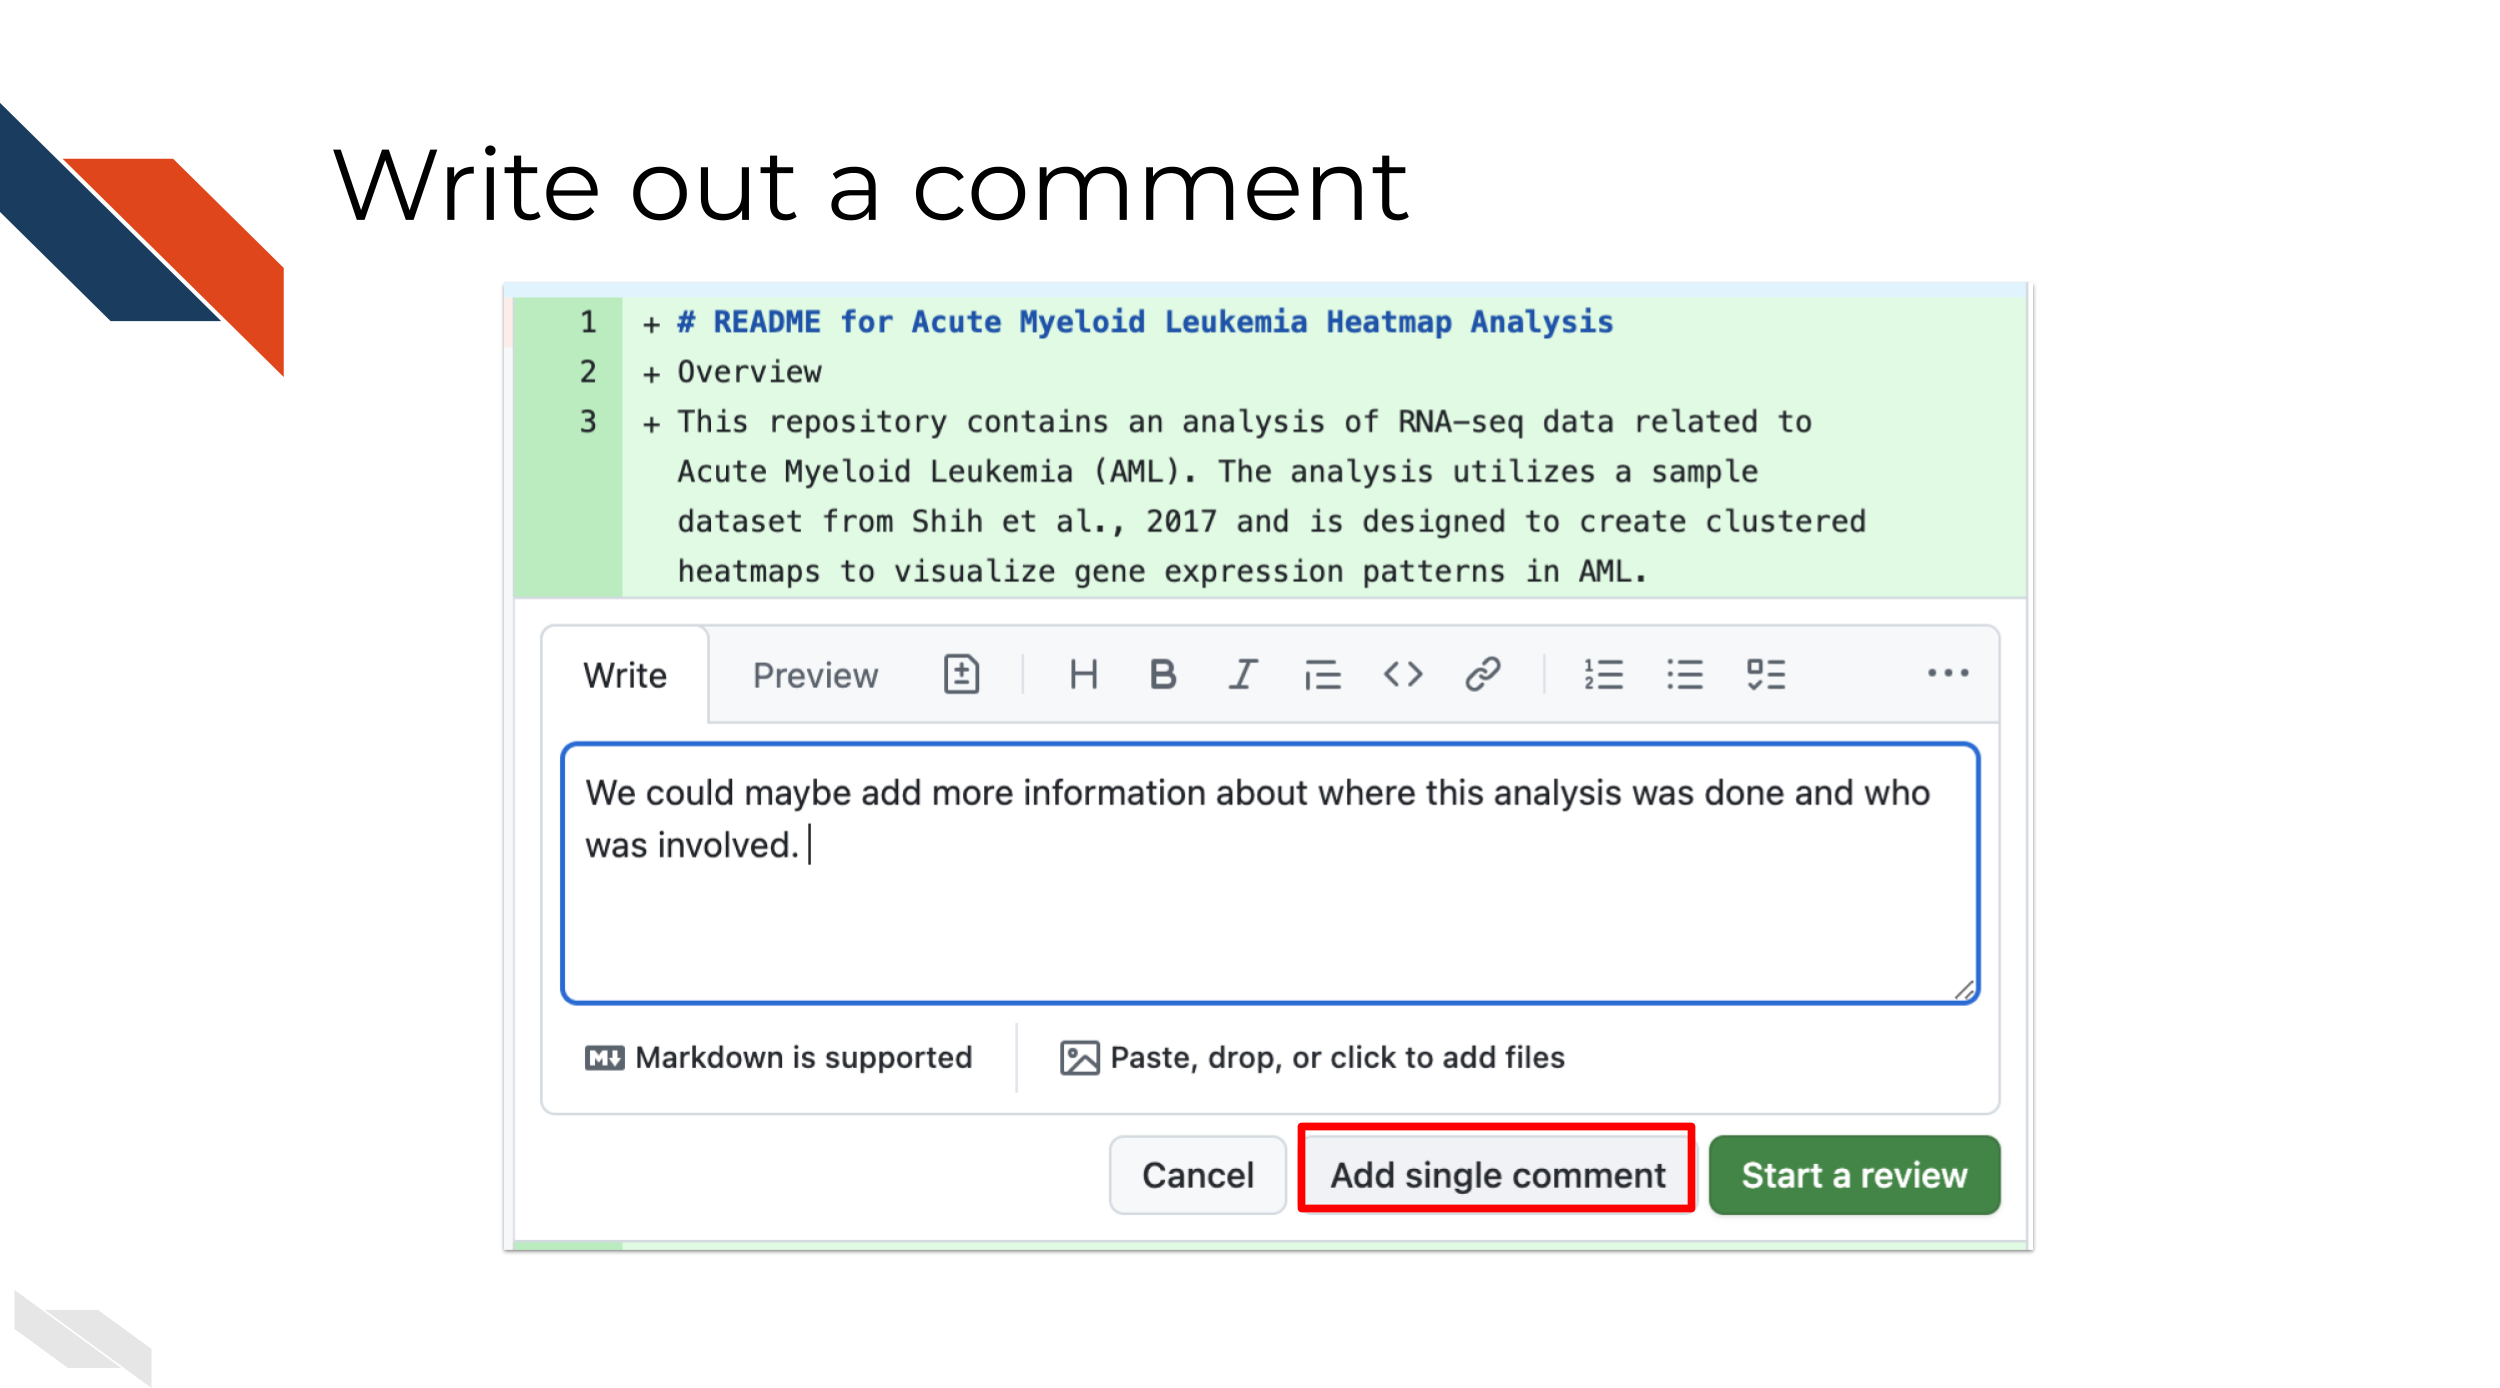
Type something and then click
Add single comment. Nice, you added a comment!
Click another plus sign to the left of a change. This time, click the little symbol that has a plus and minus in a page (next to the preview tab). This will start a suggestion, where you can make suggested changes to documents.
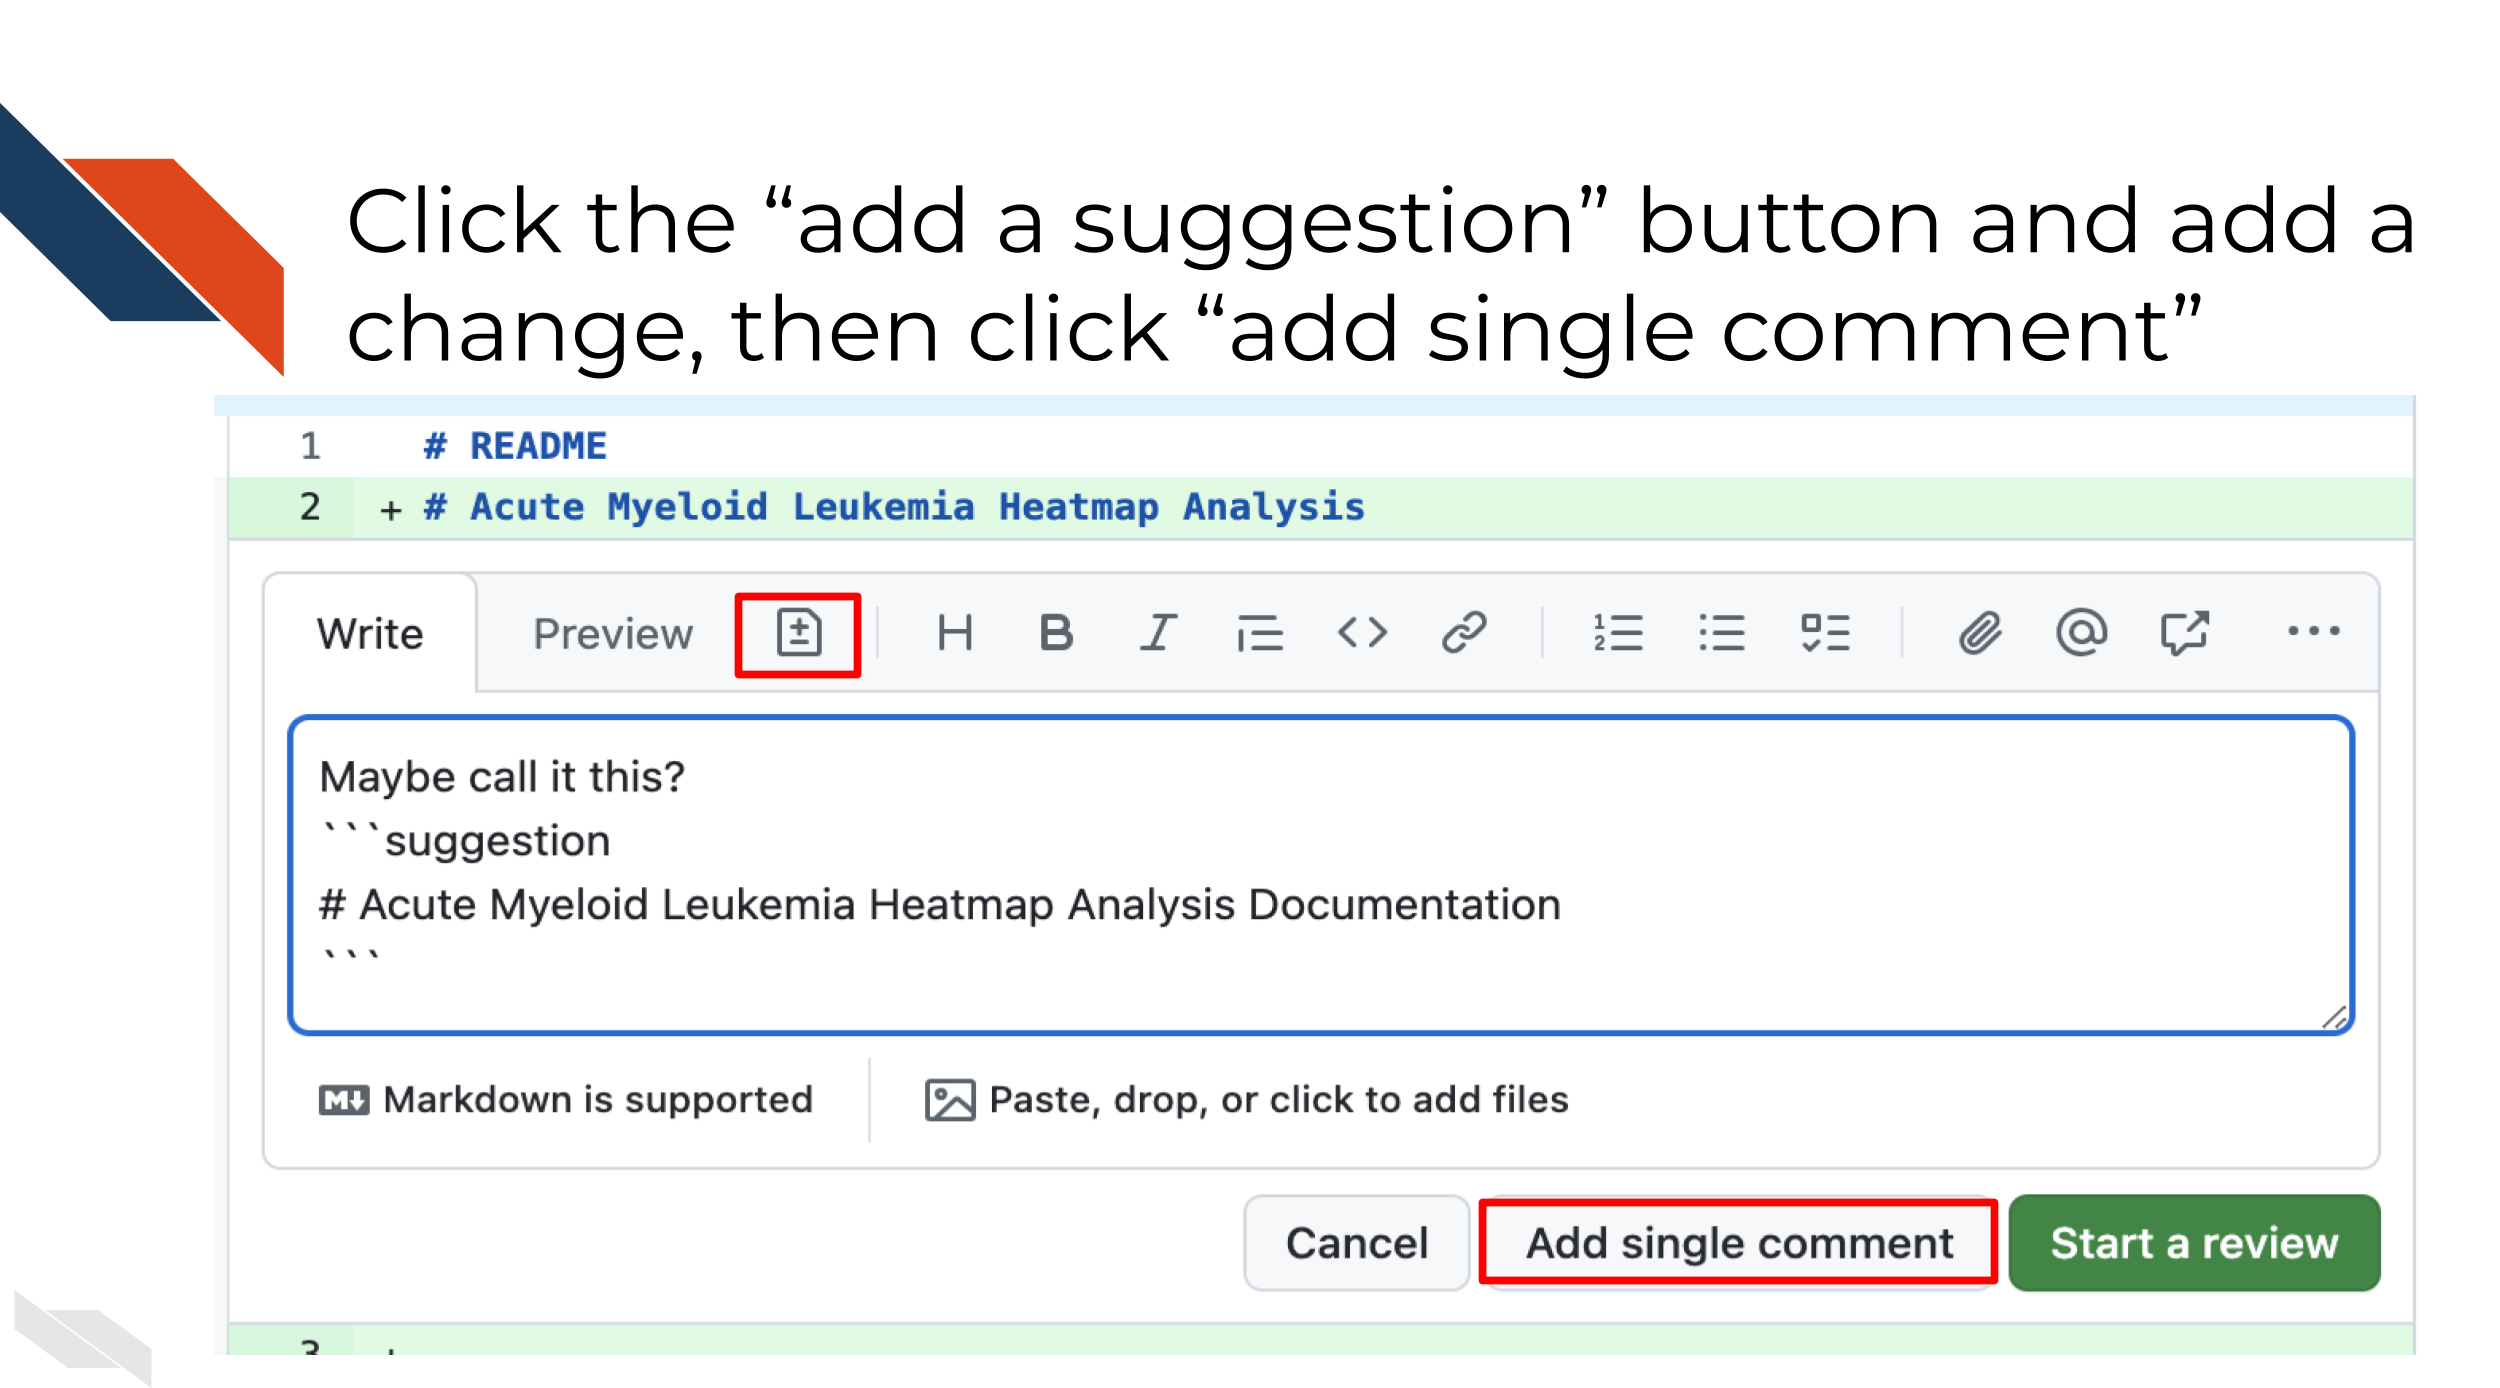
Make a change to the text in the
suggestion.
Click Add a single comment. Great,
You added a suggestion!
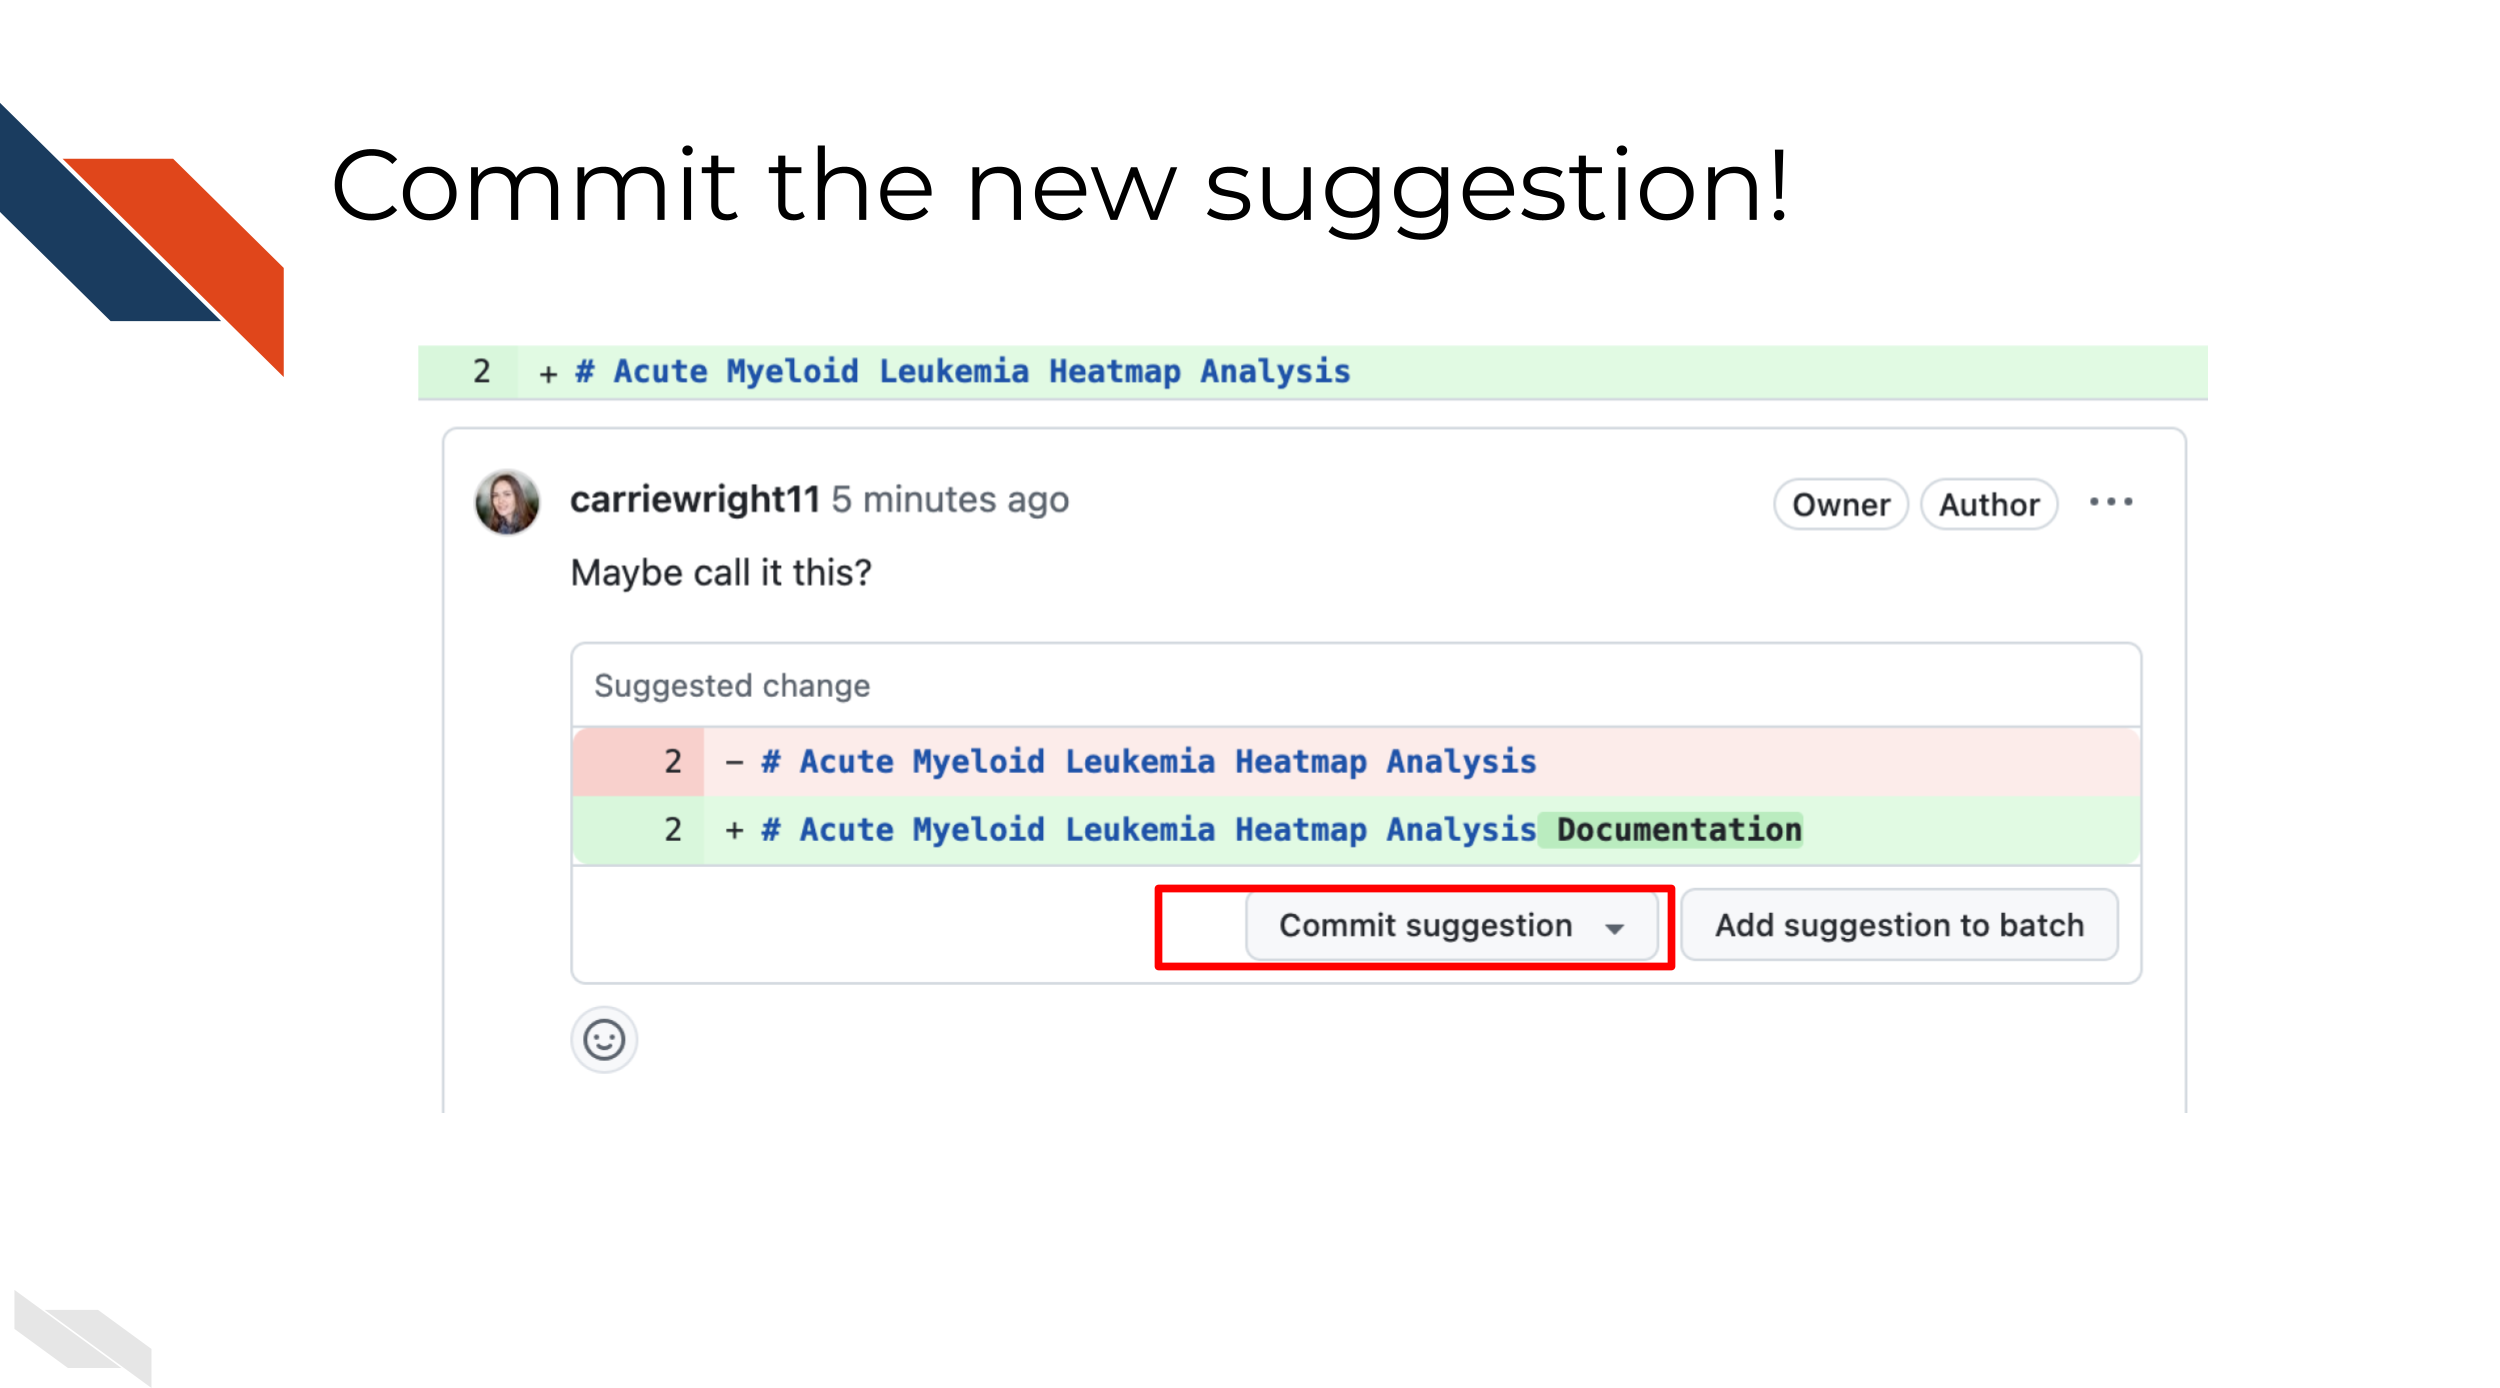
Note that you or a collaborator can now readily incorporate your
suggestion by clicking Commit suggestion or they could
comment back to further discuss.
Click Commit suggestion and then
Commit changes.
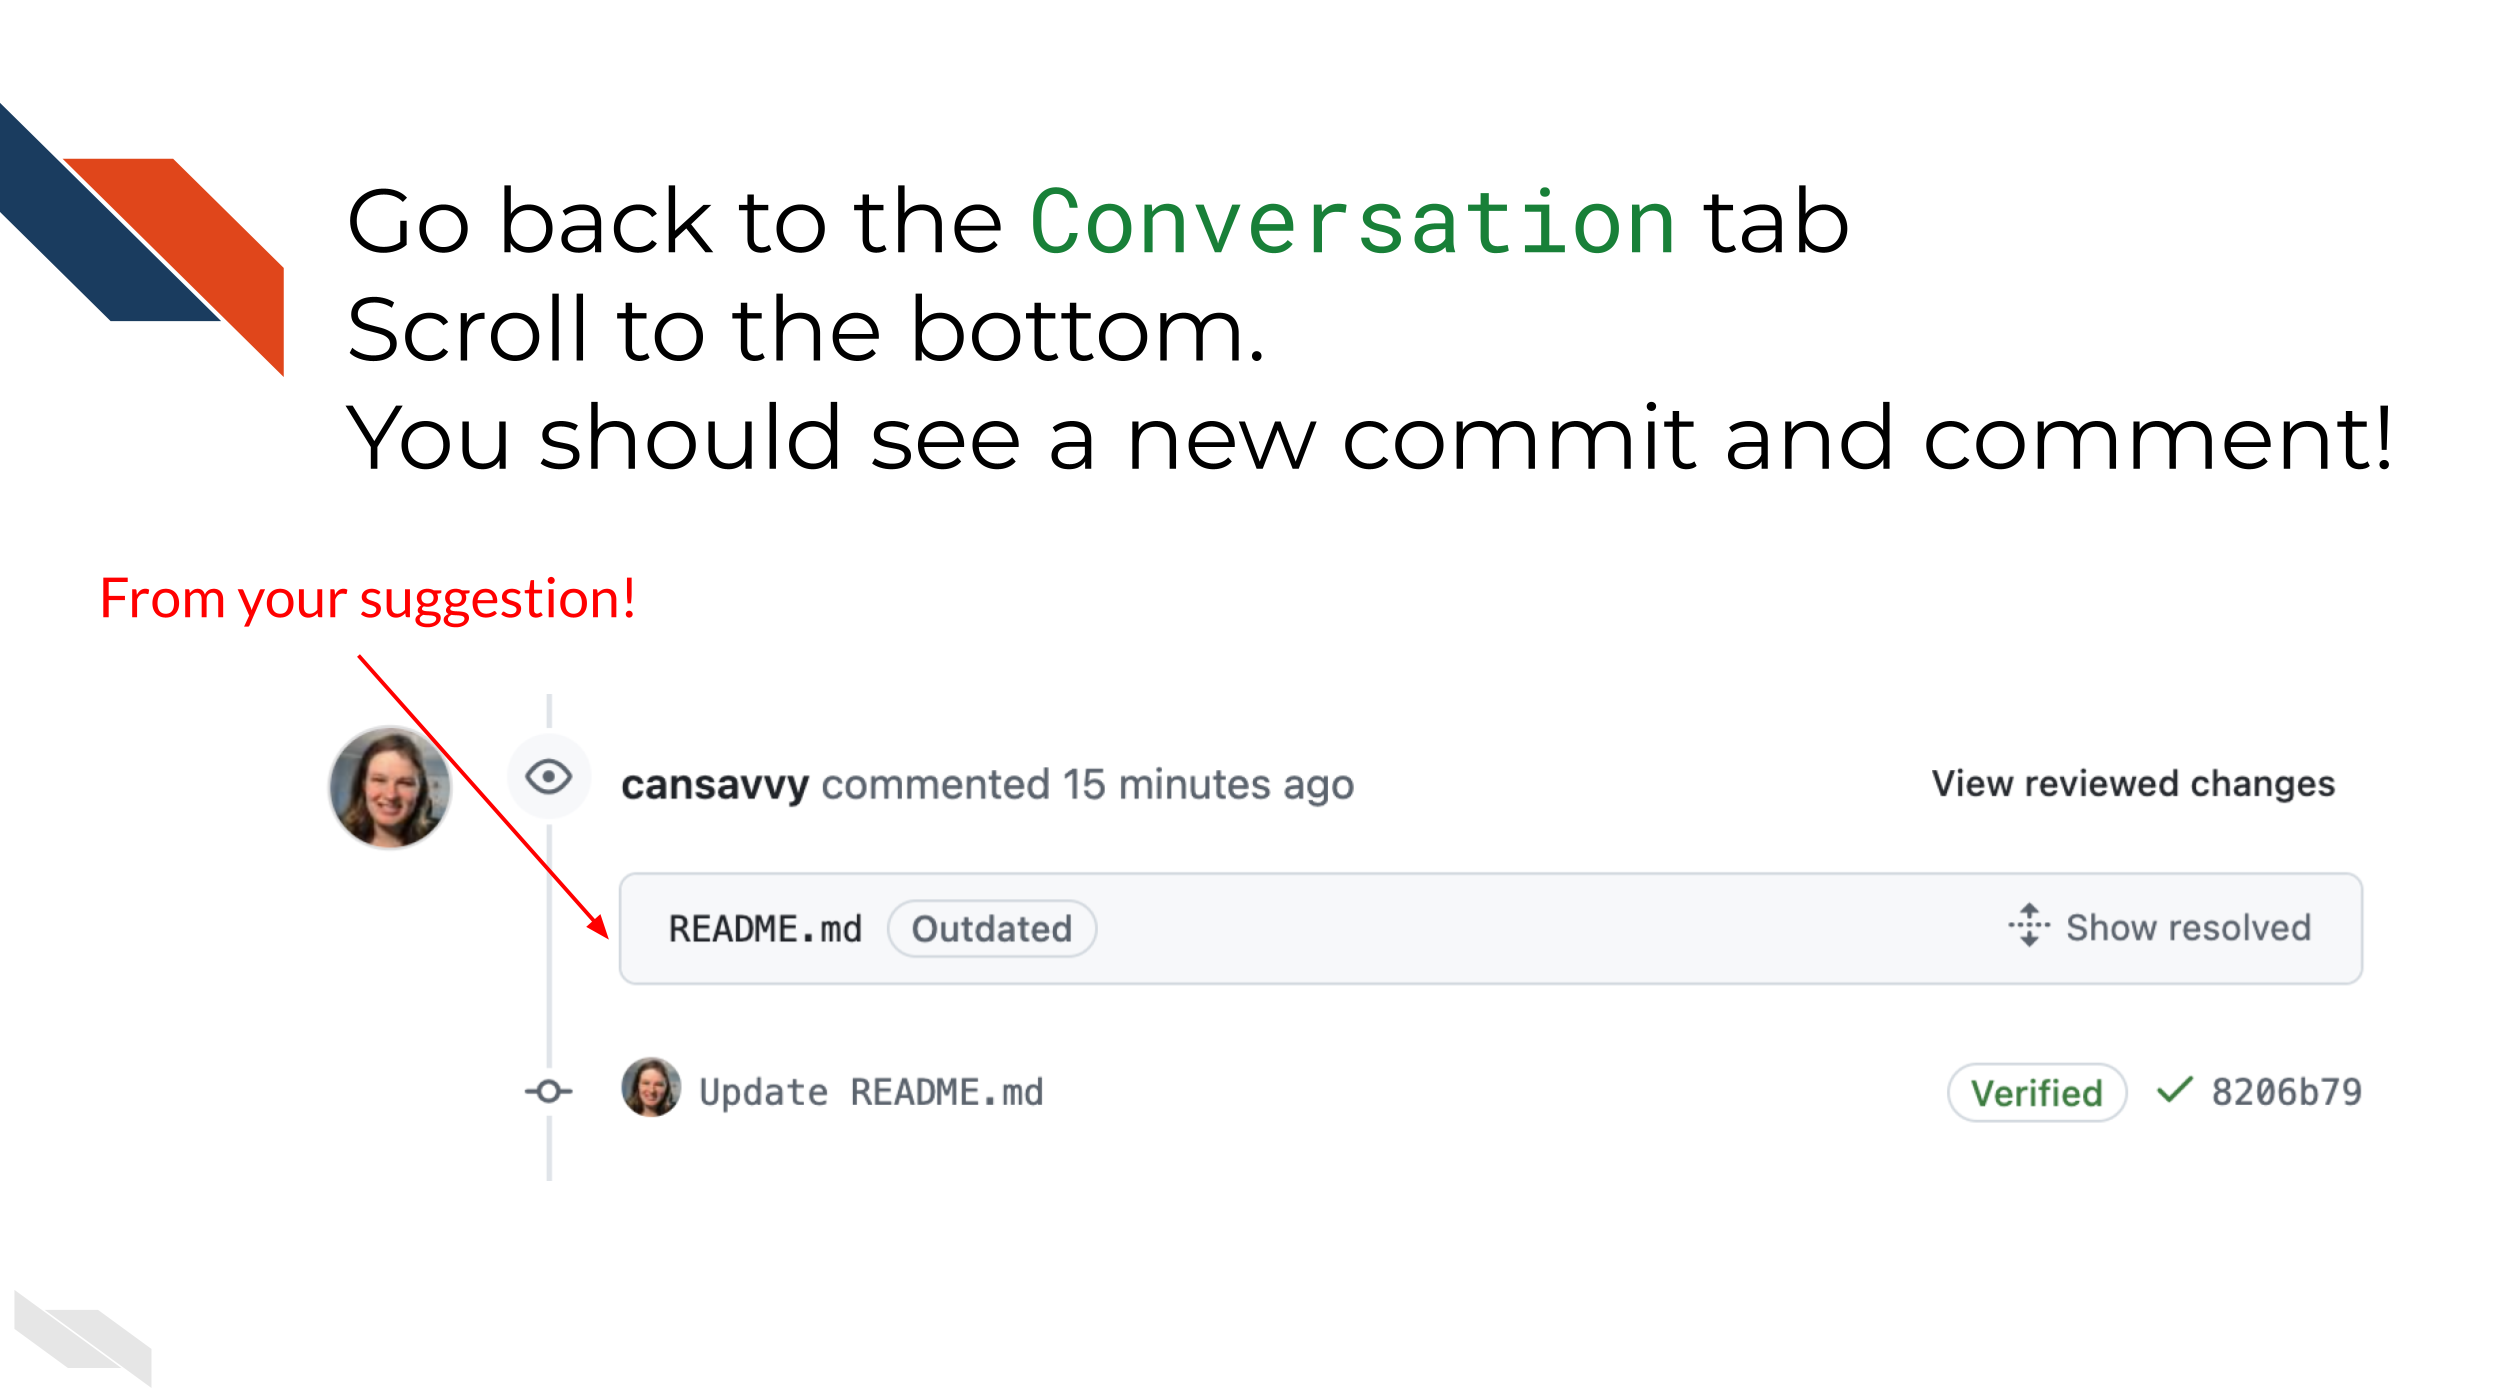
Return to the Conversation tab
and scroll to the bottom. You should see an additional commit and your
comment now!
2b: Updating your local repository
If you followed the steps in the
Leaving comments and suggestions section of this activity
you will now have at least one commit that is on your online version of
your repository but the changes done online won’t automatically get to
your local repository. To do this we need to Pull the
latest changes to our computer.
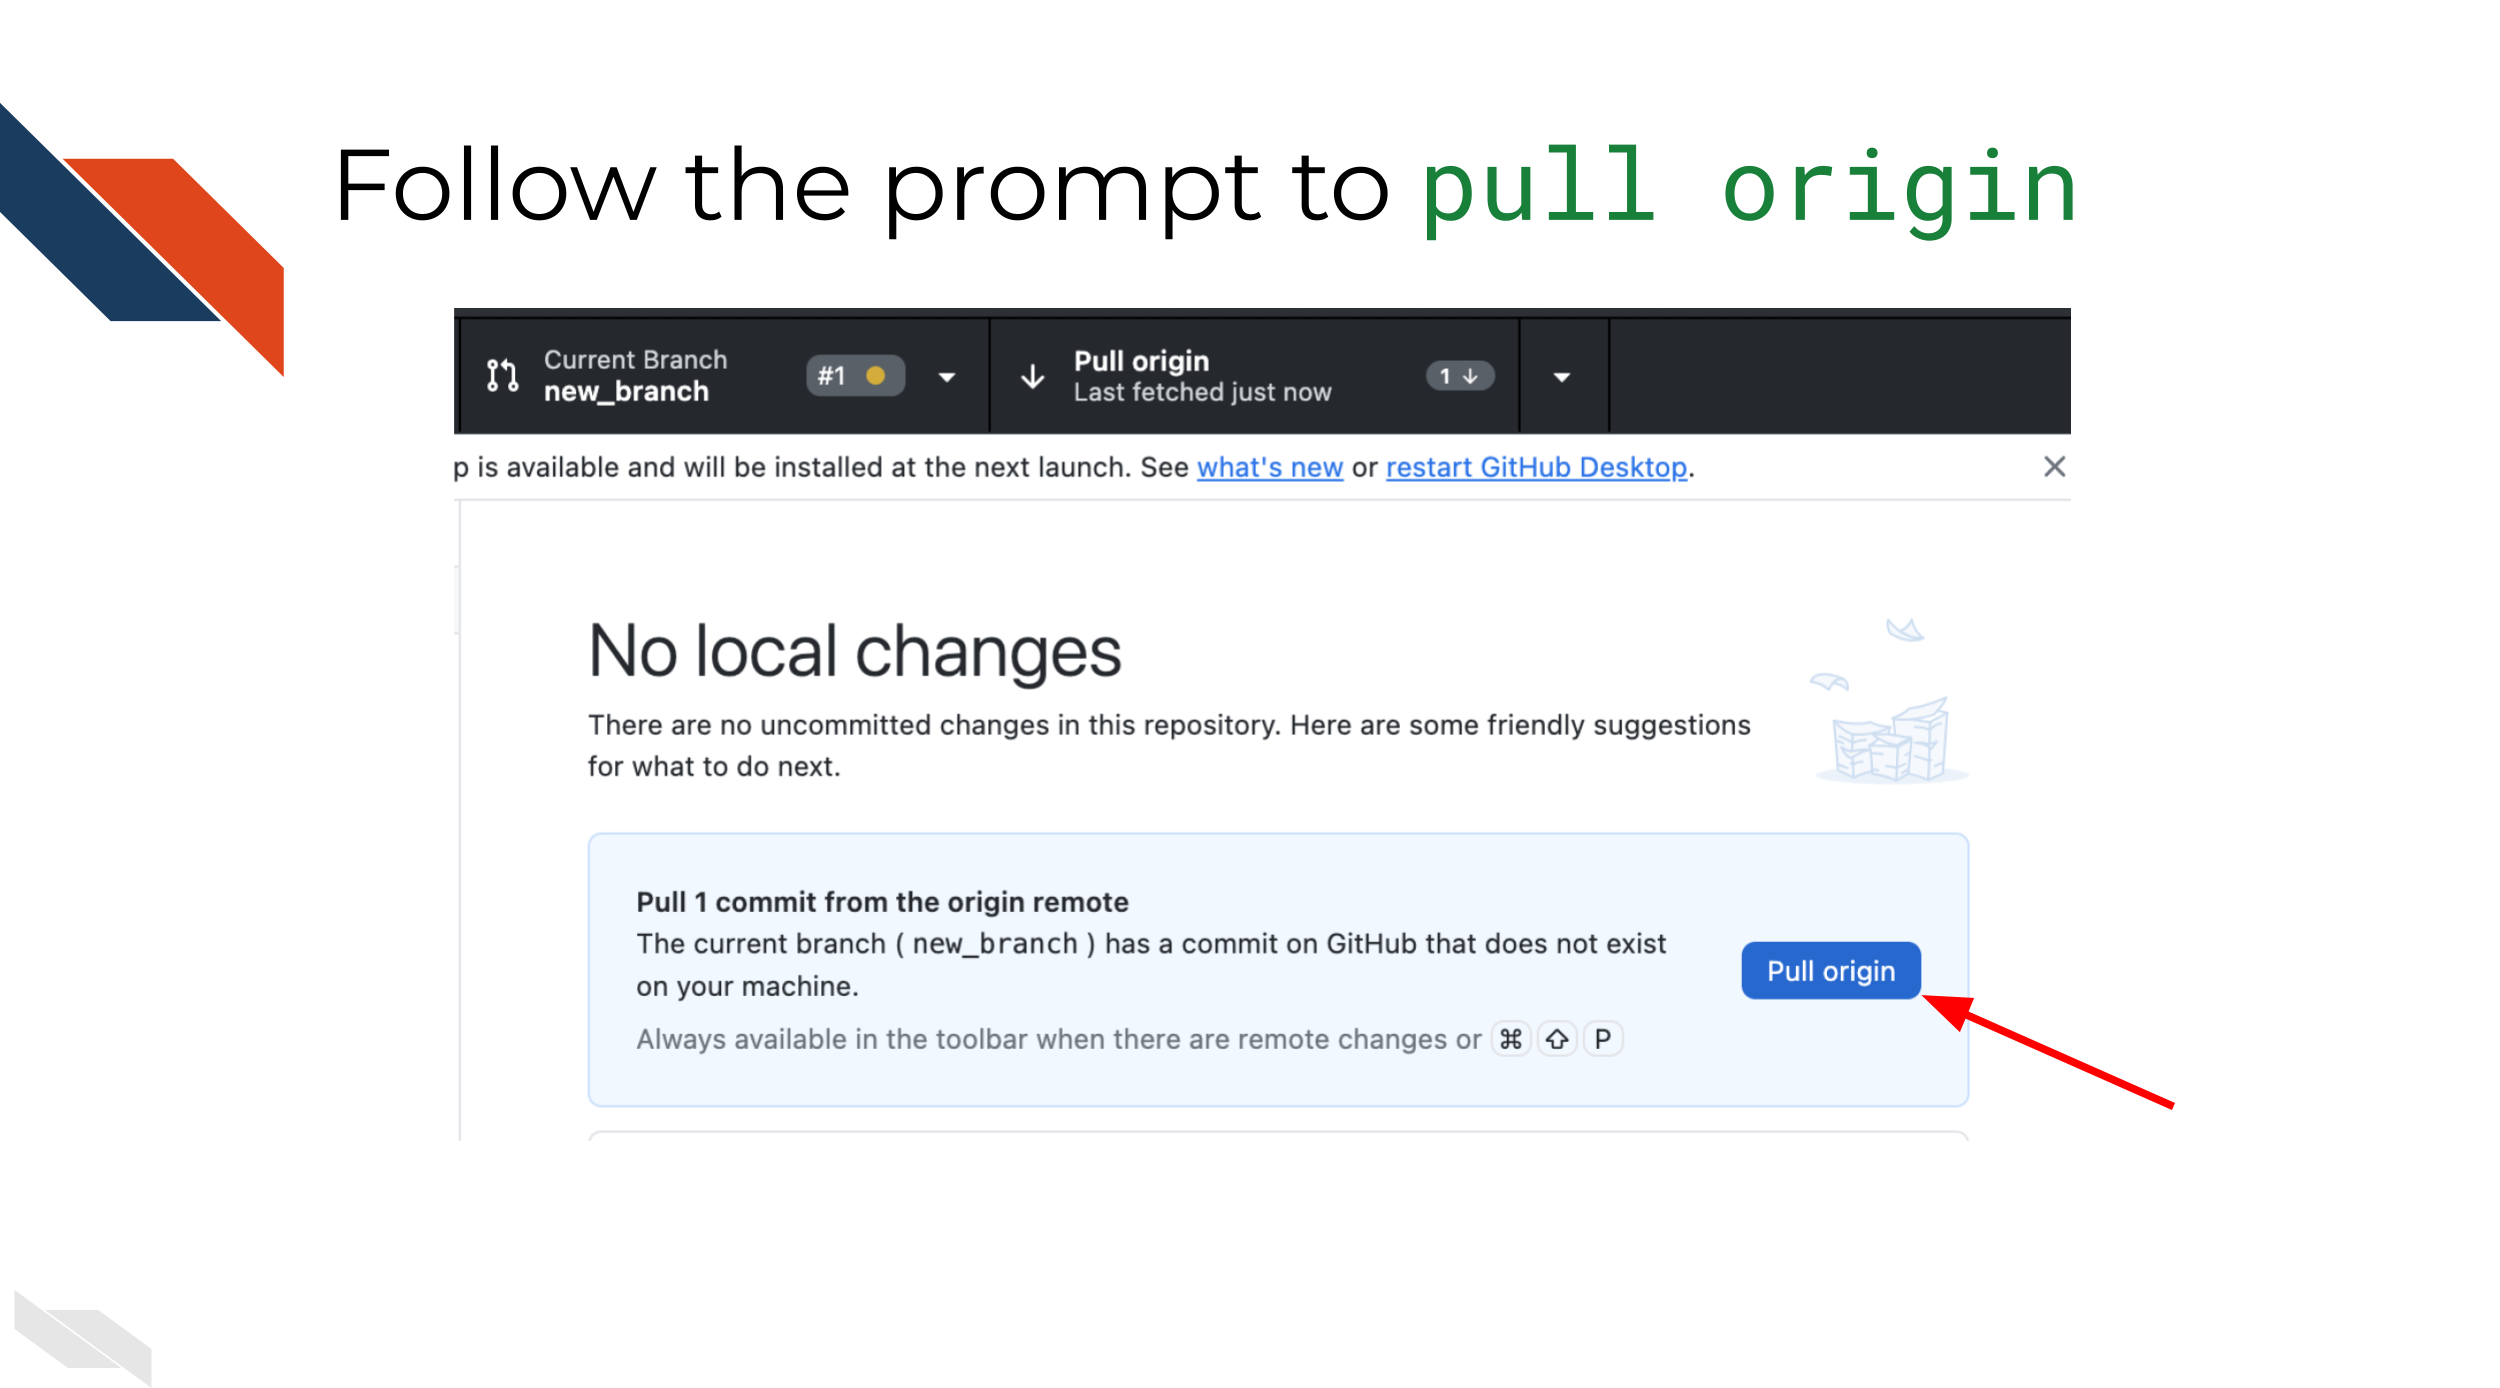
Return to GitHub Desktop.
Click the Fetch origin button.
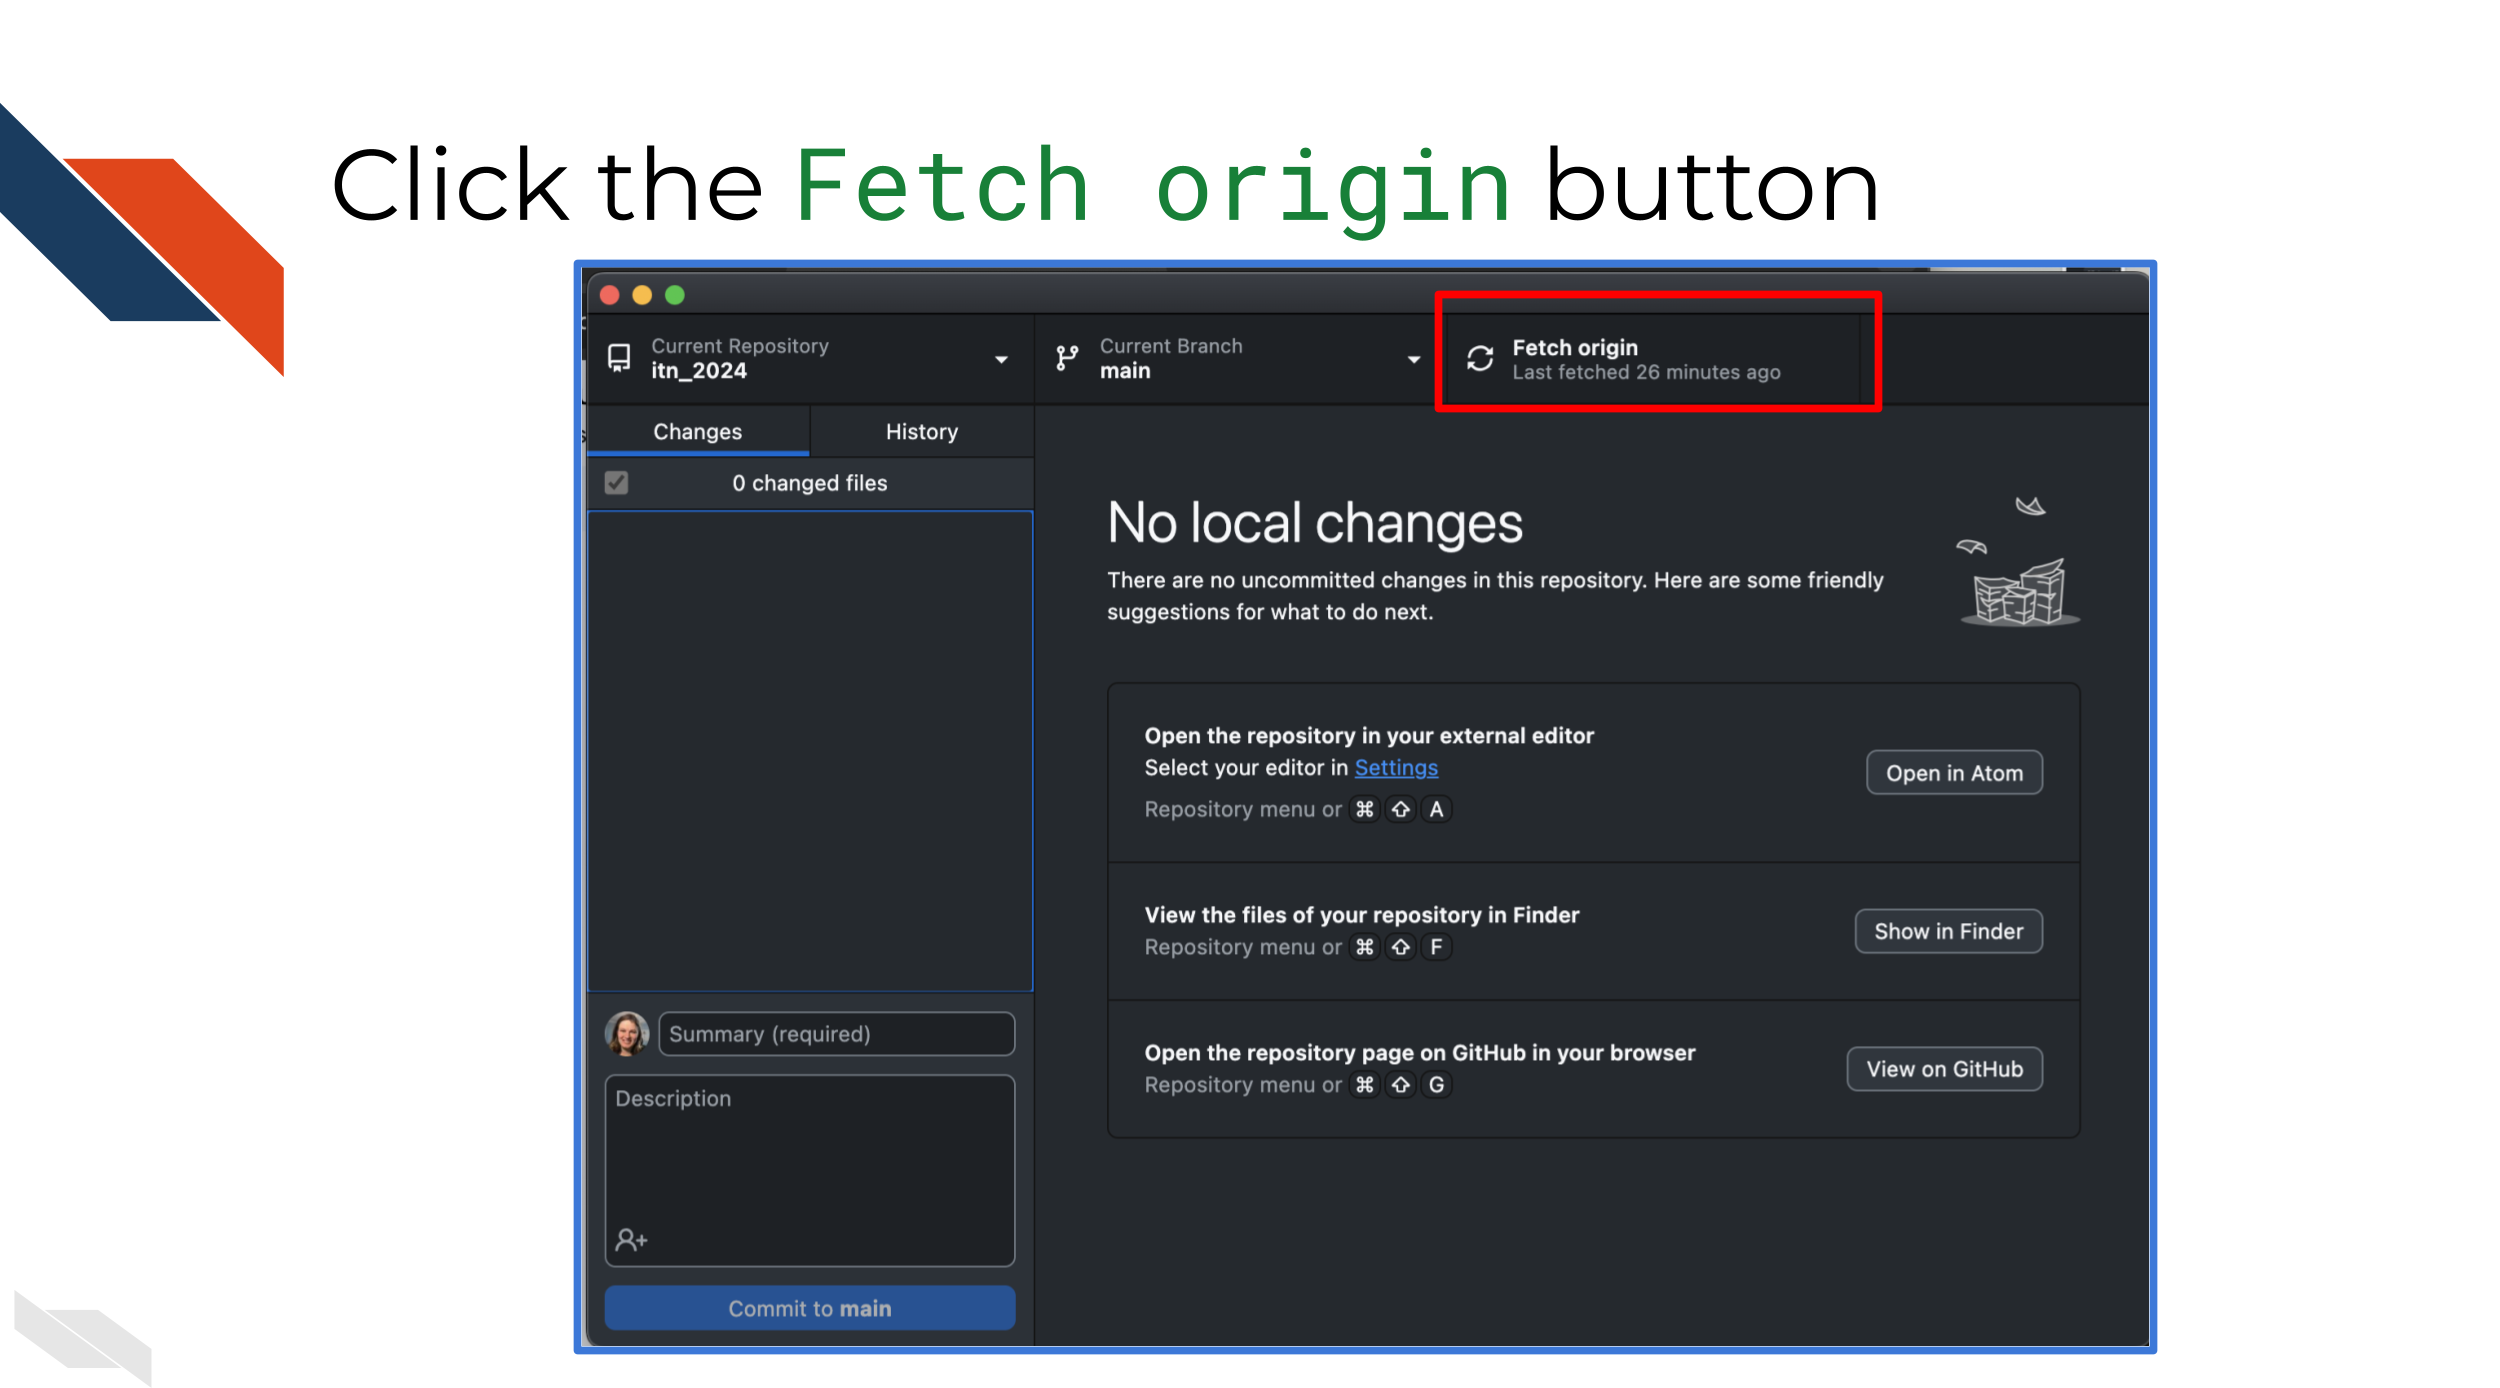
You should be prompted to
Pull origin click this button.
Click the History tab to see your changes over time. Note the most recent are at the top.
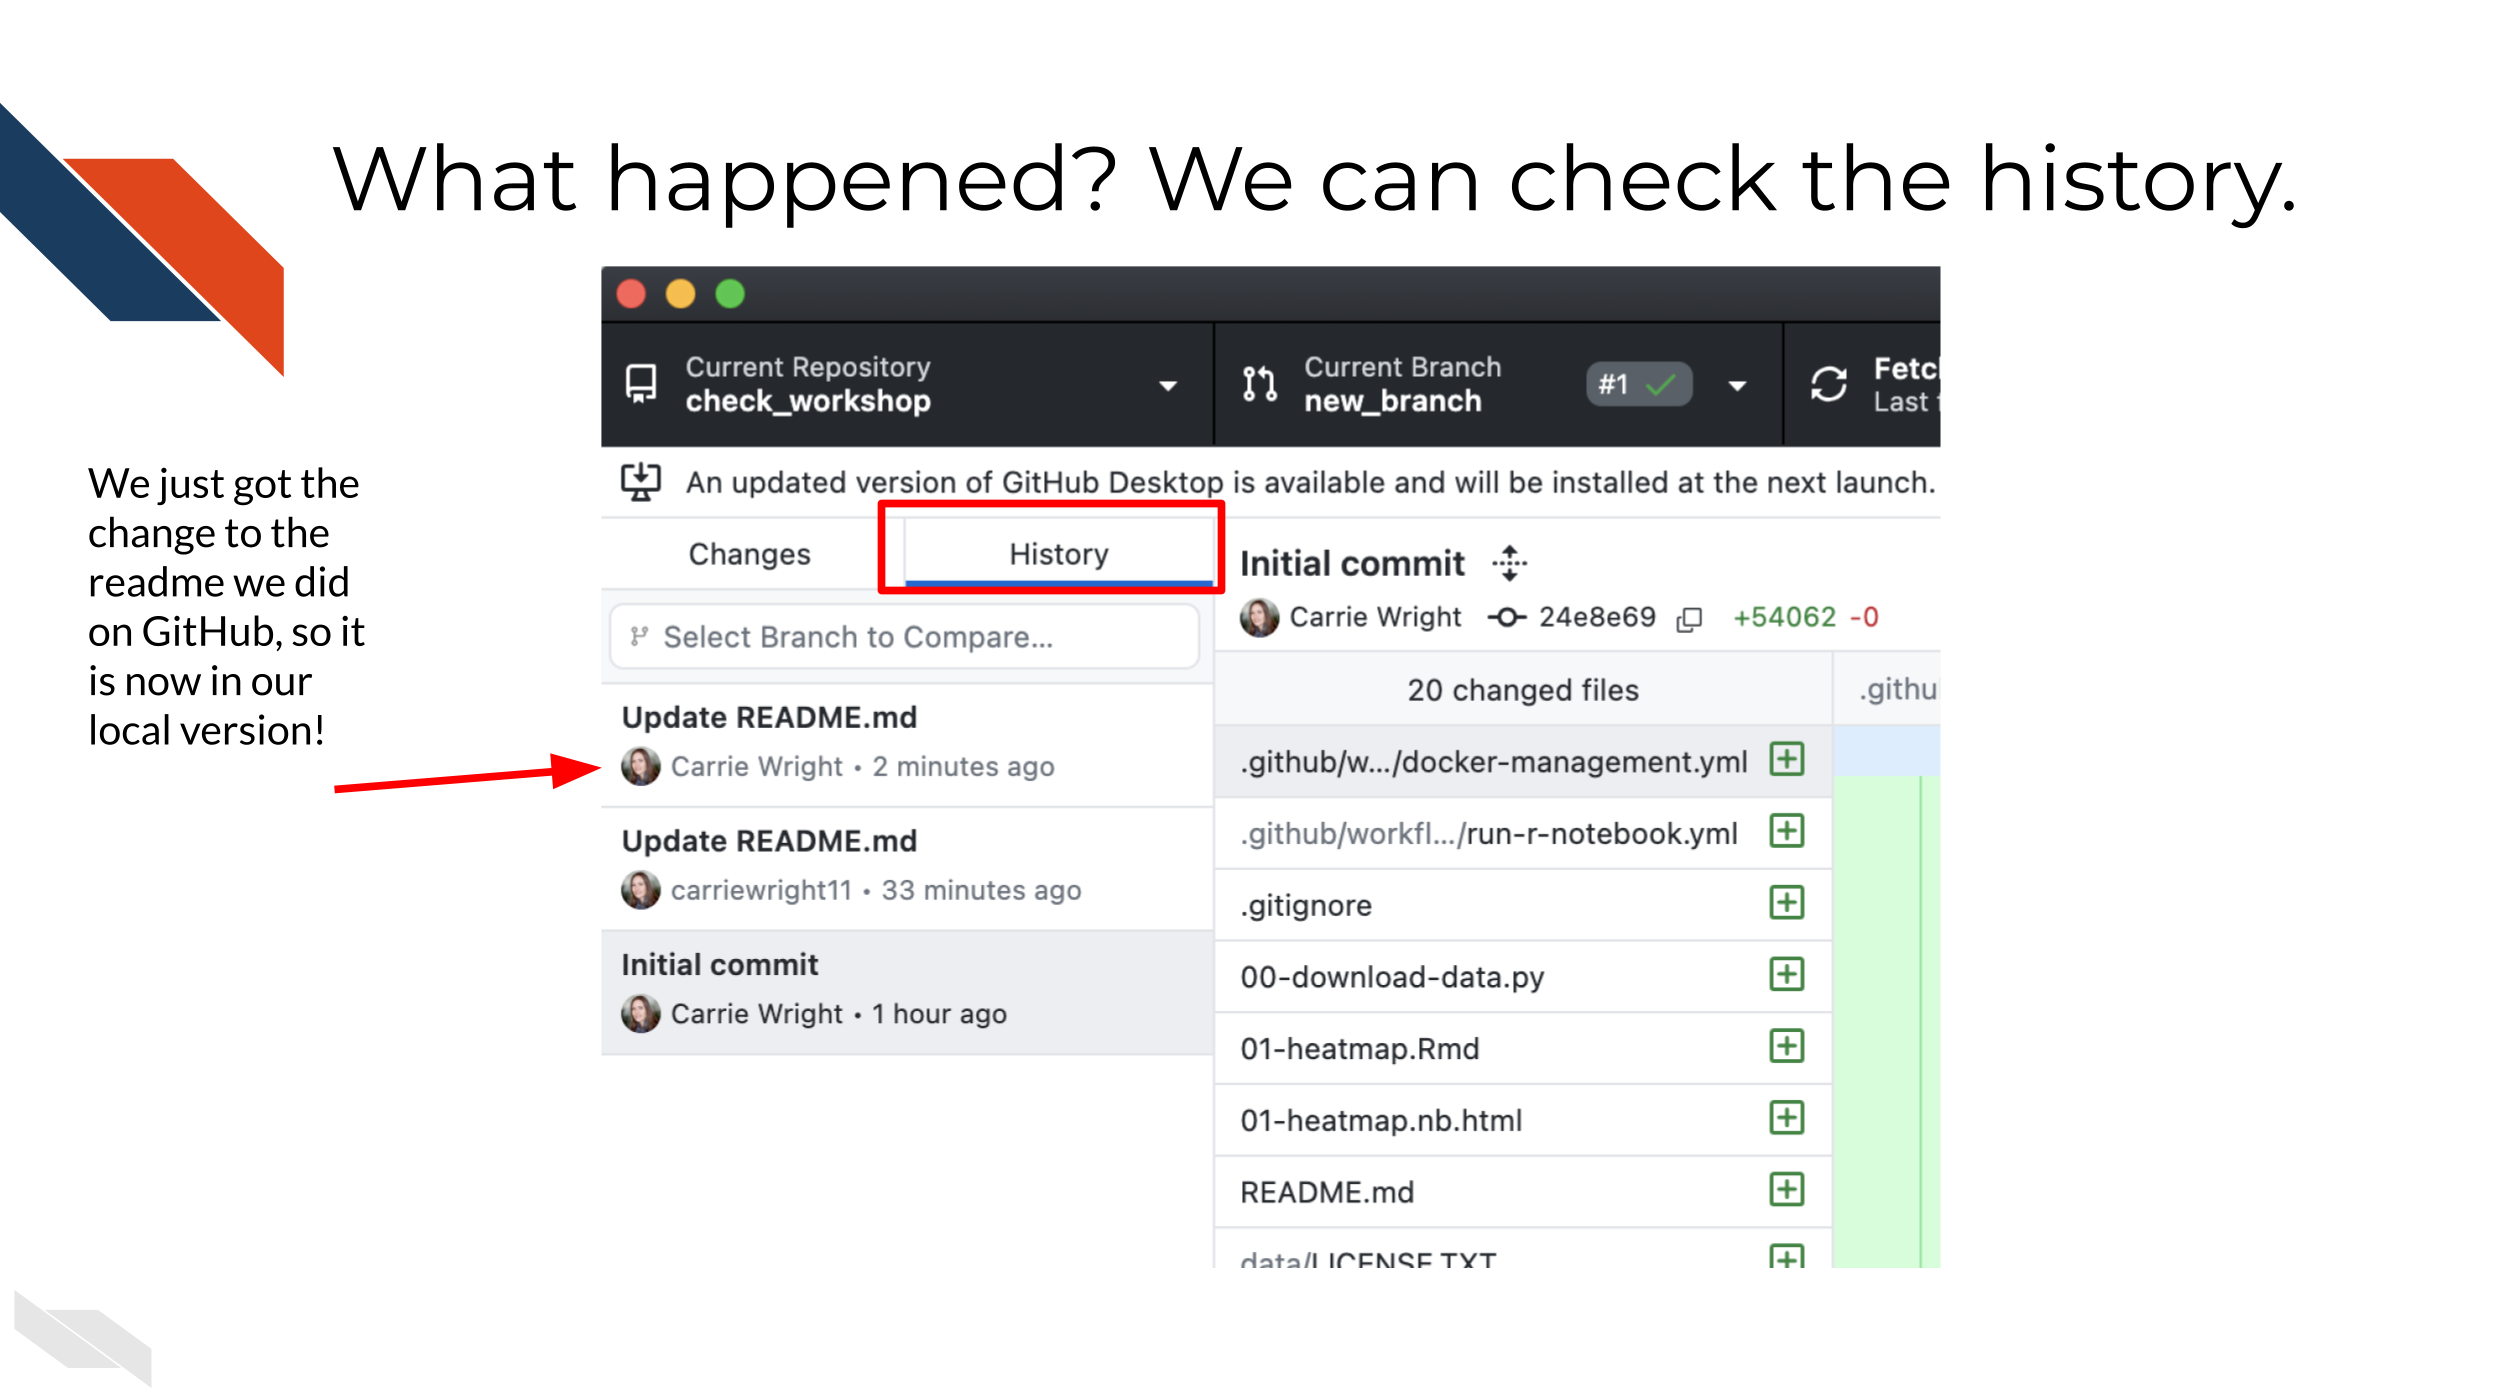
Now your changes should be synced. Open up
the file you’ve changed with any default text editor to look for the
change you made to make sure.
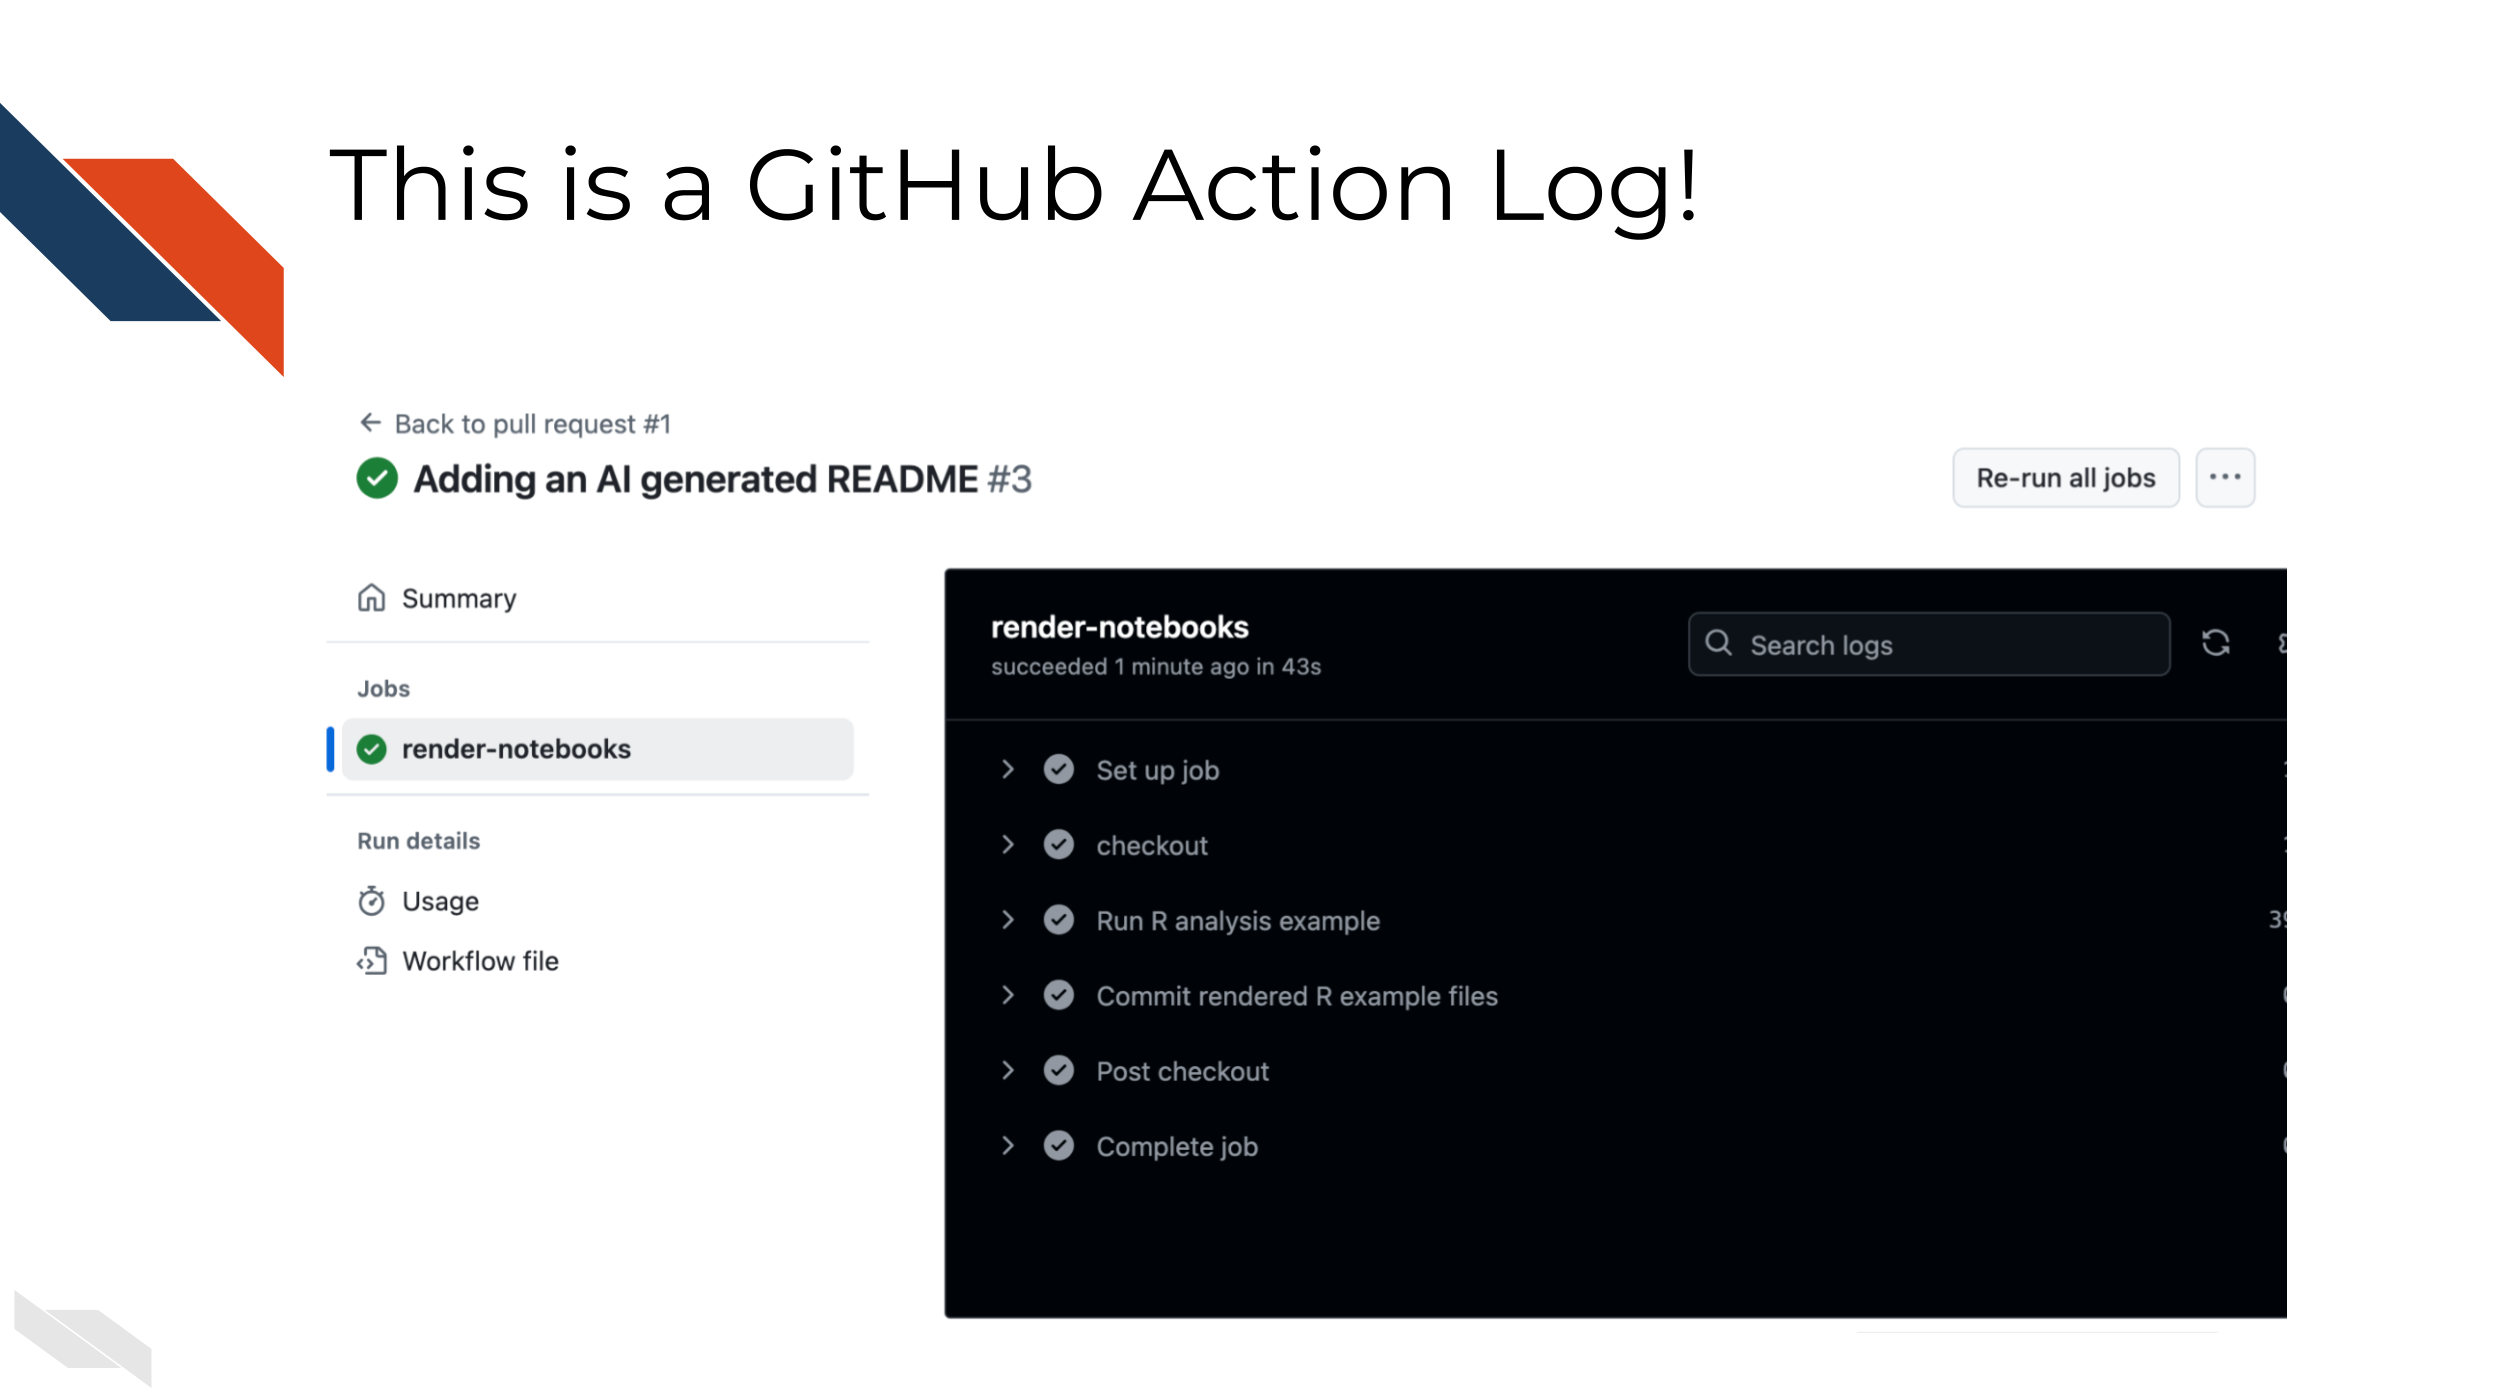
### 2c: Reading GitHub Actions logs
On the bottom of your Pull Request (PR) you will notice a box at the
bottom that will probably either say
Some checks haven't completed yet or
All checks passed.
This is an automatic check run by GitHub Actions which is one of many systems used for Continuous Integration/Continuous Deployment.
If needed, click
Show all checks.
If no failing checks, Click the 3 dots at the
end of the line that says
Render R Example / render-notebooks (pull_request). Click
View Details If failing checks,
Click Details at the end of the line that says
Render R Example / render-notebooks (pull_request)
Click around to investigate what GitHub Actions
logs look like.
For more learning about using GitHub Actions for science see our course.
2d: Merging your PR
In a real life setting the life of a pull request could be long or short. What’s important is that the discussions that need to be had about the changes are had before the pull request is merged.
Pull requests and GitHub have their own kind of etiquette. Make sure you talk to your team or collaborators to create and discuss what kind of guidelines and workflows you’d like to adhere to so everyone can do their best work!
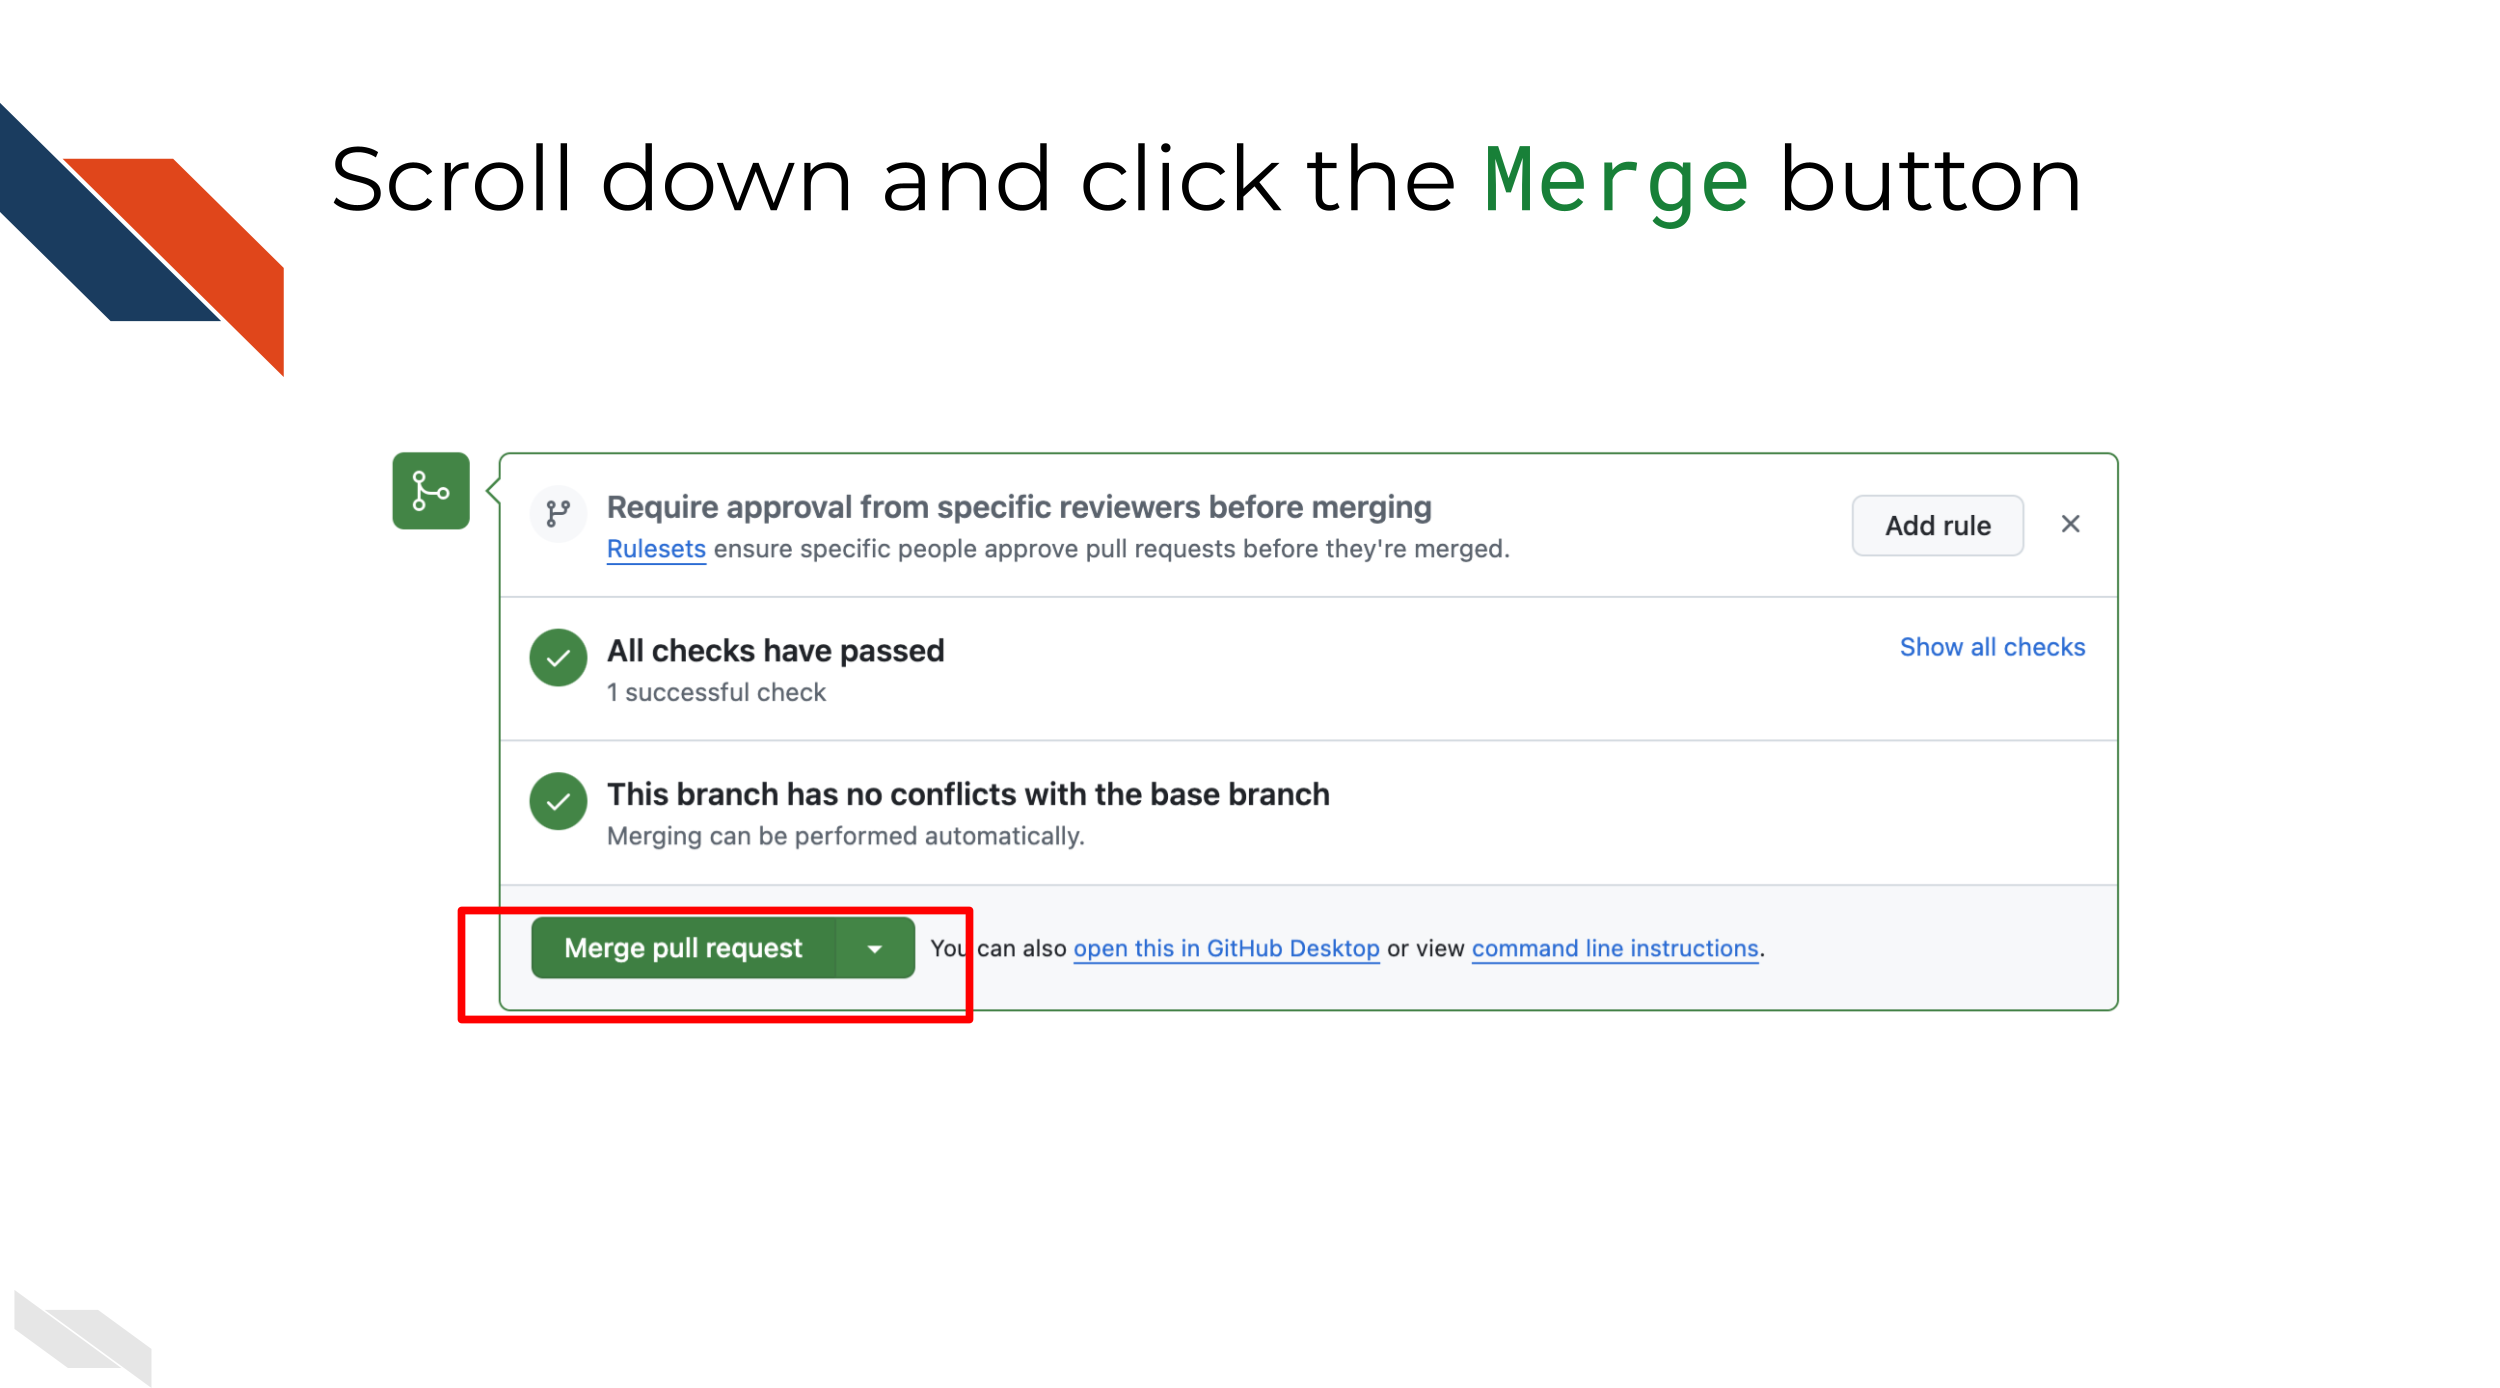
Return to GitHub Pull Request Online.
Click the Merge button.
Follow up with the Confirm merge
button.
You can also click the
Delete branch button - our changes are already in main and
we have a copy of what we did.
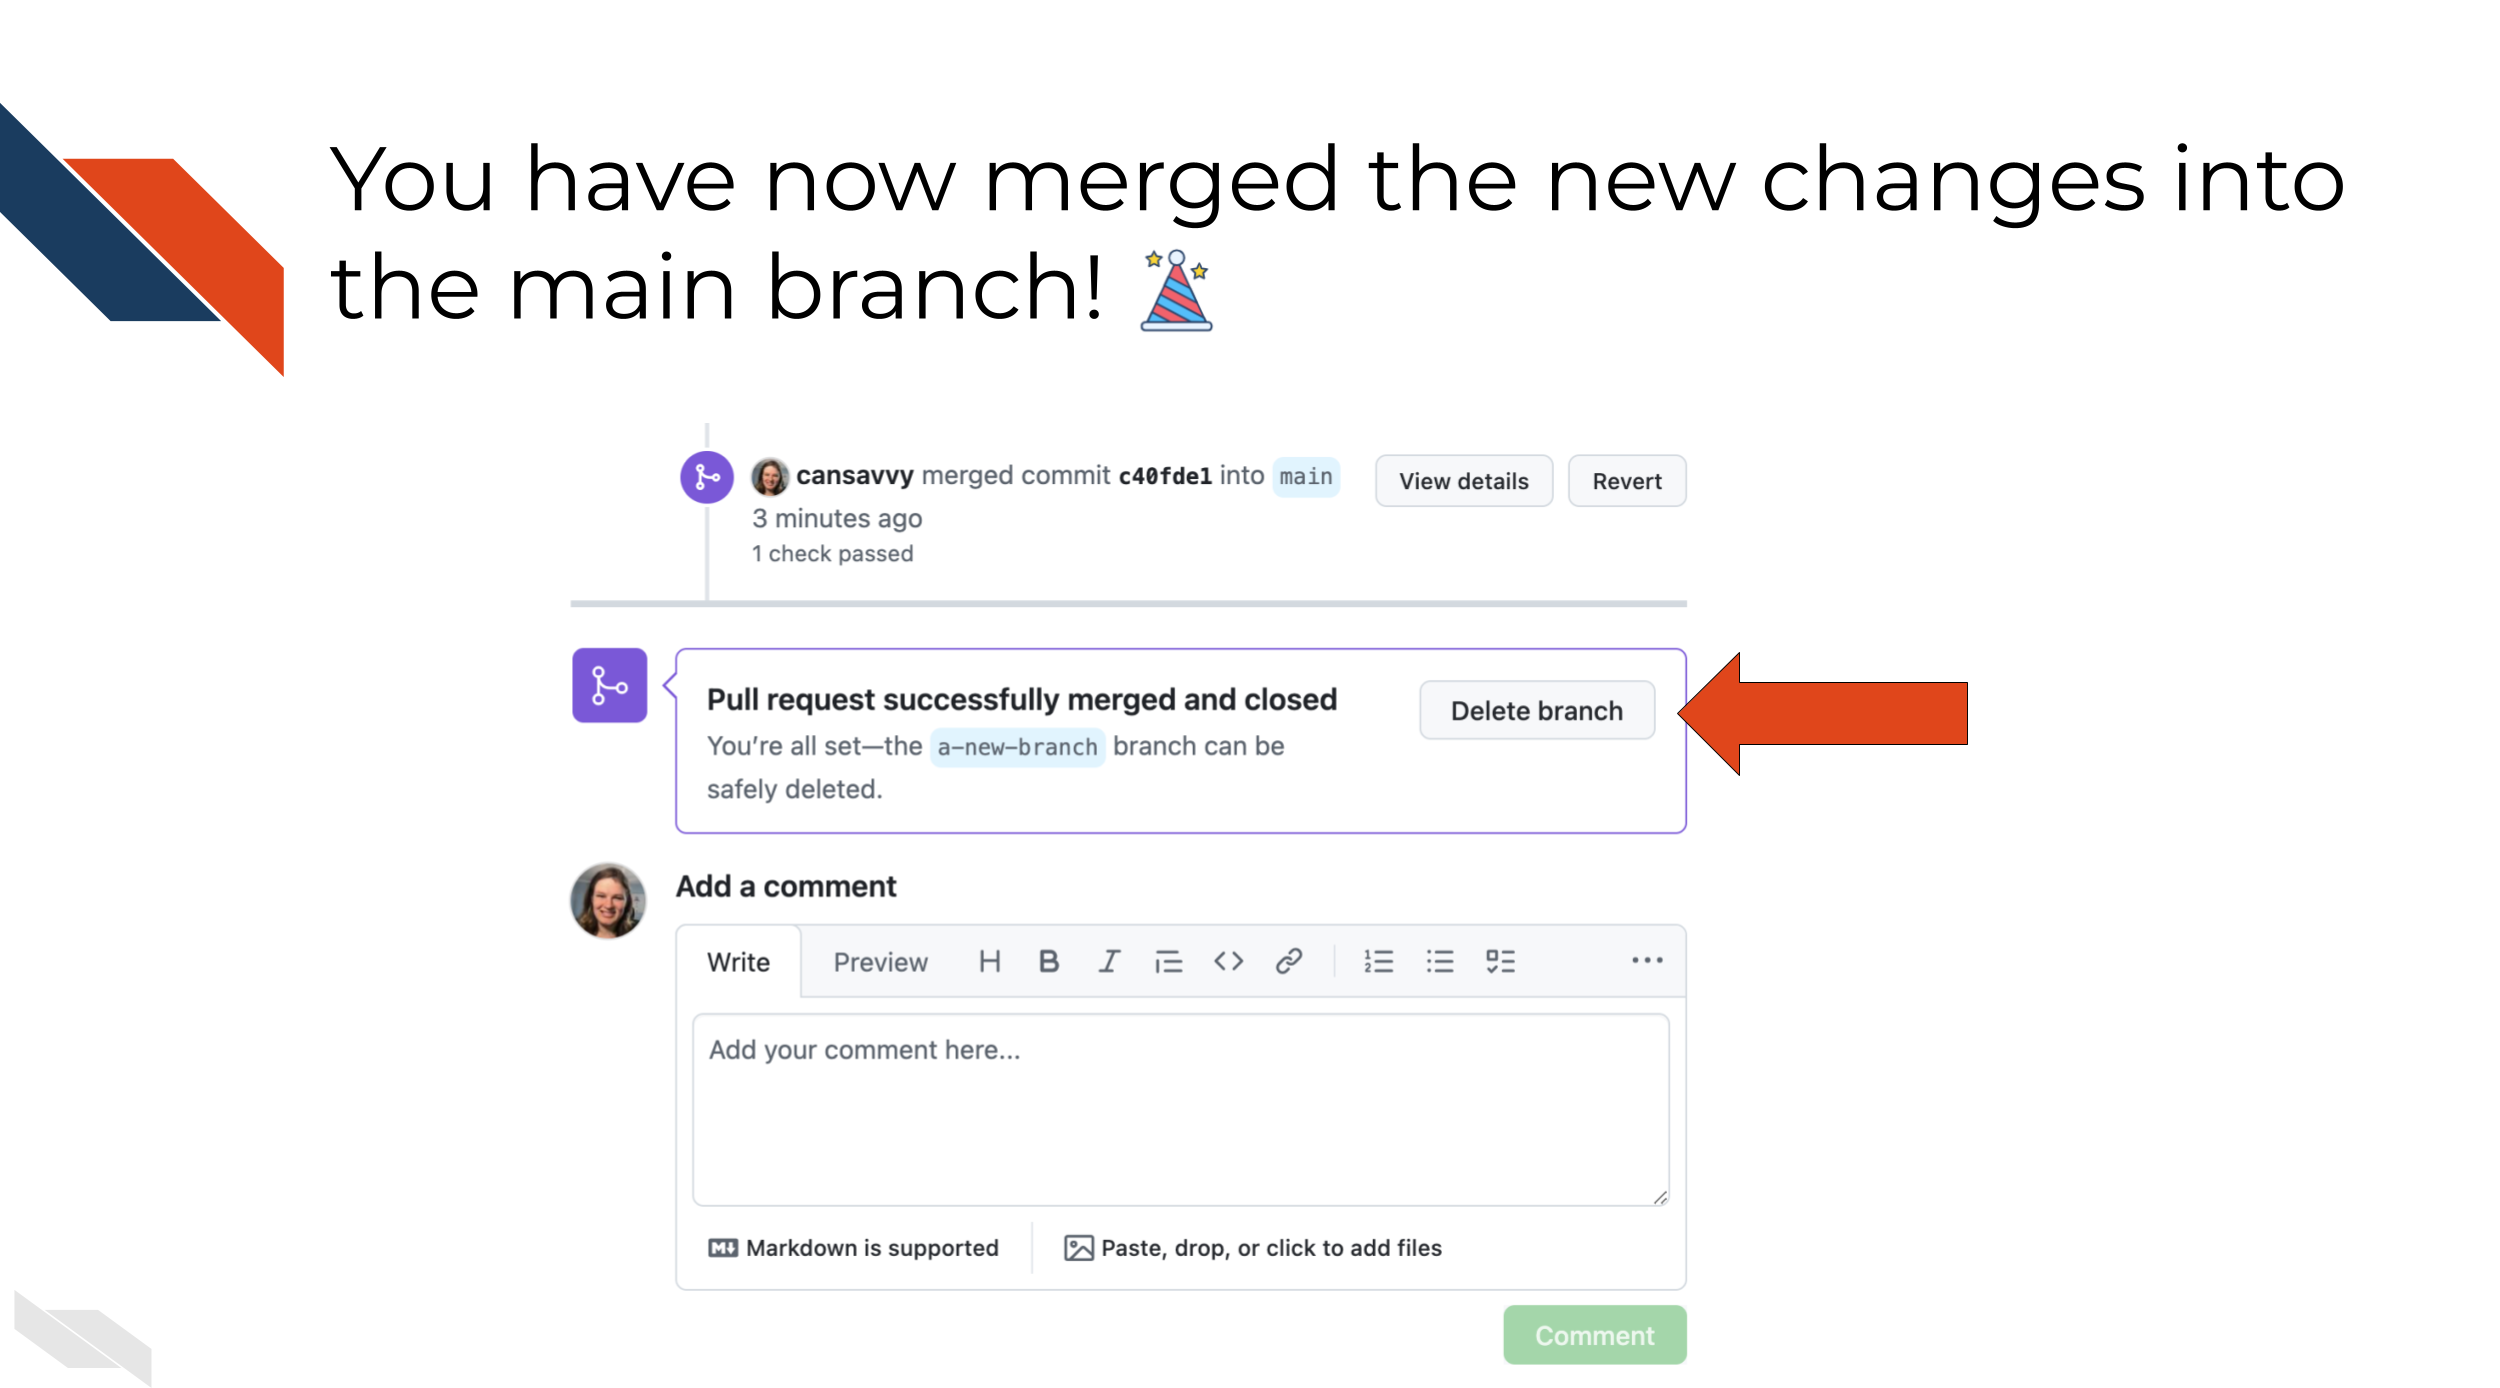
Yay! Congrats.